Stihl BR 550 Product Instruction Manual - Page 19
BR 500, BR 550, BR 600 - fuel cap
 |
View all Stihl BR 550 manuals
Add to My Manuals
Save this manual to your list of manuals |
Page 19 highlights
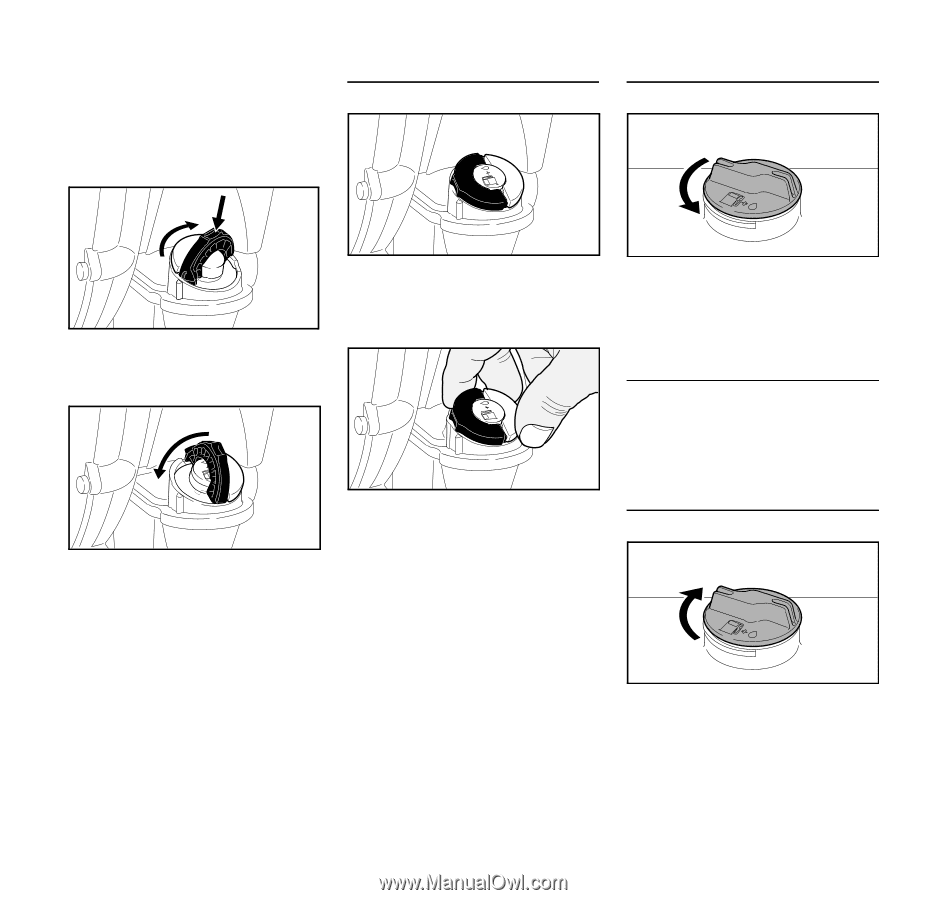
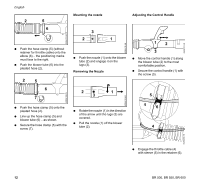
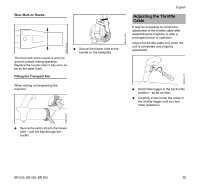
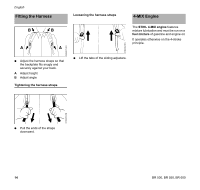
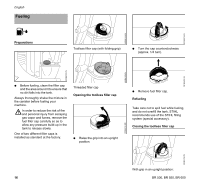
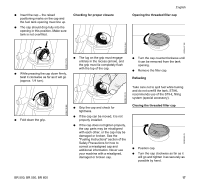
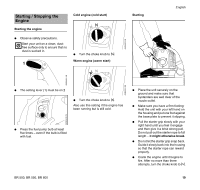
N Insert the cap - the raised positioning marks on the cap and the fuel tank opening must line up. N The cap should drop fully into the opening in this position. Make sure tank is not overfilled. Checking for proper closure English Opening the threaded filler cap 002BA447 KN 452BA119 KN N While pressing the cap down firmly, twist it clockwise as far as it will go (approx. 1/4 turn). N Fold down the grip. 452BA118 KN 452BA117 KN N The lug on the grip must engage entirely in the recess (arrow), and the grip must lie completely flush with the top of the cap. N Grip the cap and check for tightness. N If the cap can be moved, it is not properly installed. N If the cap does not tighten properly, the cap parts may be misaligned with each other, or the cap may be damaged or broken. See the "Fueling Instructions" section of the Safety Precautions for how to correct a misaligned cap and additional information. Never use your machine with a misaligned, damaged or broken cap. 452BA120 KN N Turn the cap counterclockwise until it can be removed from the tank opening. N Remove the filler cap. Refueling Take care not to spill fuel while fueling and do not overfill the tank. STIHL recommends use of the STIHL filling system (special accessory). Closing the threaded filler cap N Position cap. N Turn the cap clockwise as far as it will go and tighten it as securely as possible by hand. 002BA448 KN BR 500, BR 550, BR 600 17
-
 1
1 -
2
-
3
-
4
-
5
-
6
-
7
-
8
-
9
-
10
-
11
-
12
-
13
-
 14
14 -
 15
15 -
 16
16 -
 17
17 -
 18
18 -
 19
19 -
 20
20 -
 21
21 -
 22
22 -
 23
23 -
 24
24 -
25
-
26
-
27
-
28
-
29
-
30
-
31
-
32
-
33
-
34
-
35
-
36
-
37
-
38
-
39
-
40
-
41
-
42
-
43
-
44
-
45
-
46
-
47
-
48
-
49
-
50
-
51
-
52
-
53
-
54
-
55
-
56
-
57
-
58
-
59
-
60
-
61
-
62
-
63
-
64
-
65
-
66
-
67
-
68
-
69
-
70
-
71
-
72
-
73
-
74
-
75
-
76
-
77
-
78
-
79
-
80
-
81
-
82
-
83
-
84
-
85
-
86
-
87
-
88
 |
 |