TEAC GF450K7 Owners Manual - Page 24
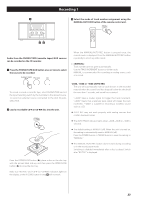
Recording 2, Press the PLAY or the PAUSE button to start recording.
 |
View all TEAC GF450K7 manuals
Add to My Manuals
Save this manual to your list of manuals |
Page 24 highlights
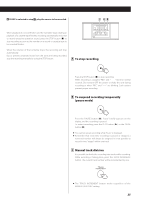
47 Recording 2 6 Prepare a recording source. < Recording a record Move the tone arm to the end of a record or a position to record and slowly put it down. 5 4 Press the RECORD button. When the turntable is stopped, the PLAY or the PAUSE button will not work and you cannot start recording. < Recording a cassette tape Press the PLAY button (y). The red indicator on the RECORD button lights. The unit enters record pause mode. In record pause mode, "REC" indicator blinks and the J indicator lights on the display. < No button will work while "busy" is displayed. Wait a few seconds until "busy" disappears from the display. < If the red indicator on the RECORD button doesn't light, reload a recordable disc, wait a few seconds until "NO TOC" and "CD-R" (or "CD-RW") indicators light on the display, and press the RECORD button again. 5 If necessary, adjust the recording level using the REC LEVEL knob. To prevent the beginning part from being cut out, cue the cassette tape, suspend playback temporarily, start recording as described in step 7 , and cancel the pause of the tape. (To suspend playback temporarily when playback is stopped, press the PAUSE button (J) and then PLAY button.) < Recording a sound played by a component connected to the AUX terminal Play the component connected to the AUX terminal. To prevent the beginning part from being cut out, cue the component, suspend playback temporarily, start recording as described in step 7 , and cancel the pause of the component. If the component does not have the suspend function, start recording as described in step 7 then play the component. 7 Press the PLAY or the PAUSE button to start recording. Play the source to be recorded and adjust the recording level so that the loudest sound does not exceed the "OVER" indicator on the peak level meter. The level can be adjusted from -00 (-∞) dB to 18 dB. < The default setting is 0 dB. When the unit is turned on, or when the STOP button is pressed, the setting is automatically reset to 0 dB. 24
-
 1
1 -
2
-
3
-
4
-
5
-
6
-
7
-
8
-
9
-
10
-
11
-
12
-
13
-
14
-
15
-
16
-
17
-
18
-
 19
19 -
 20
20 -
 21
21 -
 22
22 -
 23
23 -
 24
24 -
 25
25 -
 26
26 -
 27
27 -
 28
28 -
 29
29 -
30
-
31
-
32
 |
 |
