TEAC HD-P2 HD-P2 Owner's Manual - Page 20
Software Update, Default Project Settings, Project Templates, Display Menu, PROJECT, Display
 |
View all TEAC HD-P2 manuals
Add to My Manuals
Save this manual to your list of manuals |
Page 20 highlights
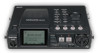
HD-P2 Screens and Menus Continued from the previous page Software Update Figure 29 - Software Update Screen w/o Update From time to time new software may be released for the HD-P2. To update the HD-P2 software you will copy the update file (e.g. UPDATE_1_1.BIN) to a CF card and insert it into the HD-P2. You can also copy the update file to the HD-P2 card while the system is docked to a host computer over FireWire. Whenever the HD-P2 detects an update file on an inserted media (that is a different version from what is currently installed), it will display the Software Update screen. This screen shows the current version of software and the version of software contained in the update file. Default Project Settings This menu is almost identical to the Project Settings menu except that it changes the system's default set- Project Templates Figure 30 - Software Update Screen w/Update The HD-P2 stores two software versions in non-volatile flash memory. There is the default system version, which came from the factory and cannot be changed, and there is the current user version. When updating software it replaces the user version. If there is a problem with the update, you can always boot up the HD-P2 using the default system version by holding the STOP key and the PROJECT key while powering up. Once completed, the software update file is automatically deleted from the media. tings. When you create a new project without using a project template, the HD-P2 uses these settings. You can turn a project's settings into a template, which can then be used when creating new projects. This screen shows all of the saved templates on the CF card. Selecting a template brings up a sub-menu which lets you Rename or permanently Delete the template. Figure 31 - Project Templates Screen Display Menu This menu shown in Figure 32 provides access to display related settings. You can adjust Contrast or Brightness, just as you do when pressing the dedicated Display key. To help save on battery power you can set a timeout for shutting off the display's backlighting. Whenever the system is inactive (no key presses) for greater than the set period of time, the backlight is turned off. The next time you press a key or turn the SHUTTLE/DATA wheel the backlight is turned back on and the timeout period starts again. 20 TASCAM HD-P2 Owner's Manual Figure 32 - Display Menu Screen
-
 1
1 -
2
-
3
-
4
-
5
-
6
-
7
-
8
-
9
-
10
-
11
-
12
-
13
-
14
-
 15
15 -
 16
16 -
 17
17 -
 18
18 -
 19
19 -
 20
20 -
 21
21 -
 22
22 -
 23
23 -
 24
24 -
 25
25 -
26
-
27
-
28
 |
 |
