TEAC SR-L230I-W Owners Manual - Page 9
Memory/clock Adj, Snooze/dimmer - manual
 |
View all TEAC SR-L230I-W manuals
Add to My Manuals
Save this manual to your list of manuals |
Page 9 highlights
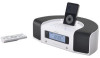
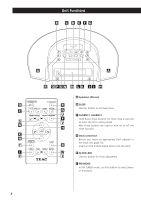
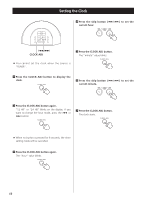
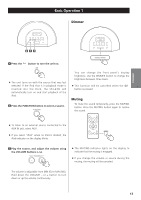
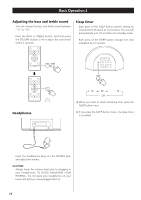
ENGLISH G FM/AM In TUNER mode, press this button to select FM or AM. R FUNCTION Use these buttons to select the source you want to listen to. H Play/Pause (y/J) Use this button to start or pause playback of iPod. I DISPLAY In standby mode, use this button to check the timer on/off time. During the snooze function is working, use this button to display the current time. J AUX IN You can connect a portable audio player to this jack. See page 17 for details. S PRESET/SCROLL (‡/°) In TUNER mode, use these buttons to select a preset station. In iPod mode, use these buttons to scroll up and down the menu. T MEMORY/CLOCK ADJ In the TUNER mode, use this button to store preset channels into memory. This button is also used for clock adjustment. U MENU Use this button to go back to the previous menu. K TUNING/TIME In TUNER mode, use these buttons to tune in stations. In iPod mode, use these buttons to skip tracks. Hold down this button to search for a part of a track. L SNOOZE/DIMMER After the TIMER ON time is reached, use this button to turn the unit off for 5 minutes. This button is also used for display dimming. M Display N VOLUME Press these buttons to adjust the volume level. O Remote sensor When operating the remote control unit, point it towards here. V SELECT Use this button to confirm selection in menus. W MUTING Use this button to mute the sound. X TREBLE Use this button to enter treble level adjustment mode. Y BASS Use this button to enter bass level adjustment mode. Note: To simplify explanations, instructions in this manual refer to the names of the buttons and controls on the front panel only. Associated controls on the remote control will also operate similarly. P PHONES For private listening, insert the headphones plug into this jack, and adjust the volume using the VOLUME button. See page 14 for details. Q Standby/on ( ) Use this button to turn the unit on or standby. 9
-
 1
1 -
2
-
3
-
 4
4 -
 5
5 -
 6
6 -
 7
7 -
 8
8 -
 9
9 -
 10
10 -
 11
11 -
 12
12 -
 13
13 -
 14
14 -
15
-
16
-
17
-
18
-
19
-
20
-
21
-
22
-
23
-
24
-
25
-
26
-
27
-
28
-
29
-
30
-
31
-
32
-
33
-
34
-
35
-
36
-
37
-
38
-
39
-
40
-
41
-
42
-
43
-
44
-
45
-
46
-
47
-
48
-
49
-
50
-
51
-
52
-
53
-
54
-
55
-
56
-
57
-
58
-
59
-
60
-
61
-
62
-
63
-
64
 |
 |
