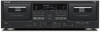
TEAC W-890R Manual for W-890R - Page 17
Continuous recording, Press the TAPE
 |
View all TEAC W-890R manuals
Add to My Manuals
Save this manual to your list of manuals |
Page 17 highlights
ENGLISH Continuous recording This function allows you to make uninterrupted recordings on both sides of two tapes. 1 Load cassette tapes for recording into the TAPE I and TAPE II compartments. NOTE Be careful not to press the PLAY (h or y) key whose arrow points in the same direction as the indicator. Doing so will start recording. Recording is done in this order: TAPE I Side "A" x Side "B" x TAPE II Side "A" x Side "B" You can start recording from side "B" of TAPE I. But if you do so, side "A" of this tape is not recorded: when recording reaches the end of side "B", the TAPE II deck starts recording. NOTE The TAPE II deck always starts recording from side "A". 5 Start recording. Side "A" facing you 2 Set the REV MODE switch to the p (CONT REC/PLAY) position. Set the DOLBY NR switch to the ON position if you want to. 3 Press the TAPE I deck's RECORD (K) key. Recording starts when you press the PAUSE key or the PLAY (h or y) key whose arrow points in the same direction as the indicator on the TAPE I deck. When recording is finished on the TAPE I deck, the TAPE II deck automatically starts recording. NOTE The transition from TAPE I to TAPE II takes several seconds. A To stop recording Press the STOP (H) key of the deck which is currently recording. The deck enters the record-pause mode. J and will light on the display. Now adjust the recording level and any other settings, as required. 4 Check the recording direction. If an indicator is lit which points in the direction opposite to the one desired, change the direction by pressing the opposite direction PLAY (h or y) key. 17
-
 1
1 -
2
-
3
-
4
-
5
-
6
-
7
-
8
-
9
-
10
-
11
-
 12
12 -
 13
13 -
 14
14 -
 15
15 -
 16
16 -
 17
17 -
 18
18 -
 19
19 -
 20
20 -
 21
21 -
 22
22 -
23
-
24
-
25
-
26
-
27
-
28
-
29
-
30
-
31
-
32
-
33
-
34
-
35
-
36
-
37
-
38
-
39
-
40
-
41
-
42
-
43
-
44
-
45
-
46
-
47
-
48
-
49
-
50
-
51
-
52
-
53
-
54
-
55
-
56
-
57
-
58
-
59
-
60
-
61
-
62
-
63
-
64
 |
 |
