TP-Link TL-SL1117 TL-SL1117 V2 QIG 7106503252 - Page 7
Mounting the Switch in a Rack
 |
View all TP-Link TL-SL1117 manuals
Add to My Manuals
Save this manual to your list of manuals |
Page 7 highlights
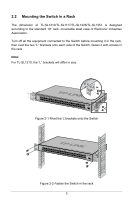
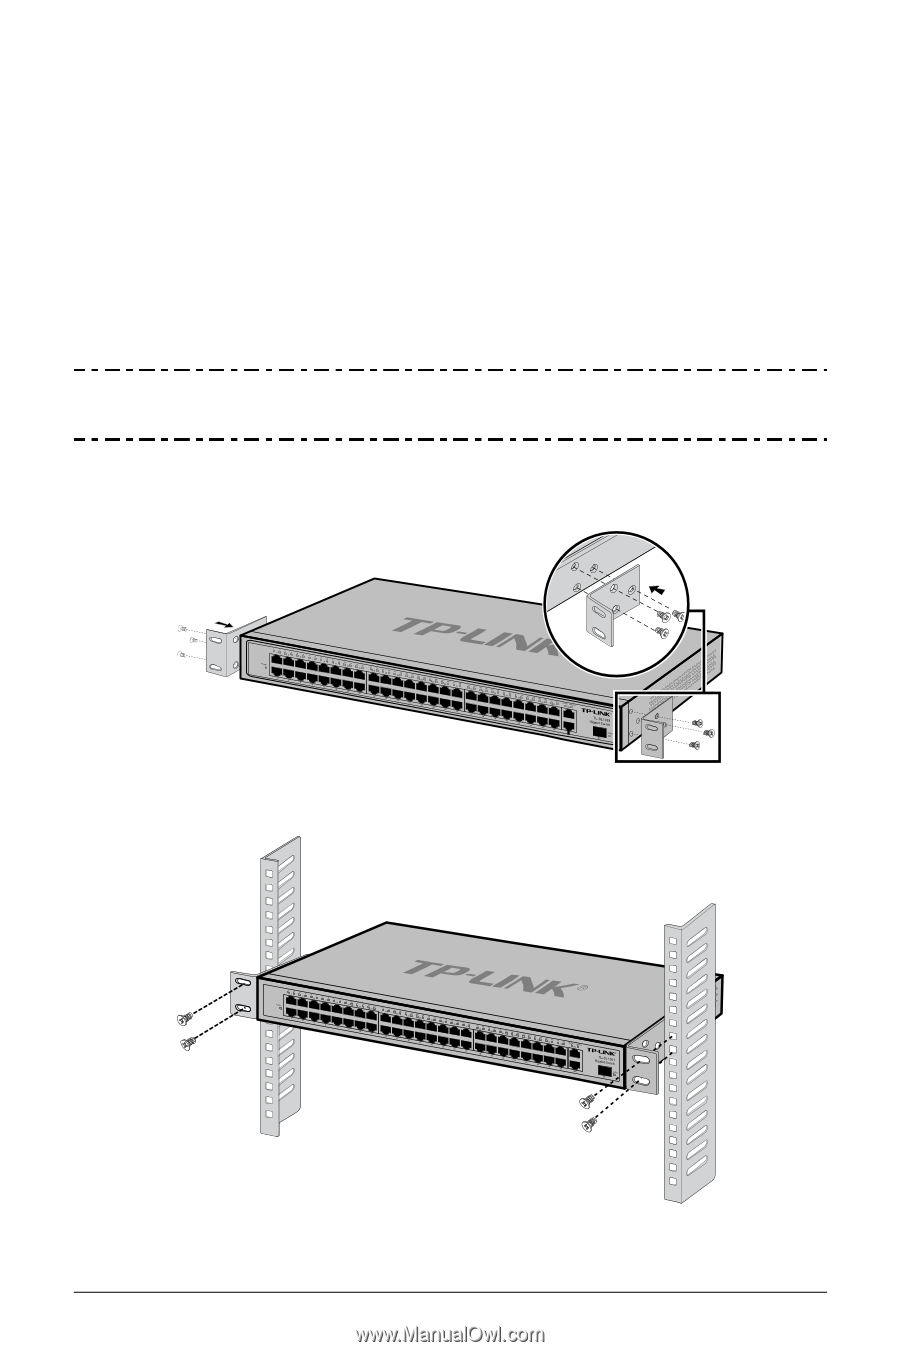
2.2 Mounting the Switch in a Rack The dimension of TL-SL1210/TL-SL1117/TL-SL1226/TL-SL1351 is designed according to the standard 19'' rack- mountable steel case of Electronic Industries Association. Turn off all the equipment connected to the Switch before mounting it in the rack, then rivet the two "L" brackets onto each side of the Switch, fasten it with screws in the rack. Note: For TL-SL1210, the "L" brackets will differ in size. Figure 2-1 Rivet the 'L'brackets onto the Switch Figure 2-2 Fasten the Switch in the rack 3
-
 1
1 -
 2
2 -
 3
3 -
 4
4 -
 5
5 -
 6
6 -
 7
7 -
 8
8 -
 9
9 -
 10
10 -
 11
11 -
 12
12
 |
 |
3
2.2
Mounting the Switch in a Rack
The dimension of TL-SL1210/TL-SL1117/TL-SL1226/TL-SL1351 is designed
according to the standard 19'' rack- mountable steel case of Electronic Industries
Association.
Turn off all the equipment connected to the Switch before mounting it in the rack,
then rivet the two “L” brackets onto each side of the Switch, fasten it with screws in
the rack.
Note:
For TL-SL1210, the “L” brackets will differ in size.
Figure 2-1 Rivet the ‘L’brackets onto the Switch
Figure 2-2 Fasten the Switch in the rack