TP-Link TL-WN821N User Guide - Page 26
Import a Profile, 3.2.6 Scan Available Networks, TL-WN821N, Refresh
 |
UPC - 845973050368
View all TP-Link TL-WN821N manuals
Add to My Manuals
Save this manual to your list of manuals |
Page 26 highlights
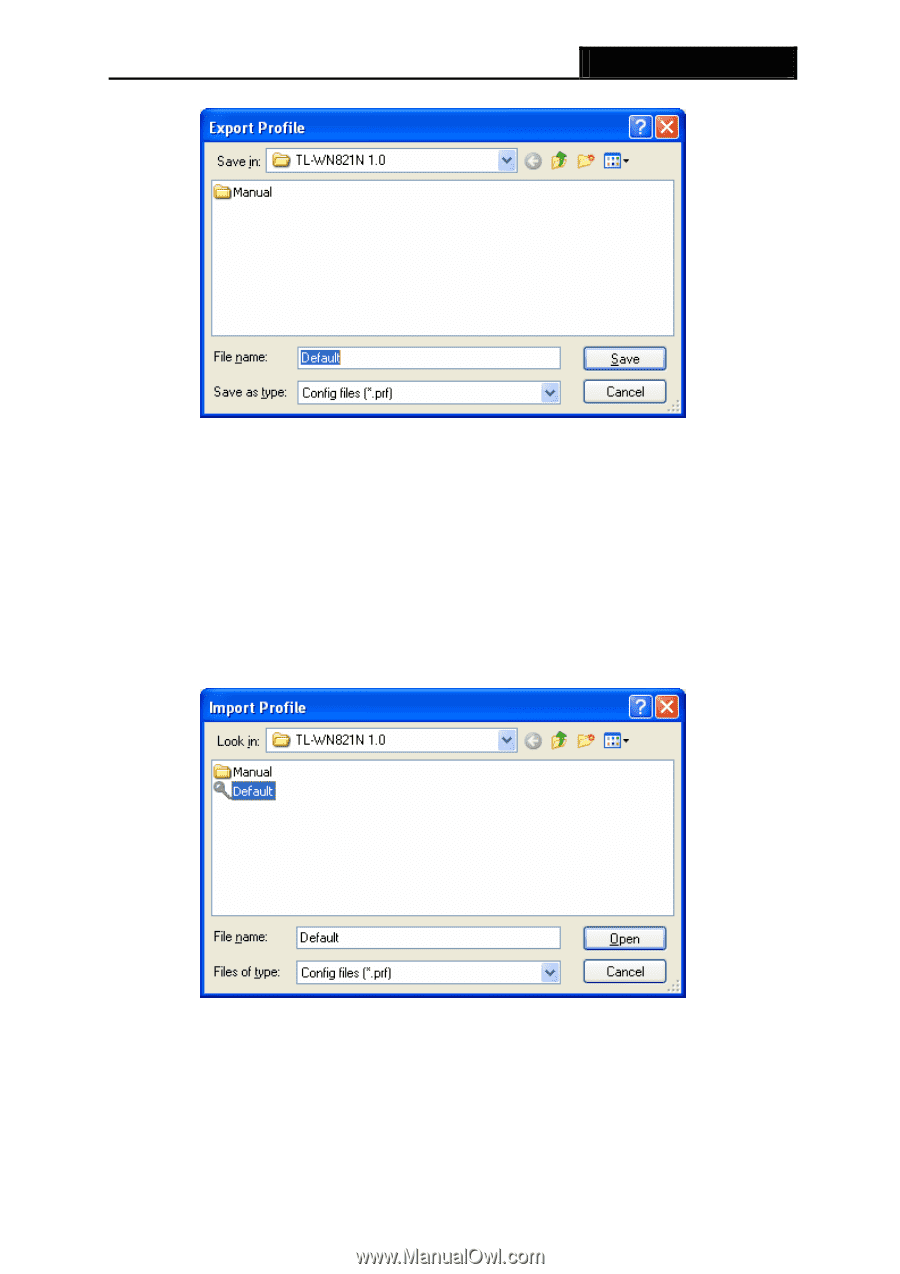
TL-WN821N Wireless N USB Adapter Figure 3-8 3.2.5 Import a Profile 1. From the Profile Management screen (shown in Figure 3-2), click Import.... Then the 8 Import Profile will appear below. 2. Browse to the directory where the profile is located. 3. Highlight the profile name. 4. Click Open, the imported profile will then appear in the Profiles List. Figure 3-9 3.2.6 Scan Available Networks 1. Click Scan on the Profile Management screen (shown in Figure 3-2), the Available 8 Infrastructure and Ad Hoc Networks window will appear below. 2. Click Refresh to refresh the list at any time. 19
-
 1
1 -
2
-
3
-
4
-
5
-
6
-
7
-
8
-
9
-
10
-
11
-
12
-
13
-
14
-
15
-
16
-
17
-
18
-
19
-
20
-
 21
21 -
 22
22 -
 23
23 -
 24
24 -
 25
25 -
 26
26 -
 27
27 -
 28
28 -
 29
29 -
 30
30 -
 31
31 -
32
-
33
-
34
-
35
-
36
-
37
-
38
-
39
-
40
-
41
-
42
-
43
 |
 |
TL-WN821N
Wireless N USB Adapter
19
Figure 3-8
3.2.5 Import a Profile
1.
From the Profile Management screen (shown in
8
Figure 3-2), click
Import…
. Then the
Import Profile will appear below.
2.
Browse to the directory where the profile is located.
3.
Highlight the profile name.
4.
Click
Open
, the imported profile will then appear in the Profiles List.
Figure 3-9
3.2.6 Scan Available Networks
1.
Click
Scan
on the Profile Management screen (shown in
8
Figure 3-2), the Available
Infrastructure and Ad Hoc Networks window will appear below.
2.
Click
Refresh
to refresh the list at any time.