TRENDnet TEG-PCITXM2 User Guide - Page 5
TRENDnet TEG-PCITXM2 Manual
 |
View all TRENDnet TEG-PCITXM2 manuals
Add to My Manuals
Save this manual to your list of manuals |
Page 5 highlights
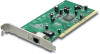
2. Hardware Installation Overview Each Gigabit Network Adapter is equipped with an RJ-45 port that automatically adjusts the connection speed to 10Mbps, 100Mbps or 1000Mbps; allowing your PC to attach to Ethernet, Fast Ethernet or Gigabit Ethernet networks. For best results, we recommend using Category 5E or higher twisted-pair RJ45 cable. However, if you are connecting the adapter to 10Base-T (10Mbps) network, you can use Category 3 or higher cable. For 100Base-TX (100Mbps) and 1000Base-T (1000Mbps) networks, please use Category 5 or higher cables. Installing Gigabit PCI Adapter into your Pcs 1. Power off your PC and any peripherals attached to it and unplug your PC's power cord. 2. Remove computer's cover. 3. Open your computer and locate the PCI slot(s) on your motherboard. PCI slots are easily identified by their beige or white color, and by the fact that network cards fit snugly into them. Remove the metal slot cover on the back of the PC and then insert the Gigabit Adapter into any available PCI slot. 4. Once your Gigabit Adapter is firmly in place, secure it on your PC's chassis with a screw. 5. Replace your PC's cover. 6. Connect one end of the Category 5/5E cable to the Adapter's RJ-45 port and another end to a Gigabit Switch or Adapter. 7. Reconnect your PC's power, then power on your computer. If your computer has Windows Operating System, the computer would automatically recognize the Adapter as a new hardware and start the driver installation wizard. Follow the instructions in the Software Installation section to install the adapter driver. For computers with Netware Server/Client and Linux, please go to HELP folder from the driver diskette and select the desired operating system to view the driver installation procedures. The hardware installation is now complete. Next step is to load the adapter driver and configure your PC's operating system to work with the Gigabit Adapter. 3 English
-
 1
1 -
 2
2 -
 3
3 -
 4
4 -
 5
5 -
 6
6 -
 7
7 -
 8
8 -
 9
9 -
 10
10 -
 11
11 -
12
-
13
-
14
 |
 |
