TRENDnet TEW-711BR User's Guide - Page 22
How to allow/deny multicast streaming, How to identify your network on the Internet - ip address
 |
View all TRENDnet TEW-711BR manuals
Add to My Manuals
Save this manual to your list of manuals |
Page 22 highlights
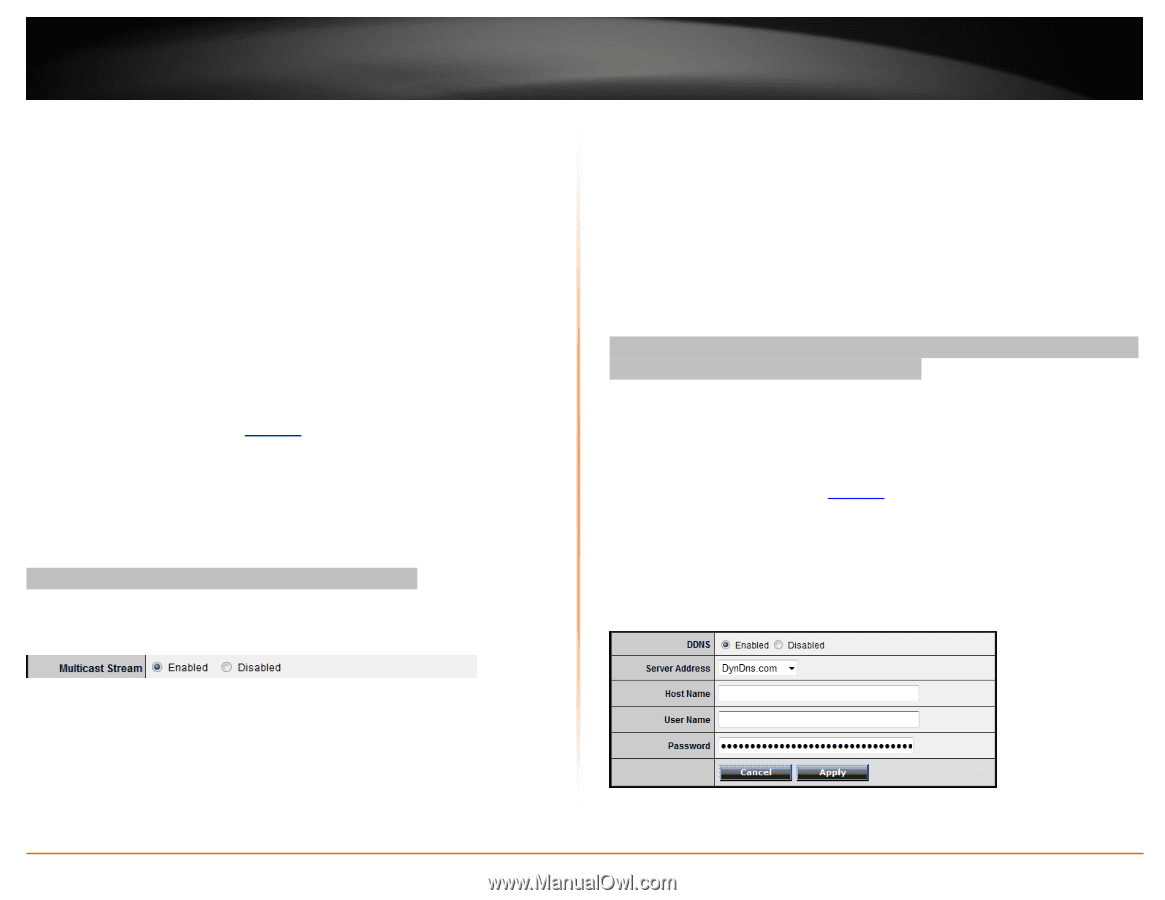
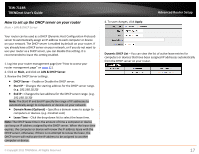
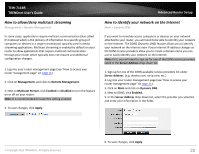
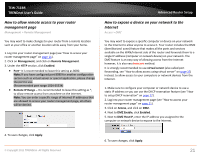
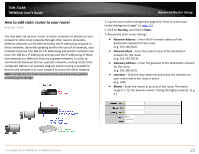
TEW-711BR TRENDnet User's Guide How to allow/deny multicast streaming Management > Remote Management In some cases, applications require multicast communication (also called IP multicast which is the delivery of information to a specific group of computers or devices in a single transmission) typically used in media streaming applications. Multicast streaming is enabled by default on your router to allow applications that require multicast communication through your router which typically does not require and additional configuration changes. 1. Log into your router management page (see "How to access your router management page" on page 11). 2. Click on Management, and click on Remote Management. 3. Next to Multicast Stream, click Enabled or Disabled to turn the feature on or off on your router. Note: It is recommended to leave this setting enabled. 4. To save changes, click Apply. Advanced Router Setup How to identify your network on the Internet Main > Dynamic DNS If you want to remotely access computers or devices on your network attached to your router, you will need to be able to identify your network on the Internet. The DDNS (Dynamic DNS) feature allows you to identify your network on the Internet even if your Internet IP address changes as the DDNS service providers allow you to create a domain name you can use to easily identify your network on the Internet. Note: First, you will need to sign up for one of the DDNS service providers listed in the Server Address drop-down list. 1. Sign up for one of the DDNS available service providers list under Server Address. (e.g. dyndns.com, no-ip.com, etc.) 2. Log into your router management page (see "How to access your router management page" on page 11). 3. Click on Main and click on Dynamic DNS. 4. Next to DDNS, click Enabled. 5. In the Server Address drop-down list, select the provider you selected, and enter your information in the fields. 6. To save changes, click Apply. © Copyright 2011 TRENDnet. All Rights Reserved. 20
-
 1
1 -
2
-
3
-
4
-
5
-
6
-
7
-
8
-
9
-
10
-
11
-
12
-
13
-
14
-
15
-
16
-
 17
17 -
 18
18 -
 19
19 -
 20
20 -
 21
21 -
 22
22 -
 23
23 -
 24
24 -
 25
25 -
 26
26 -
 27
27 -
28
-
29
 |
 |