TRENDnet TEW-711BR User's Guide - Page 6
Side Panel View, Application Diagram - setup
 |
View all TRENDnet TEW-711BR manuals
Add to My Manuals
Save this manual to your list of manuals |
Page 6 highlights
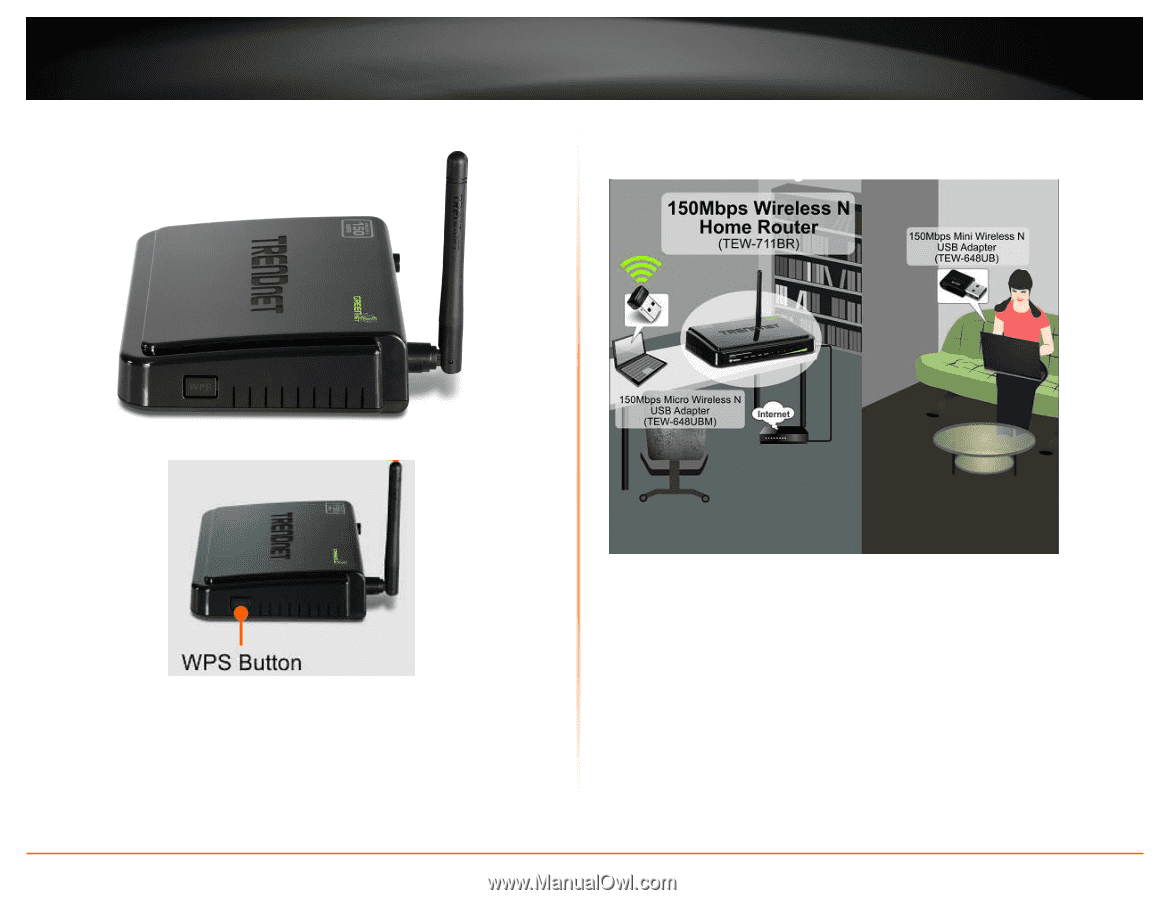
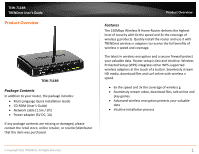
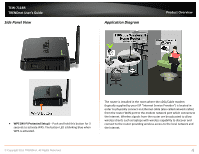
TEW-711BR TRENDnet User's Guide Side Panel View Application Diagram Product Overview WPS (Wi-Fi Protected Setup) - Push and hold this button for 3 seconds to activate WPS. The button LED is blinking blue when WPS is activated. The router is installed in the room where the xDSL/Cable modem (typically supplied by your ISP "Internet Service Provider") is located in order to physically connect an Ethernet cable (also called network cable) from the router WAN port to the modem network port which connects to the Internet. Wireless signals from the router are broadcasted to allow wireless clients such as laptops with wireless capability to discover and connect to the router providing wireless access to the local network and the Internet. © Copyright 2011 TRENDnet. All Rights Reserved. 4
-
 1
1 -
 2
2 -
 3
3 -
 4
4 -
 5
5 -
 6
6 -
 7
7 -
 8
8 -
 9
9 -
 10
10 -
 11
11 -
 12
12 -
13
-
14
-
15
-
16
-
17
-
18
-
19
-
20
-
21
-
22
-
23
-
24
-
25
-
26
-
27
-
28
-
29
 |
 |