TRENDnet TV-IP672PI User's Guide - Page 5
Installation - camera
 |
View all TRENDnet TV-IP672PI manuals
Add to My Manuals
Save this manual to your list of manuals |
Page 5 highlights
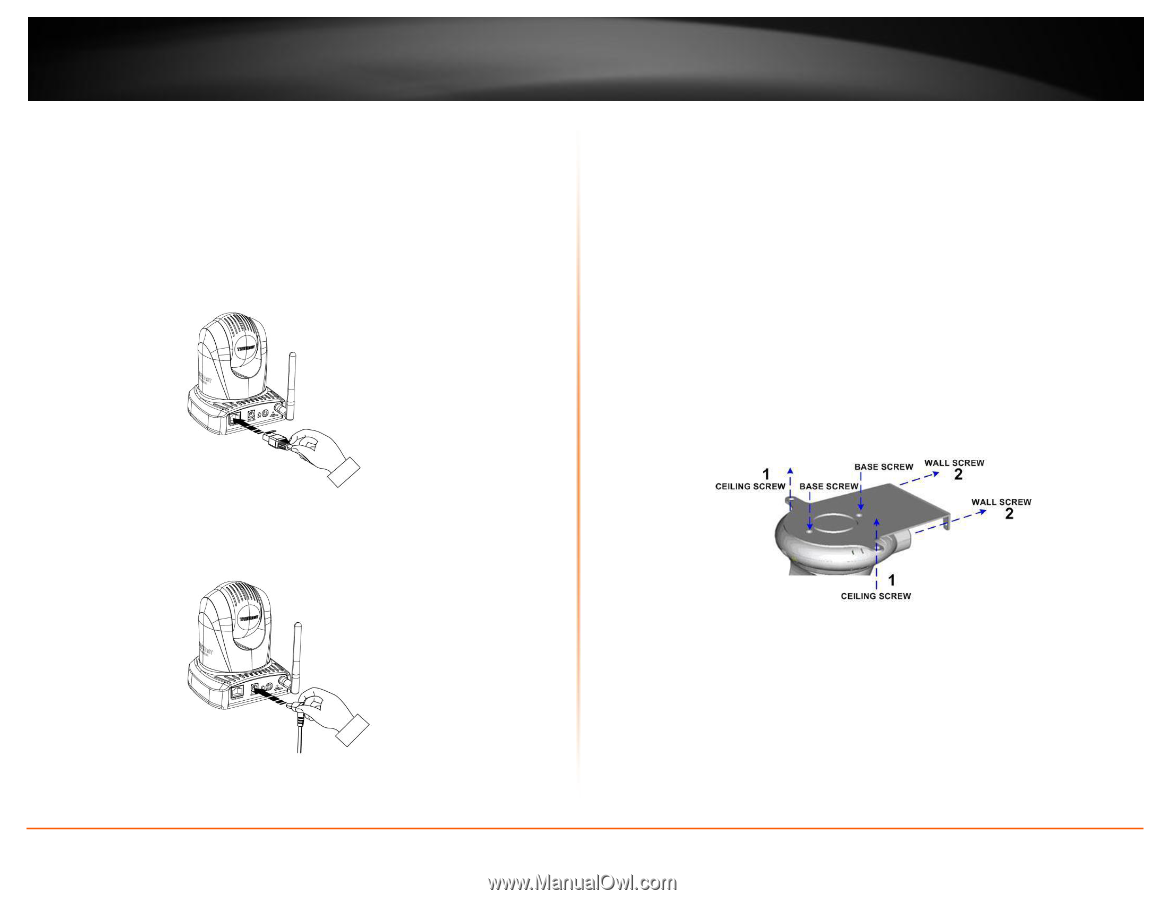
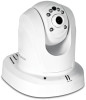
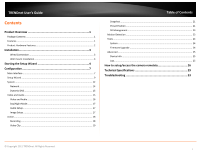
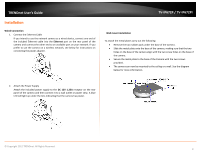
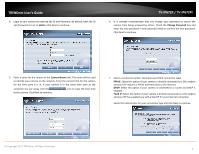
TRENDnet User's Guide Installation Wired Connection 1. Connect the Ethernet Cable If you intend to use the network camera as a wired device, connect one end of the included Ethernet cable into the Ethernet port on the rear panel of the camera and connect the other end to an available port on your network. If you prefer to use the camera on a wireless network, see below for instructions on connecting the power adapter. TV-IP672P / TV-IP672PI Wall mount installation To attach the metal plates carry out the following: Remove the two rubber pads under the base of the Camera. Slide the metal plate onto the base of the camera, making sure that the two holes on the base of the camera align with the two screw holes on the base of the camera. Secure the metal plate to the base of the Camera with the two screws provided. The camera can now be mounted to the ceiling or a wall. See the diagram below for more information. 2. Attach the Power Supply Attach the included power supply to the DC 12V 1.25A receptor on the rear panel of the camera and then connect it to a wall outlet or power strip. A blue LED will light up under the lens indicating that the camera has power. © Copyright 2012 TRENDnet. All Rights Reserved. 3
-
 1
1 -
 2
2 -
 3
3 -
 4
4 -
 5
5 -
 6
6 -
 7
7 -
 8
8 -
 9
9 -
 10
10 -
 11
11 -
12
-
13
-
14
-
15
-
16
-
17
-
18
-
19
-
20
-
21
-
22
-
23
-
24
-
25
-
26
-
27
-
28
-
29
-
30
-
31
-
32
-
33
-
34
-
35
-
36
-
37
-
38
-
39
 |
 |