Tecumseh Products LV195EA Operator Manual - Page 13
Pressing Primer Bulb, Primer Bulb, Vent Hole - recoil
 |
View all Tecumseh Products LV195EA manuals
Add to My Manuals
Save this manual to your list of manuals |
Page 13 highlights
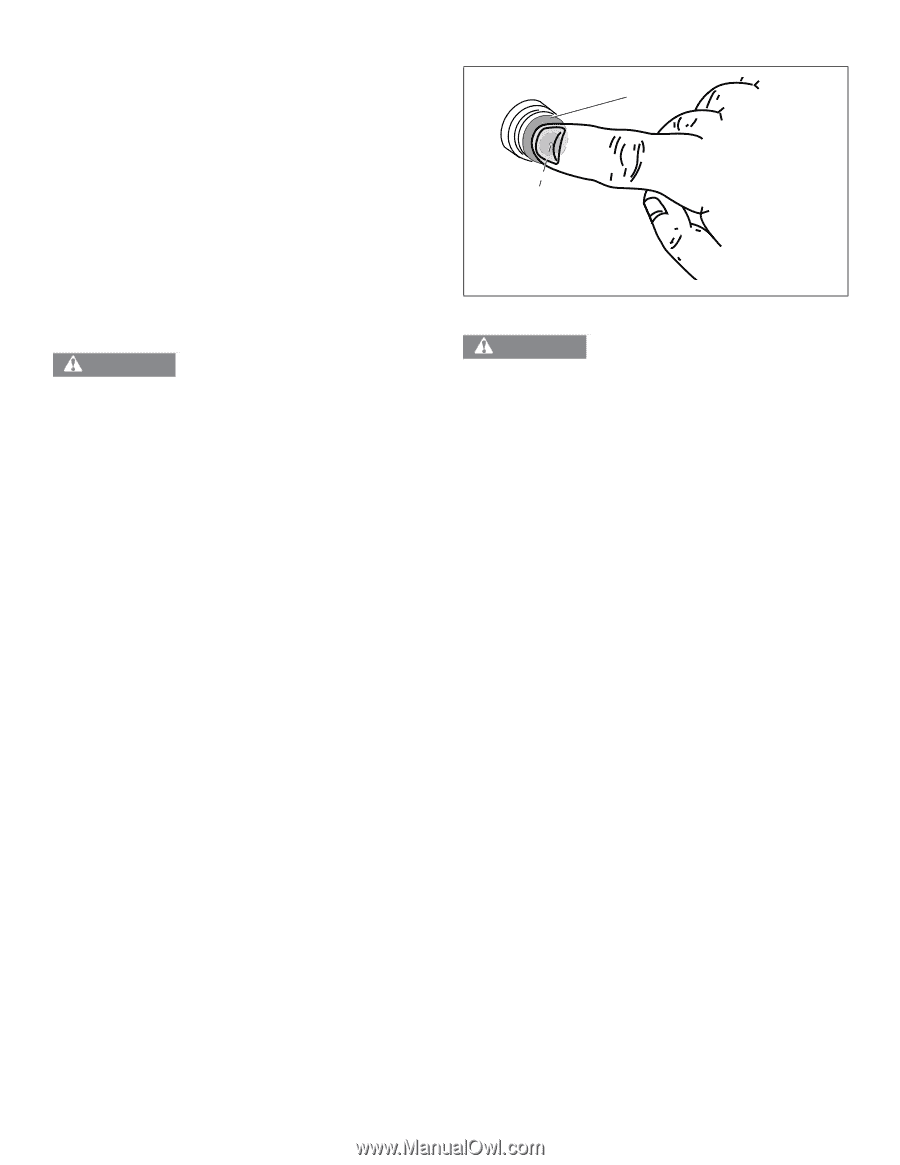
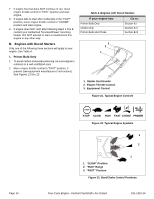
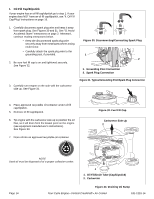
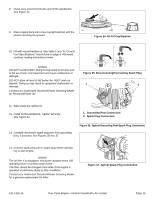
3. When starting a cold engine, push primer bulb firmly 3 times, allowing primer bulb to return completely to original position between pushes. See Figure 24. NOTES Be sure to cover vent hole when pressing primer bulb. See Figure 24. Cooler temperatures may require pushing primer bulb firmly 5 times. DO NOT use primer to restart a warm engine after a short shutdown. Doing so will flood the engine and may result in equipment malfunction. 4. Operate equipment control to release engine brake or clutch, if present (see equipment manufacturer's instructions). See Figure 21 on page 10. Afterward, continue reading instructions below. WARNING When pulling starter rope, the rope can unexpectedly jerk back toward engine causing serious injury. To avoid this risk, carefully follow these instructions: 5. Grasp starter cord handle. See Figure 21 on page 10. Afterward, continue reading instructions below. a. Pull rope out slowly until you feel drag. b. Without allowing the rope to retract, continue pulling rope with one rapid full arm stroke. c. Return rope slowly to original position. NOTE Following the instructions listed in the steps above avoids potential damage to the recoil mechanism. 6. If engine fails to start after 3 attempts repeat steps 2 thru 5 and try again. 7. If engine does NOT start after following steps 1 thru 6, contact your Authorized TecumsehPower Servicing Dealer. DO NOT attempt to start or troubleshoot this engine in any other way. II. Choke Only 1. To avoid carbon monoxide poisoning, be sure engine is outdoors in a well-ventilated area. 2. Move engine throttle control to "CHOKE" or "START" position, if present (see equipment manufacturer's instructions). See Figures 21 thru 23 on page 10. Afterward, continue reading instructions below. NOTE If restarting a warm engine after a short shutdown, move engine throttle control to "FAST" position instead of "CHOKE" or "START" position. See Figures 21 thru 23 on page 10. Afterward, continue reading instructions below. 3. Operate equipment control to release engine brake or clutch, if present (see equipment manufacturer's instructions). See Figure 21 on page 10. Afterward, continue reading instructions. 1 2 1. Primer Bulb 2. Vent Hole Figure 24. Pressing Primer Bulb WARNING When pulling starter rope, the rope can unexpectedly jerk back toward engine causing serious injury. To avoid this risk, carefully follow these instructions: 4. Grasp starter cord handle. See Figure 21 on page 10. Afterward, continue reading instructions below. a. Pull rope out slowly until you feel drag. b. Without allowing the rope to retract, continue pulling rope with one rapid full arm stroke. c. Return rope slowly to original position. NOTE Following the instructions listed in the steps above avoids potential damage to the recoil mechanism. 5. If engine fails to start after 3 attempts repeat steps 2 thru 4 and try again. 6. When engine starts: a. Move engine throttle control to "FAST" position. b. Next, move engine throttle control to desired speed in "RUN" range. NOTES If engine starts but falters when engine throttle control is moved to "FAST" position: a. Move engine throttle control back to "CHOKE" position. See Figures 21 thru 23 on page 10. Afterward, continue reading instructions below. b. Next, move engine throttle control to "FAST" position. If engine dies after engine throttle control is moved to "FAST" position, repeat steps 2 thru 6 to restart engine. 7. If engine fires but does NOT continue to run, move engine throttle control to "FAST" position and start engine. 8. If engine fails to start after 3 attempts in the "FAST" position, move engine throttle control to "CHOKE" position and start engine. 9. If engine does NOT start after following steps 1 thru 8, contact your Authorized TecumsehPower Servicing Dealer. DO NOT attempt to start or troubleshoot this engine in any other way. 181-1215-14 Four-Cycle Engine • Vertical Crankshaft • Air-Cooled Page 11
-
 1
1 -
2
-
3
-
4
-
5
-
6
-
7
-
 8
8 -
 9
9 -
 10
10 -
 11
11 -
 12
12 -
 13
13 -
 14
14 -
 15
15 -
 16
16 -
 17
17 -
 18
18 -
19
-
20
-
21
-
22
-
23
-
24
-
25
-
26
-
27
-
28
-
29
-
30
-
31
-
32
 |
 |