Thermador PCG486GD Installation Instructions PART3
Thermador PCG486GD Manual
 |
View all Thermador PCG486GD manuals
Add to My Manuals
Save this manual to your list of manuals |
Thermador PCG486GD manual content summary:
- Thermador PCG486GD | Installation Instructions PART3 - Page 1
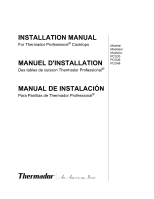
INSTALLATION MANUAL For Thermador Professional® Cooktops MANUEL D'INSTALLATION Des tables de cuisson Thermador Professional® Models/ Modèles/ Modelos: PCG30 PCG36 PCG48 MANUAL DE INSTALACIÓN Para Parrillas de Thermador Professional® - Thermador PCG486GD | Installation Instructions PART3 - Page 2
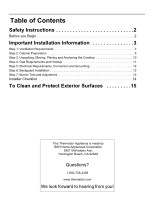
and Anchoring the Cooktop 10 Step 4: Gas Requirements and Hookup 11 Step 5: Electrical Requirements, Connection and Grounding 12 Step 6: Backguard Installation 13 Step 7: Burner Test and Adjustment 13 Installer Checklist 14 To Clean and Protect Exterior Surfaces 15 This Thermador Appliance is - Thermador PCG486GD | Installation Instructions PART3 - Page 3
by the state, province or region where this appliance is being installed. 2. Shut-off valve must be a "T" handle gas cock. 3. Flexible gas connector must not be longer than 36 inches. WARNING: If the information in this manual is not followed exactly, a fire or explosion may result causing property - Thermador PCG486GD | Installation Instructions PART3 - Page 4
rated at 18,000 BTU/HR (*15,000 BTU/HR on LP). *All models are convertible to LP/Propane gas using an accessory conversion kit. IMPORTANT • A backguard must be utilized when there is less than a 12" horizontal clearance between combustible materials and the back edge of the cooktop. The Thermador - Thermador PCG486GD | Installation Instructions PART3 - Page 5
is not to exceed 14.0 inches water column (34.9 mb) from the propane gas tank regulator. (2) This unit is designed as a cooking appliance. Based on safety considerations, never use it for warming or heating a room. Due to the high heat of the cooktop burners, installing a microwave oven with - Thermador PCG486GD | Installation Instructions PART3 - Page 6
Professional Cooktops. • Refer to www.Thermador.com for a complete selection of Professional Ventilation options, Blowers, and Accessories. • * For high output gas cooktops (60,000 BTU or greater), the minimum of one (1) CFM of ventilation per 100 BTU is recommended. If the cooktop has a griddle - Thermador PCG486GD | Installation Instructions PART3 - Page 7
Cut the openings for the following installations: • Wall installation, see Figure 3. • Island installation, see Figure 4. 10. For installation of a 48" cooktop above two side-by-side Thermador Warming Drawers, Model No. WD24, refer to Figure 8. Completing the installation as per Figure 8 will result - Thermador PCG486GD | Installation Instructions PART3 - Page 8
30" to 36" Wide Hood for 30" Cooktop 36" to 42" Wide Hood for 36" Cooktop 48" to 60" Wide Hood for 48" Cooktop Combustible Material 13" Max. depth of overhead cabinets 18" Min 10" min. . both sides VENT HOOD 30" Min. from bottom of Overhead Hood to Cooking Surface (40" or greater if hood - Thermador PCG486GD | Installation Instructions PART3 - Page 9
B See Detail A D B 23-5/16" Figure 2: Installing Side Supports (both sides) Figure 3: Wall Installation with Countertop Backsplash Vent Hood Width Requirements Island - 42" or 48" Wide Hood for 36" Cooktop Island - 54" or 60" Wide Hood for 48" Cooktop See Detail A D 3/4" Min. 22-13/16 - Thermador PCG486GD | Installation Instructions PART3 - Page 10
7-5/8" 1-1/4" 5-1/4" TO CENTERLINE OF GAS INLET 23-5/16" Cabinet face for installation with projecting control panel Cabinet face for installation with flush control panel * Low Back required when there is less than 12" horizontal clearance from back of cooktop to combustible material. With more - Thermador PCG486GD | Installation Instructions PART3 - Page 11
Fig. 4 and Table Dimension C (2527-,12/2cm" ) 1-7/8" (4,8 cm) Horizontal Distance Between Cutouts 2-3/4" (7 cm) Vertical Distance Between Cutouts (See Side View for Wood Support) Figure 8a: Installation of 48" Cooktop above two side-byside Thermador Warming Drawers - Model No. WD24 1-1/4" Notch - Thermador PCG486GD | Installation Instructions PART3 - Page 12
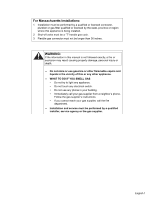
of shutting off the gas supply. Figure 9: Bottom of Unit All Installer supplied parts must conform to Local Codes. *15 Amp 120 VAC electrical supply is required for 36" and 48" models with an electric griddle. Step 3: Unpacking, Moving, Placing and Anchoring the Cooktop CAUTION Proper equipment - Thermador PCG486GD | Installation Instructions PART3 - Page 13
from natural gas to propane (LP), contact the dealer where the unit was purchased or contact Thermador. The field conversion kit for the Professional Cooktops in this series is Thermador Model PALPKITHC. Obey all instructions in this kit for correct conversion of the gas regulator and settings - Thermador PCG486GD | Installation Instructions PART3 - Page 14
IS CONNECTED TO A CORRECTLY POLARIZED 120 VOLT CIRCUIT (See Figure 10). Figure 10: Recommended Grounding Method for 120V Models THE THIRD, GROUND PRONG MUST NOT BE CUT OR REMOVED UNDER ANY CIRCUMSTANCES. NOTE: If the 120V cooktop is installed and connected as specified above, it will be completely - Thermador PCG486GD | Installation Instructions PART3 - Page 15
Island Trim Model Numbers Cooktop Size/Type 12" Low Back Island Trim* 30" PA30GLBC PA30GITC 36" PA36GLBC PA36GITC 48" PA48GLBC PA48GITC *Requires a minimum of 12" horizontal clearance between back of appliance and combustible materials. Step 7: Burner Test and Adjustment Install any - Thermador PCG486GD | Installation Instructions PART3 - Page 16
slightly forward. (See "Griddle Tilt Adjustment (not all models)" on page 10.) Gas Supply • Connection: 1/2" NPT with a minimum 3/4" diameter flex line. • If converting from natural to LP gas, refer to LP Conversion Instructions for details. • Manual gas shut off valve installed in an accessible - Thermador PCG486GD | Installation Instructions PART3 - Page 17
To Clean and Protect Exterior Surfaces The stainless steel surfaces may be cleaned by wiping with a damp soapy cloth. Any mild glass cleaner will remove fingerprints and smears. Follow all cleaning by rinsing with clear water. Wipe dry with a clean soft cloth to avoid water marks. For - Thermador PCG486GD | Installation Instructions PART3 - Page 18
Table des matières Instructions de sécurite 2 Avant de comencer 2 Information importante à propos de l'installation . .3 Chapitre 1 : Exigences de . 13 Chapitre 6 : Installation de la plaque de protection 14 Chapitre 7 : Test et réglage de brûler 14 Liste de vérification pour l' thermador - Thermador PCG486GD | Installation Instructions PART3 - Page 19
longueur maximum autorisée du tuyau de gaz est de 91,4 centimètres (36"). AVERTISSEMENT L'information fournie dans le présent manuel doit être très Suivez les instructions de la compagnie. • Si vous n'arrivez pas à contacter la compagnie de gaz, appelez les pompiers. • L'installation et les - Thermador PCG486GD | Installation Instructions PART3 - Page 20
min. à 34,9 (14 po) max. à la colonne d'eau). AVERTISSEMENT Coupez l'électricité avant d'installer l'appareil. Avant de remettre (ON) l'électricité, assurezvous que toutes les commandes sont à la position OFF. Tous les brûleurs scellés sont cotés à 18 000 Btu/h (*15 000Btu/h pour LP). *Tous les mod - Thermador PCG486GD | Installation Instructions PART3 - Page 21
d'arrivée du gaz dans cet appareil ne doit pas dépasser les 34,9 millibars (14 pouces à la colonne d'eau) à partir du détendeur du réservoir de propane de cuisson Thermador. À cause de la chaleur intense produite par cet appareil, il faut porter une attention particulière à l'installation de la - Thermador PCG486GD | Installation Instructions PART3 - Page 22
po) au dessus de la table de cuisson. (Voir Figure 1). • Si la hotte contient des matériaux combustibles (ex. : recouvrement en bois), elle doit être installée à un minimum de 40 po ou plus au-dessus de la table de cuisson. AVIS : La plupart des hottes contiennent des composantes combustibles qui - Thermador PCG486GD | Installation Instructions PART3 - Page 23
1300 pi³/min Hotte murale Pro de 48"** ou 54" Hotte à encastrement sur mesure de 48" avec ventilateur optionnel Hotte d'îlot de 54" avec ventilateur optionnel Notes importantes : • Nous recommandons l'utilisation d'une hotte murale ou d'une hotte d'îlot Thermador Professional avec les surfaces de - Thermador PCG486GD | Installation Instructions PART3 - Page 24
installations suivantes : • Installation murale, voir Figure 3. • Installation en îlot, voir Figure 4. 10. Pour l'installation de la table de cuisson de 1,22 m (48 po) sur les deux tiroirs chauffe-plats côte à côte de Thermador 4). • Si vous construisez un plan de support, les côtés ou le bas de la - Thermador PCG486GD | Installation Instructions PART3 - Page 25
cuisson de 48 po HOTTE DE VENTILATION 76,2 cm = 30 po 91,4 cm = 36 po 106,7 cm = 42 po 121,9 cm = 48 po Profundeur max. des armoires (0 po) avec plaque de protection, 30,5 cm (12 po) avec d'enjoliveur pour îlot 7,6 cm (10 po) min. des deux côtés . . Table de cuisson "A" Côtés 0 cm (0 po) Bas 0 - Thermador PCG486GD | Installation Instructions PART3 - Page 26
vue éclatée A D 59, 2 cm B (23-5/16 po) Figure 2 : Installation de supports latéraux (des deux côtés) Figure 3 : Installation murale avec rebord de plan de travail Hotte de ventilation Exigences de largeur Îlot - hotte large de 42" ou 48" pour 36" table de cuisson Îlot - hotte large de 54" ou - Thermador PCG486GD | Installation Instructions PART3 - Page 27
clatée A (Face frontale de l'armoire) Cuisson 30 po Cuisson 36 po Cuisson 48 po A 29-7/8 po 35-7/8 po 47-7/8 armoire de support), 17 mm (11/16 po) (Encoche nécessaire pour armoire de support standard de installation avec panneau de commande projeté Panneau frontal de l'armoire pour installation - Thermador PCG486GD | Installation Instructions PART3 - Page 28
14 mm (9/16 po) vers l'extérieur avec un support supports en bois) Figure 8a : Installation d'une table de cuisson de 121,9 cm (48po) sur deux tiroirs chauffe-plats côte à côte, modèle WD24 Encoche de 3,2 cm de profondeur (1-1/4 po) ARRIÉRE Support 8b : Installation d'une table de cuisson - Thermador PCG486GD | Installation Instructions PART3 - Page 29
polarisé et relié à la terre de 120 VCA, 10 A, (*15 A) monophasé, 60 Hz. Un robinet d'arrêt doit être installé à l'extérieur de l'appareil, à un endroit réglementations locales. *Alimentation électrique 15A, 120VAC pour les modèles 36 et 48 po avec grille électrique. Chapitre 3 : Déballage, - Thermador PCG486GD | Installation Instructions PART3 - Page 30
du gaz naturel au propane (LP), communiquer avecle marchand oùl'appareila été acheté ou avec Thermador. La trousse de conversion des surfaces de cuisson Professional de cette série est le modèle Thermador PALPKITHC. Suivez toutes les instructions du this kit pour convertir correctement le détendeur - Thermador PCG486GD | Installation Instructions PART3 - Page 31
rification de la pression de gaz du collecteur, la pression d'entrée du détendeur doit être de 14,9 mb (6 po) au minimum pour le gaz naturel et de 7,4 mb (11 po) pour lectricité (Voir Figure 10). • Avant l'installation, mettre l'alimentation HORS CIRCUIT au panneau de service, le verrouiller pour emp - Thermador PCG486GD | Installation Instructions PART3 - Page 32
10 A. • Brûleurs 4 avec grille électrique : protection de circuit de15 A. • Brûleurs 6 avec grille électrique : protection de circuit de 15 A. Installateur - indiquer au propriétaire l'emplacmeent du coupe-circuit ou du fusible. Le noter à des ns de références. Chapitre 6 : Installation 36 ais 14 l' - Thermador PCG486GD | Installation Instructions PART3 - Page 33
brûleur. Si les brûleurs ne sont pas enveloppés, communiquer avec Thermador. Les 2 brûleurs de surface de cuisson du côté gauche sont dot gaz naturel et gaz LP, consulter les instructions de conversion LP pour plus de détails. • Le robinet manuel d'arrêt de gaz est installé à un endroit accessible - Thermador PCG486GD | Installation Instructions PART3 - Page 34
Installateur • Laisser les GUIDES D'UTILISATION e t D'ENTRETIEN et D'INSTALLATION avec le propriétaire. Nettoyage et protection des surfaces extérieures Les surfaces en acier inoxydable se nettoient en passant un chiffon mouillé à l'eau savonneuse. - Thermador PCG486GD | Installation Instructions PART3 - Page 35
- Thermador PCG486GD | Installation Instructions PART3 - Page 36
mover, posicionar y jar la parrilla 11 Paso 4: Requerimientos de gas y conexiones 12 Paso 5: Requerimientos eléctricos, conexión y 14 Paso 7: Probar y Ajustar el Quemador 14 Lista de chequeo de instalador 15 Para limpiar y proteger las superficies exteriores .16 Este electrodomestico de Thermador - Thermador PCG486GD | Installation Instructions PART3 - Page 37
está instalando este aparato. 2. La válvula de cierre debe ser un grifo de gas en T. 3. El conector flexible de gas no debe medir más de 36 pulgadas. ADVERTENCIA La falta de observar la información en este manual puede causar un fuego o una explosión, y como resultado daños a la propiedad, lesiones - Thermador PCG486GD | Installation Instructions PART3 - Page 38
000 BTU/HR en gas LP). *Todos los modelos son convertibles a gas LP/Propano utilizando un kit de accesorios de conversión. IMPORTANTE • Se debe instalar una consola trasera de protección cuando hay menos de 12" (305 mm) de espacio horizontal libre entre los materiales combustibles y la parte trasera - Thermador PCG486GD | Installation Instructions PART3 - Page 39
de gas a este aparato no debe exceder 14.0 pulgadas de columna de agua (34.9 mb) del tanque de gas propano al de la campana para todas las hornillas Thermador. Debido a la capacidad de alta temperatura los códigos de edificación locales. No instale una combinación del horno de microondas/ ventilador - Thermador PCG486GD | Installation Instructions PART3 - Page 40
combustibles (i.e., una cubierta de madera), se debe instalar a una distancia mínima de 40" arriba de la superficie de cocinar. AVISO: La mayor parte de las campanas contienen componentes combustibles que hay que tener en cuenta en el momento de planificar la instalación. Considerar aire de - Thermador PCG486GD | Installation Instructions PART3 - Page 41
Profesional con todas las hornillas Thermador. • Visite el www.Thermador.com para una selección completa de las opciones de ventilación, de los ventiladores y de los accesorios. • * Se recomienda una ventilación mínima de un (1) pi³/min por 100 BTU para las hornillas de gas de alto rendimiento (60 - Thermador PCG486GD | Installation Instructions PART3 - Page 42
la conexión del tubo de gas del aparato se encuentran en la parte inferior izquierda de la parrillla puede utilizar una moldura tipo isla de Thermador. Instale la consola trasera antes de insertar el Figure 4. 10. Para instalar una parrilla de 48" arriba de dos cajones calentadores Thermador, Modelo - Thermador PCG486GD | Installation Instructions PART3 - Page 43
de 36" o 42" para Parilla de 36" Campana de 48" o 60" para Parilla de 48" Material combustible CAMPANA PARED PARED 13" Max. profundidad gabinetes colgados 30" min. del fondo de campana colgada a superficie de cocinar (40" o más si la campana contiene materiales combustibles ). 18" Min 10" min - Thermador PCG486GD | Installation Instructions PART3 - Page 44
3: Instalación de pared con salpicadero trasero en la cubierta Requerimientos espacios libres para Campanas Isla - Ancho de campana de 42" o 48" para Parrilla 36" Isla - Ancho de campana de 54" o 60" para Parrilla 48" Vea Detalle A D 3/4" Min. 22-13/16" Español 8 Figura 4: Instalación tipo isla - Thermador PCG486GD | Installation Instructions PART3 - Page 45
2 x 4 Ángulo Detalle de entalladura Detalle A: (cara del gabinete) Parilla 30" Parilla 36" Parilla 48" A 29-7/8" 35-7/8" 47-7/8" B 3/8" 3/8" 13/16" C 0" ( ENTRADA DE GAS LÍNEA CENTRAL 23-5/16" Cara de gabinete para instal. con panel de control saliente Cara de gabinete para instal. con - Thermador PCG486GD | Installation Instructions PART3 - Page 46
8a: Instalación de una Parrilla 48" arriba de dos cajones calentadores Thermador lado-a-lado, Modelo No. WD24 1-1/4" Profundidad de la entalladura 77-1-111 Figura 8b: Instalación de una Parrilla 48" arriba de dos cajones calentadores Thermador lado-a-lado, Modelo No. WD24 (Vista lateral) Español - Thermador PCG486GD | Installation Instructions PART3 - Page 47
tierra y polarizada de 120 VAC, 10 Amps, (o 15A*) monofásica, 60 HZ. Se debe instalar una válvula manual externa al aparato, en un lugar de fácil acceso desde el frente, para poder apagar el suministro de gas. Figura 9: Fondo de unidad Todas las partes suministradas por el instalador deben cumplir - Thermador PCG486GD | Installation Instructions PART3 - Page 48
. Si el lugar/trabajo requiere una conversión de gas natural a gas propano (LP), contacte al distribuidor donde compró la unidad o contacte a Thermador. El kit de conversión de las hornillas Profesionnal de está serie es el modelo Thermador PALPKITHC. Observe todas las instrucciones en el esta - Thermador PCG486GD | Installation Instructions PART3 - Page 49
14.0 pulgadas de columna de agua (34.9 mb). PRECAUCIÓN El aparato debe estar aislado del sistema de tubería de suministro de gas cerrando la válvula manual de cierre durante cualquier prueba de presión de la línea de suministro de gas 10 para el método recomendado de la puesta a tierra. • En la parte - Thermador PCG486GD | Installation Instructions PART3 - Page 50
trasera. Instale la 36" PA36GLBC PA36GITC 48" PA48GLBC PA48GITC *Requiere un mínimo espacio horizontal libre de 12" entre la parte gas para saber si hay fugas y que la unidad haya sido Español 14 conectada con la fuente de la corriente eléctrica. Dar vuelta a la válvula de cierre manual del gas - Thermador PCG486GD | Installation Instructions PART3 - Page 51
alguno de los quemadores no queda completamente envuelto, llame al Servicio de Thermador. Los dos quemadores de la parrilla de estufa en el lado izquierdo de gas natural a LP, para mayores detalles, refiérase a las Instrucciones de Conversión a LP. • Se instaló la válvula de cierre manual de gas en - Thermador PCG486GD | Installation Instructions PART3 - Page 52
Para limpiar y proteger las superficies exteriores Se pueden limpiar las supercies de acero inoxidable con un trapo húmedo, jabonoso. Cualquier detergente suave para vidrio quitará huellas digitales y manchas. Después de cada limpieza enjuague bien con agua limpia. Seque con un trapo limpio suave - Thermador PCG486GD | Installation Instructions PART3 - Page 53
Notes: Remarques : Notas: - Thermador PCG486GD | Installation Instructions PART3 - Page 54
- Thermador PCG486GD | Installation Instructions PART3 - Page 55
- Thermador PCG486GD | Installation Instructions PART3 - Page 56
the most detailed information, refer to installation instructions accompanying product or write Thermador indicating model number. We reserve the right to change specifications or design without notice. Some models are certified for use in Canada. Thermador is not responsible for products which are
-
 1
1 -
 2
2 -
 3
3 -
 4
4 -
 5
5 -
 6
6 -
 7
7 -
8
-
9
-
10
-
11
-
12
-
13
-
14
-
15
-
16
-
17
-
18
-
19
-
20
-
21
-
22
-
23
-
24
-
25
-
26
-
27
-
28
-
29
-
30
-
31
-
32
-
33
-
34
-
35
-
36
-
37
-
38
-
39
-
40
-
41
-
42
-
43
-
44
-
45
-
46
-
47
-
48
-
49
-
50
-
51
-
52
-
53
-
54
-
55
-
56
 |
 |

INSTALLATION MANUAL
For Thermador Professional
®
Cooktops
MANUEL D'INSTALLATION
Des tables de cuisson Thermador Professional
®
MANUAL DE INSTALACIÓN
Para Parrillas de Thermador Professional
®
Models/
Modèles/
Modelos:
PCG30
PCG36
PCG48