Thermador PRG486JDG Use and Care Manual - Page 20
Checking Burner Cap Placement, Power Failure, Flame Height
 |
View all Thermador PRG486JDG manuals
Add to My Manuals
Save this manual to your list of manuals |
Page 20 highlights
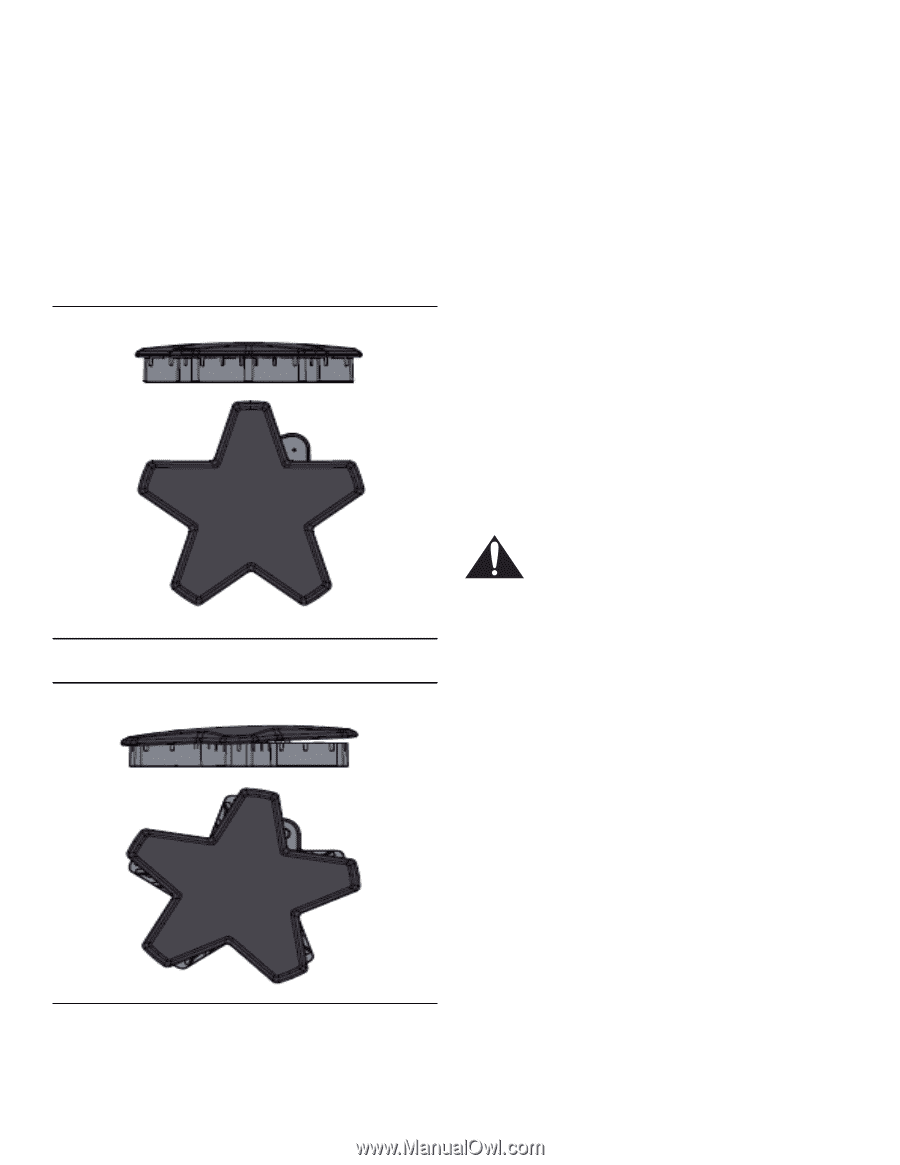
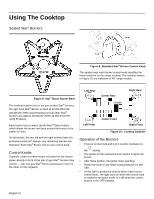
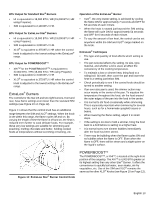
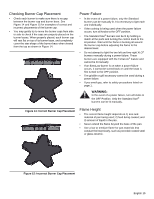
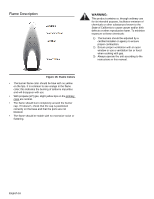
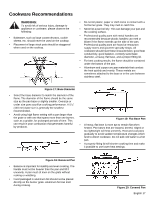
Checking Burner Cap Placement • Check each burner to make sure there is no gap between the burner cap and burner base. See Figure 14 and Figure 15 for examples of correct and incorrect placements of the burner cap. • You may gently try to move the burner caps from side to side to check if the caps are properly placed on the burner bases. When properly placed, each burner cap will rest flat on top of its burner base, and completely cover the star-shape of the burner base when viewed from the top as shown in Figure 14. Power Failure • In the event of a power failure, only the Standard burners can be manually lit. It is necessary to light each one individually. • If the cooktop is being used when the power failure occurs, turn all knobs to the OFF position. • The Standard Star® burners can be lit by holding a match at the ports and turning the control knob to the HI position. Wait until the flame is burning all around the burner cap before adjusting the flame to the desired level. • Do not attempt to light the two left and two right XLO® burners manually during a power failure. These burners are equipped with the ExtraLow® feature and cannot be lit manually. • If an ExtraLow burner is on when a power failure occurs, it cannot be turned back on until the knob is first turned to the OFF position. • The griddle or grill accessory cannot be used during a power failure. • If you smell gas, refer to safety precautions listed on page 1. WARNING: In the event of a power failure, turn all knobs to the OFF Position. Only the Standard Star® burners can be lit manually. Figure 14: Correct Burner Cap Placement Flame Height • The correct flame height depends on 1) size and material of pan being used; 2) food being cooked; and 3) amount of liquid in the pan. • Never extend the flame beyond the base of the pan. • Use a low or medium flame for pan materials that conduct the heat slowly, such as porcelain coated steel or glass-ceramic. Figure 15: Incorrect Burner Cap Placement English 15
-
 1
1 -
2
-
3
-
4
-
5
-
6
-
7
-
8
-
9
-
10
-
11
-
12
-
13
-
14
-
 15
15 -
 16
16 -
 17
17 -
 18
18 -
 19
19 -
 20
20 -
 21
21 -
 22
22 -
 23
23 -
 24
24 -
 25
25 -
26
-
27
-
28
-
29
-
30
-
31
-
32
-
33
-
34
-
35
-
36
-
37
-
38
-
39
-
40
-
41
-
42
-
43
-
44
-
45
-
46
-
47
-
48
-
49
-
50
-
51
-
52
-
53
-
54
-
55
-
56
-
57
-
58
-
59
-
60
-
61
-
62
-
63
-
64
-
65
-
66
-
67
-
68
-
69
-
70
-
71
-
72
-
73
-
74
-
75
-
76
-
77
-
78
-
79
-
80
-
81
-
82
-
83
-
84
-
85
-
86
-
87
-
88
-
89
-
90
-
91
-
92
-
93
-
94
-
95
-
96
-
97
-
98
-
99
-
100
-
101
-
102
-
103
-
104
-
105
-
106
-
107
-
108
-
109
-
110
-
111
-
112
-
113
-
114
-
115
-
116
-
117
-
118
-
119
-
120
-
121
-
122
-
123
-
124
-
125
-
126
-
127
-
128
-
129
-
130
-
131
-
132
-
133
-
134
-
135
-
136
-
137
-
138
 |
 |