Timex T307S User Guide - Page 6
Installation and Maintenance, Setting Clock Time and Calendar - alarm clock instructions
 |
UPC - 758859205007
View all Timex T307S manuals
Add to My Manuals
Save this manual to your list of manuals |
Page 6 highlights
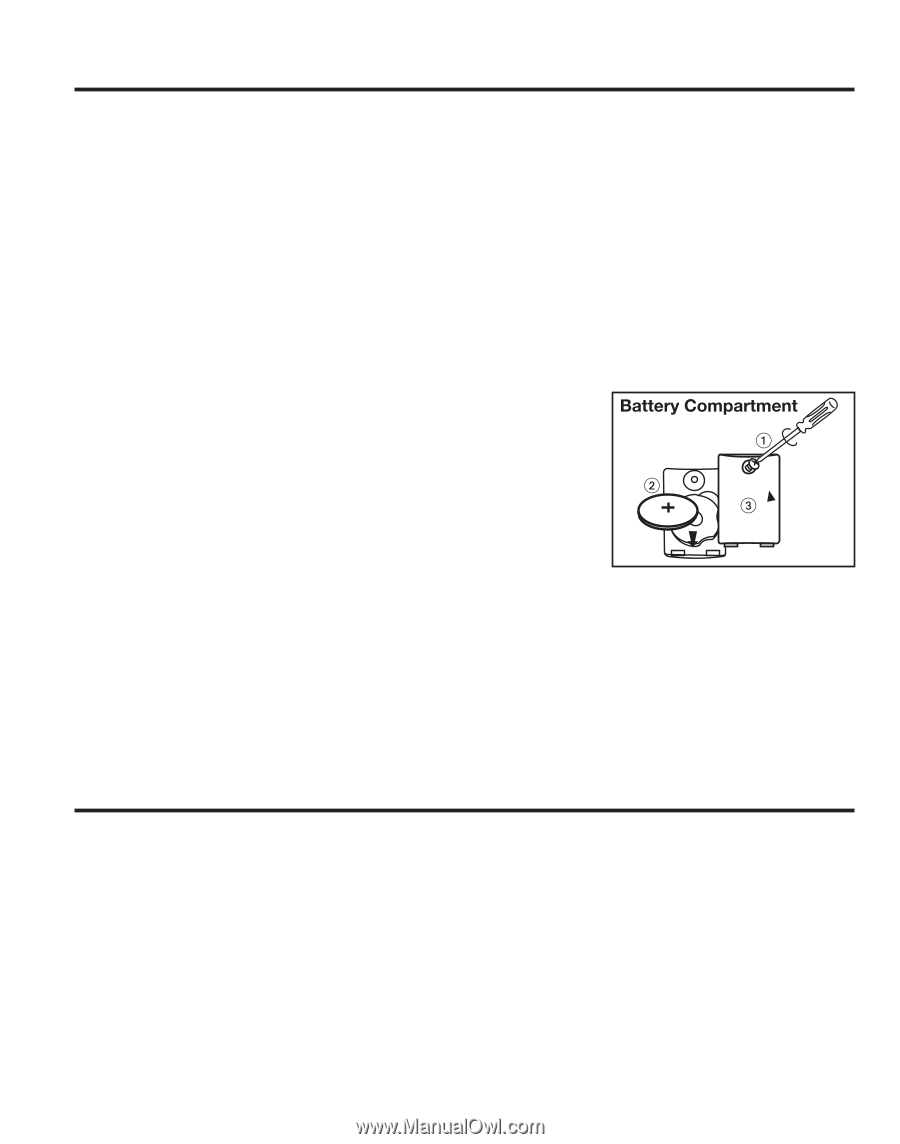
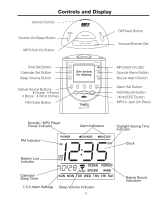
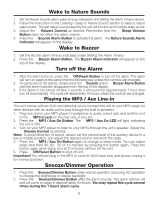
Installation and Maintenance 1. Remove the unit and all packing materials from the carton. You should save packing materials in case unit needs to be returned for service. If you do not wish to save the materials, please dispose of them properly. 2. Place the unit on a stable, level surface, close to an AC outlet, out of direct sunlight, and away from sources of dust, dirt, heat, water, moisture, vibration, and strong magnetic fields. 3. After installing the batteries (see below) and reading the Maintenance notes, plug the AC cord into an outlet. "Sure Alarm" Battery Backup Installation It is recommended that a CR-2032 battery be installed into the unit, as directed below, to activate the "Sure Alarm" battery backup feature. In the event that the AC power cord is disconnected or a power failure or other interruption occurs, the "Sure Alarm" system will maintain clock and alarm settings for the life of the batteries, ensuring that the alarm will sound at the set time (note: while operating on battery power, all set alarms will sound as a buzzer). When power is restored, the clock will cease using battery power, and will again operate on AC power. The Battery Low Indicator shows if there is not enough battery power to run the backup. To install backup battery: 1. Using screw driver to open the battery compartment door. 2. Install a CR-2032 battery into the battery compartment. Please make sure the polarity is correct as shown within the battery compartment. 3. Put the battery compartment door back. Maintenance l Place the unit on a level surface away from sources of direct sunlight or excessive heat. l Protect your furniture when placing your unit on a natural wood and lacquered finish. A cloth or other protective material should be placed between it and the furniture. l Clean your unit with a soft cloth moistened only with mild soap and water. Stronger cleaning agents, such as Benzine, thinner or similar materials can mar the surface of the case. l If the unit is not to be used for a prolonged period, such as a month or longer, remove the batteries to prevent possible corrosion. Should the battery compartment become corroded or dirty, clean the compartment thoroughly and replace the batteries. Setting Clock Time and Calendar Important - While setting the time or calendar, if you do not press the appropriate buttons (as explained below) within approximately 8 seconds, the display will stop flashing. If this happens you must follow the instructions again from step 1. Setting the Clock Time 1. Press and hold the Time Set Button until the display begins flashing. 2. Press the FWD/Month or REV/Date Button to select correct time. Remember to set the correct AM or PM. The PM Indicator is located on the upper left side of the time digits (there is no AM indicator). 3. Press the Time Set Button again to return the display to normal mode. You can also allow the display to flash for approximately 8 seconds to return to normal mode. Note: While setting the time, if you press and hold the FWD/Month or REV/Date Button the minutes will begin counting at a moderate pace, then get faster. This will assist you in easily setting the time quickly and accurately. 6
-
 1
1 -
 2
2 -
 3
3 -
 4
4 -
 5
5 -
 6
6 -
 7
7 -
 8
8
 |
 |