Toro 20332 Operation Manual - Page 6
Product Overview - spark plug
 |
UPC - 021038203324
View all Toro 20332 manuals
Add to My Manuals
Save this manual to your list of manuals |
Page 6 highlights
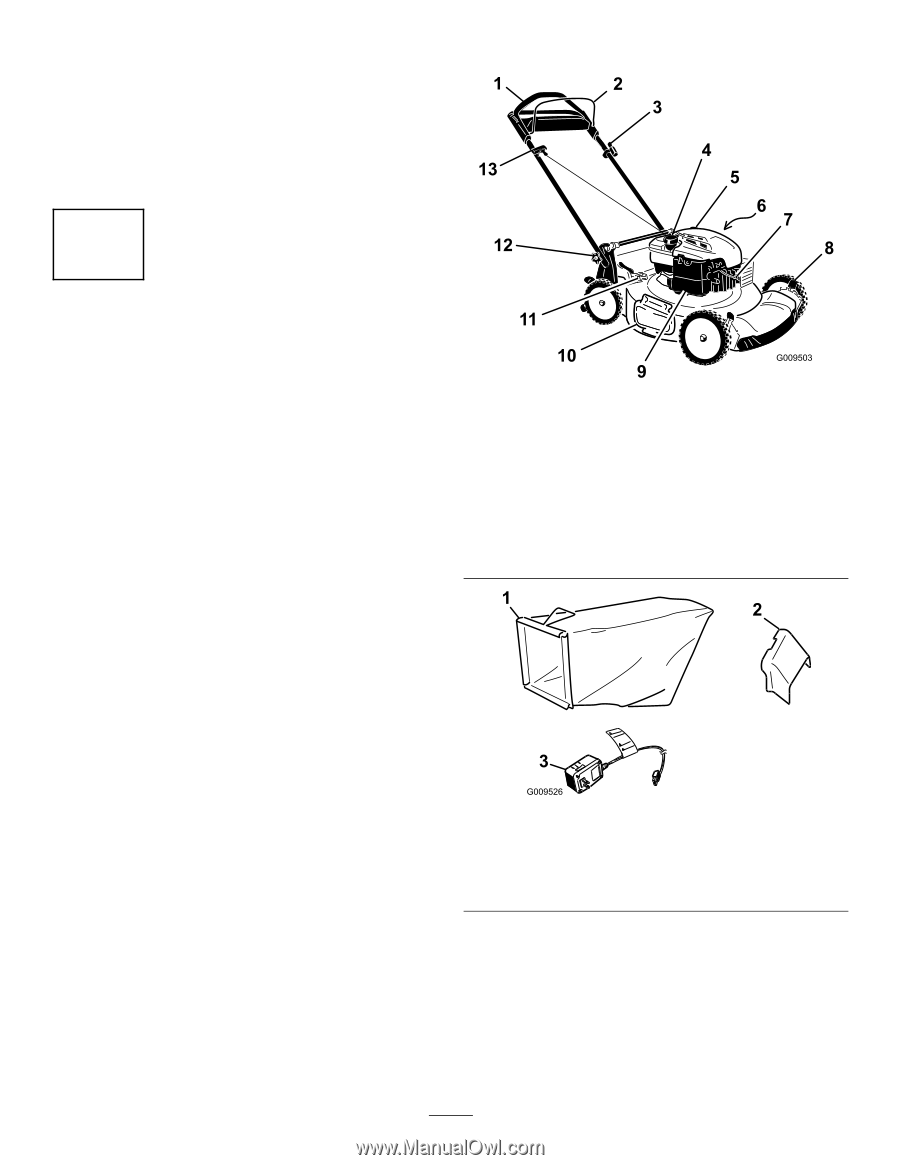
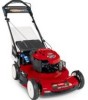
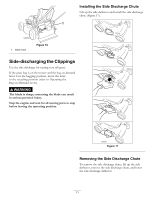
Important: Do not overfill the crankcase with oil and run the engine. Drain the excess oil until the oil level on the dipstick reads Full. 6. Install the dipstick into the oil fill tube securely. Important: Change the engine oil after the first 5 operating hours; change it yearly thereafter. Refer to Changing the Engine Oil. Product Overview 3 Charging the Battery No Parts Required Procedure Electric-start models only Refer to Charging the Battery in the Maintenance section. Figure 5 1. Handle 8. Cutting height lever (4) 2. Blade control bar 9. Air filter 3. Ignition key (electric-start 10. Side-discharge deflector models only) 4. Fuel tank cap 11. Bag-on-demand lever 5. Oil fill/dipstick 12. Handle knob (2) 6. Washout port (not shown) 13. Recoil start handle 7. Spark plug Figure 6 1. Grass bag 2. Side discharge chute 3. Battery charger (electric-start models only) 6
-
 1
1 -
 2
2 -
 3
3 -
 4
4 -
 5
5 -
 6
6 -
 7
7 -
 8
8 -
 9
9 -
 10
10 -
 11
11 -
 12
12 -
13
-
14
-
15
-
16
-
17
-
18
-
19
-
20
 |
 |