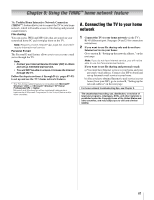
Toshiba 52LX177 Owner's Manual - English - Page 88
B. Setting up the network address - canada
 |
UPC - 022265000700
View all Toshiba 52LX177 manuals
Add to My Manuals
Save this manual to your list of manuals |
Page 88 highlights
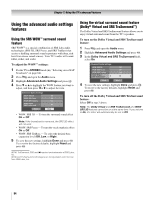
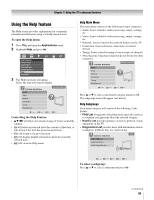
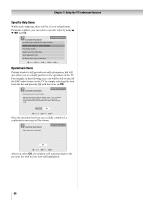
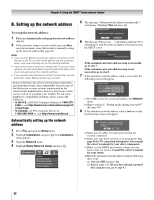
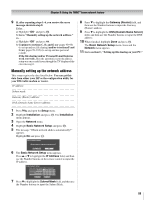
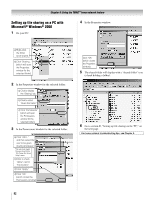
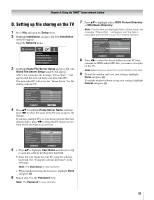
Chapter 8: Using the THINC™ home network feature B. Setting up the network address To set up the network address: 1 First, try automatically setting up the network address (below). 2 If the automatic setup is not successful, you can either retry the automatic setup (below) or try manually setting up the network address (- page 89). Note: • If you used an Ethernet crossover cable to connect your PC directly to the TV, you will not be able to use the automatic setup, and must manually set up the network address. • If you used a hub or switch to connect the TV to your home network, you will not be able to use the automatic setup, and must manually set up the network address. • If you used a router with built-in DHCP functionality, use the automatic setup. Manual setup may not work. Router technology, like all new and emerging technologles, may from time to time cause compatibility issues because of the differences in router systems implemented by the various router manufacturers; however, most issues can be easily resolved. If you think your Toshiba TV and router might have compatibility problems, please contact the following: • In the U.S., call TACP Consumer Solutions at 1-800-575- 5469 or visit http://www.tacp.com/customersupport/ contact.asp. • In Canada, call TCL Customer Service at 1-800-268-3404 or visit http://www.toshiba.ca. Automatically setting up the network address 1 Press Y and open the Setup menu. 2 Highlight Installation and press T. The Installation menu appears. 3 Open the Network menu. 4 Highlight Basic Network Setup and press T. Installation Network Basic Network Setup Personal E-mail Setup Home File Server Setup Software Upgrade 5 The message "Obtain network address automatically?" will display. Highlight Yes and press T. Basic Network Setup Obtain network address automatically? Yes No 6 The message "Please wait..." will display while the TV is attempting to load the network address information from the DHCP server. Basic Network Setup Please wait... If the automatic network address setup is successful, go to step 7. If the automatic network address setup is not successful, go to step 8. 7 If the automatic network address setup is successful, the following screen will appear: Basic Network Setup Done! Network address information has been found! IP Address 0 0 0 0 Subnet Mask 255 255 225 0 Gateway (Router) 0 0 0 0 DNS (Domain Name Server) 0 0 0 0 OK a) Press T to close the screen and return to the Network menu. b) Skip to section C, "Setting up file sharing on your PC" (- page 90). 8 If the automatic network address setup is not successful, the following screen will appear: There may be a problem with the network connection. Please check network cables and settings. Retry Abort a) Make sure all cables for your home network are securely connected. b) Make sure your home network is set up properly. See page 24 for TV connection information. Also consult the owner's manuals for your other components. c) Make sure the DHCP and security settings on your home router are correct. Consult the owner's manual for your router. d) Retry the automatic network address setup by following these steps: (1) Highlight OK and press T. (2) Repeat steps 1-6. (If you have already repeated this setup process, go to step 9.) 88
-
 1
1 -
2
-
3
-
4
-
5
-
6
-
7
-
8
-
9
-
10
-
11
-
12
-
13
-
14
-
15
-
16
-
17
-
18
-
19
-
20
-
21
-
22
-
23
-
24
-
25
-
26
-
27
-
28
-
29
-
30
-
31
-
32
-
33
-
34
-
35
-
36
-
37
-
38
-
39
-
40
-
41
-
42
-
43
-
44
-
45
-
46
-
47
-
48
-
49
-
50
-
51
-
52
-
53
-
54
-
55
-
56
-
57
-
58
-
59
-
60
-
61
-
62
-
63
-
64
-
65
-
66
-
67
-
68
-
69
-
70
-
71
-
72
-
73
-
74
-
75
-
76
-
77
-
78
-
79
-
80
-
81
-
82
-
 83
83 -
 84
84 -
 85
85 -
 86
86 -
 87
87 -
 88
88 -
 89
89 -
 90
90 -
 91
91 -
 92
92 -
 93
93 -
94
-
95
-
96
-
97
-
98
-
99
-
100
-
101
-
102
-
103
-
104
-
105
-
106
-
107
-
108
-
109
-
110
-
111
-
112
-
113
-
114
-
115
-
116
-
117
-
118
 |
 |
