Toshiba D-VR600 Owner's Manual - English - Page 18
Connect to a TV with HDMI output, To select the HDMI output resolution - operators manual
 |
UPC - 022265000748
View all Toshiba D-VR600 manuals
Add to My Manuals
Save this manual to your list of manuals |
Page 18 highlights
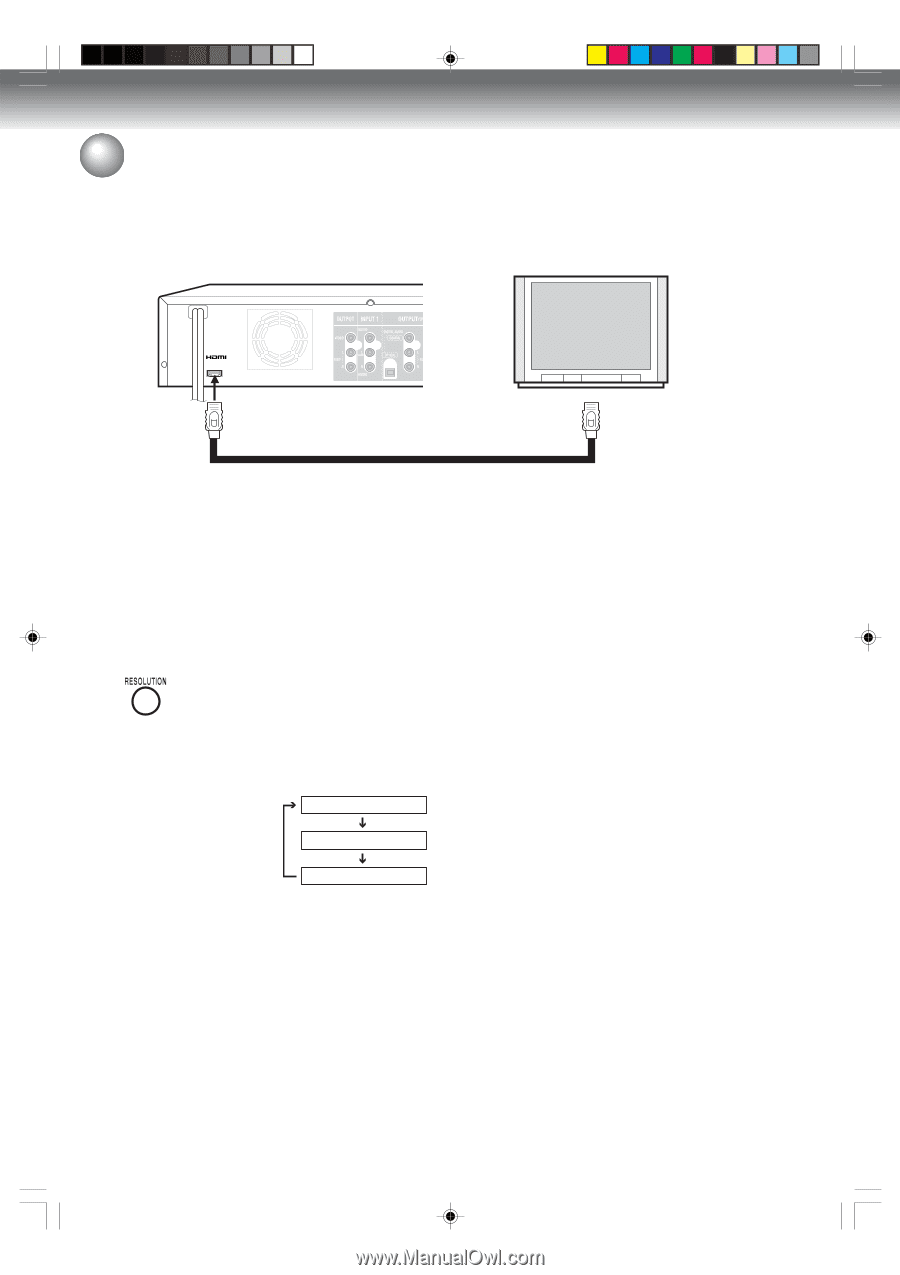
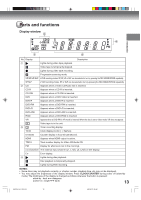
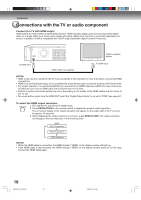
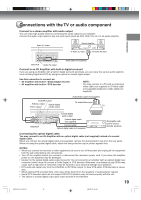
Introduction Connections with the TV or audio component Connect to a TV with HDMI output HDMI stands for High Definition Multimedia Interface. HDMI transfers digital audio and uncompressed digital video on a single cable. As a result, audio cables and video cables don't need to be connected separately to a device. In addition, HDMI is compatible with HDCP (High Bandwidth Digital Content Protection). HDMI-compatible display To HDMI OUT HDMI Cable (not supplied) To HDMI input NOTES: • Refer to the owner's manual for the TV to be connected to this recorder for more information concerning HDMI connections. • HDMI is an evolving technology, so it is possible that some devices may not operate properly with this recorder. • For proper operation, it is recommended that you use as short an HDMI cable as possible.You may not encoun- ter difficulty if you use an HDMI cable that is shorter than 16.4 ft (5m). • Defects in picture and sound quality may occur depending on the quality of the HDMI cables and the nature of the TV set. • No sound will be output from the HDMI OUT jack if the "Digital Output Mode" is not set to "PCM" (see page 27). To select the HDMI output resolution 1. Turn ON the TV and set to the HDMI mode. 2. Press RESOLUTION on the remote control to display the present output resolution. The on-screen display of the output resolution will appear on the upper right of the TV screen for approx. 10 seconds. 3. While displaying the output resolution on-screen, press RESOLUTION. The output resolution will change to the next resolution in the following order. HDMI 480p (Progressive) 720p (Progressive) 1080i (Interlace) NOTES: • When the HDMI cable is connected, the HDMI indicator "HDMI" on the display window will light up. • If the HDMI cable is disconnected, the HDMI indicator "HDMI" on the display window goes off. In this case, connect the HDMI cable again. 18 2K70101A_E P12-19 18 08`02`07, 20:42
-
 1
1 -
2
-
3
-
4
-
5
-
6
-
7
-
8
-
9
-
10
-
11
-
12
-
 13
13 -
 14
14 -
 15
15 -
 16
16 -
 17
17 -
 18
18 -
 19
19 -
 20
20 -
 21
21 -
 22
22 -
 23
23 -
24
-
25
-
26
-
27
-
28
-
29
-
30
-
31
-
32
-
33
-
34
-
35
-
36
-
37
-
38
-
39
-
40
-
41
-
42
-
43
-
44
-
45
-
46
-
47
-
48
-
49
-
50
-
51
-
52
-
53
-
54
-
55
-
56
-
57
-
58
-
59
-
60
-
61
-
62
-
63
-
64
-
65
-
66
-
67
-
68
-
69
-
70
-
71
-
72
-
73
-
74
-
75
-
76
-
77
-
78
-
79
-
80
 |
 |