Toshiba P47LSB User Manual - Page 31
Multiple Screen Wall system example
 |
View all Toshiba P47LSB manuals
Add to My Manuals
Save this manual to your list of manuals |
Page 31 highlights
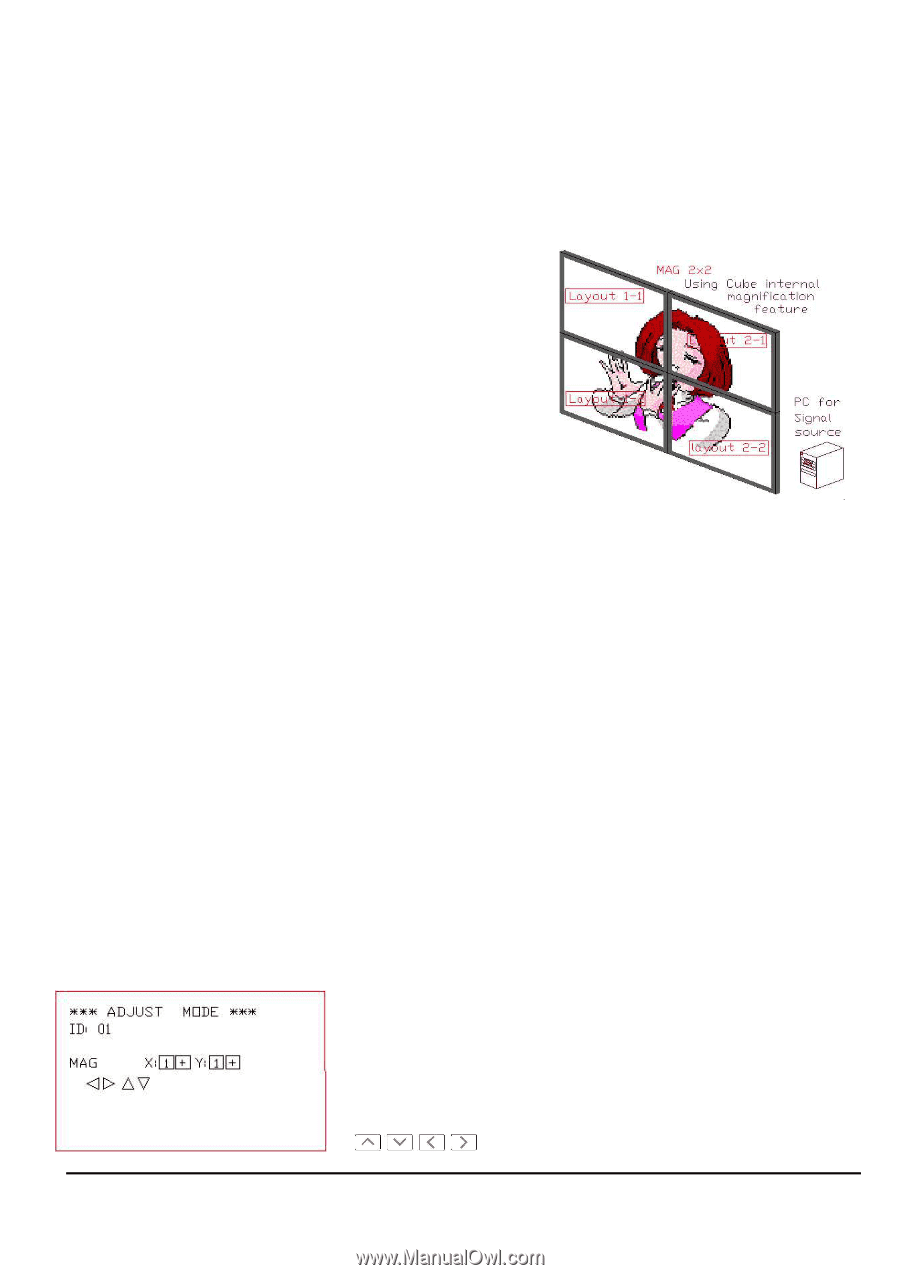
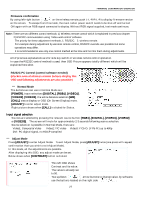
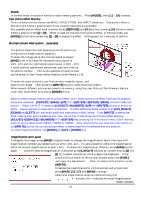
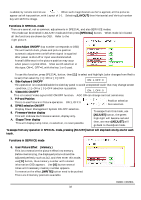
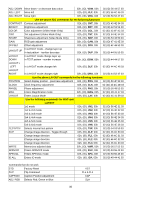
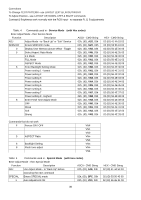
MODE In normal mode, this button works to recall memory patterns. Press [MODE], then [ 1 ] - [ 9 ] to select. User picture effect Memory This is a feature which memorizes MAG, LAYOUT, POSI. and INPUT selections. One picture effect is Stored in one memory position with 9 user memory positions are available. Any possible picture effect need to memorize by [SERVICE] and [ 0 ] buttons, pressing [ 0 ] button to select memory position from [1] to [9]. When to read out the one of this picture effect, in Normal mode, use [MODE] button and number key [1] - [9] to display the effect. OSD appears for 5 seconds to confirm. Multiple Screen Wall system (example) The picture shows 2x2 wall displaying one PC picture by using internal magnification capability. To make this image using the internal signal processor, [MAG] is set to 2x2 and left top panel has a Layout of 1(H) - 1(V) and the right bottom panel layout is 2(H) - 2(V). A small position adjustment sometimes required to line up the picture content. This is one example of s picture that can be saved in User Picture effect Memory (User Memory 1-9). To make this type of picture, you first correctly magnify, layout, and position the image. Then press the [WRITE] button to save the picture effect. When several different pictures are saved into memory, using the User Picture Effect Memory feature, recall each saved effect by pressing [MODE] button. When wireless remote need to use for picture effect, at 1st, make a picture of effect itself as like as above picture for example. [ADJUST] [MAG] [UP] "2" [ENTER] [ENTER] [MAG], this will make 2x2 picture. Select LAYOUT if needed as [LAYOUT] [NUMBER] [UP] # [ENTER] and so on as like as MAG. Adjust position to make picture matched. If small additional MAG needed, then [UP], [RIGHT], [DOWN] and [LEFT] will add small additional sizes while in MAG mode. Push [WRITE] to memorize. After making such picture effect as 2x2, then, this is how to memorize into Picture Effect Memory. [ADJUST] [SERVICE] [NUMBER] "0" [ENTER] by pressing ENTER several times, USER memory position can be obtained as USER1, USER2 or USER3. After selecting the user position to be memorize, use [WRITE] so that this current picture effect is memorized into the selected memory position. To recall magnified effects, use [MODE] and [UP] or [DOWN] key. Magnification and Layout To magnify the image, press [MAG] in Adjust Mode, to change the magnification factor then type H+V magnification numbers as needed such as 1(H) x 1(V), 2x2... It is also possible to select the magnification factor for uneven magnification as 4(H) x 3(V). To make this magnification effective, press [MAG] button again. Once the desired magnification is selected, press [LAYOUT] followed by number keys as [1] (H), [1] (V) to select the portion of the image to be displayed. If the picture will not match at the mullion (frame) area, then [POSI.] will cover the adjustment. Then, to memorize this picture, press [WRITE]. To decide the magnification for x2 (horizontal) and x2 (vertical) press [MAG], [ 2 ], [ 2 ] and [MAG] to change. Additional magnification steps are obtained using the buttons, the + indicates the small magnification RS232C CONTROL 31
-
 1
1 -
2
-
3
-
4
-
5
-
6
-
7
-
8
-
9
-
10
-
11
-
12
-
13
-
14
-
15
-
16
-
17
-
18
-
19
-
20
-
21
-
22
-
23
-
24
-
25
-
 26
26 -
 27
27 -
 28
28 -
 29
29 -
 30
30 -
 31
31 -
 32
32 -
 33
33 -
 34
34 -
 35
35 -
 36
36 -
37
-
38
-
39
-
40
-
41
-
42
-
43
-
44
-
45
-
46
 |
 |