Toshiba Satellite A210 Maintenance Manual - Page 174
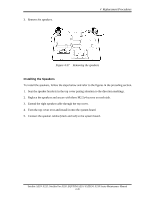
Installing the Touch Pad, Replacement Procedures,
 |
View all Toshiba Satellite A210 manuals
Add to My Manuals
Save this manual to your list of manuals |
Page 174 highlights
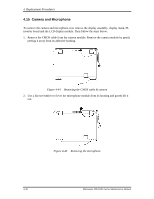
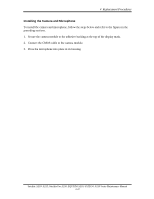
4 Replacement Procedures 3. Remove the Touch Pad bracket by sliding it away from you and lifting it gently. Figure 4-50 Removing the touch pad bracket 4. Remove the Touch Pad by lifting it gently. Figure 4-51 Removing the touch pad Installing the Touch Pad To install the Touch Pad, follow the steps below and refer to the figures in the preceding section: 1. Turn the top cover upside down and place the Touch Pad in position. 2. Place the Touch Pad Bracket in position on top, sliding it down into place. 3. Secure the Touch Pad bracket with one M2.5x4 screw. Satellite A210/ A215, Satellite Pro A210, EQUIUM A210, SATEGO A210 Series Maintenance Manual 4-45
-
 1
1 -
2
-
3
-
4
-
5
-
6
-
7
-
8
-
9
-
10
-
11
-
12
-
13
-
14
-
15
-
16
-
17
-
18
-
19
-
20
-
21
-
22
-
23
-
24
-
25
-
26
-
27
-
28
-
29
-
30
-
31
-
32
-
33
-
34
-
35
-
36
-
37
-
38
-
39
-
40
-
41
-
42
-
43
-
44
-
45
-
46
-
47
-
48
-
49
-
50
-
51
-
52
-
53
-
54
-
55
-
56
-
57
-
58
-
59
-
60
-
61
-
62
-
63
-
64
-
65
-
66
-
67
-
68
-
69
-
70
-
71
-
72
-
73
-
74
-
75
-
76
-
77
-
78
-
79
-
80
-
81
-
82
-
83
-
84
-
85
-
86
-
87
-
88
-
89
-
90
-
91
-
92
-
93
-
94
-
95
-
96
-
97
-
98
-
99
-
100
-
101
-
102
-
103
-
104
-
105
-
106
-
107
-
108
-
109
-
110
-
111
-
112
-
113
-
114
-
115
-
116
-
117
-
118
-
119
-
120
-
121
-
122
-
123
-
124
-
125
-
126
-
127
-
128
-
129
-
130
-
131
-
132
-
133
-
134
-
135
-
136
-
137
-
138
-
139
-
140
-
141
-
142
-
143
-
144
-
145
-
146
-
147
-
148
-
149
-
150
-
151
-
152
-
153
-
154
-
155
-
156
-
157
-
158
-
159
-
160
-
161
-
162
-
163
-
164
-
165
-
166
-
167
-
168
-
 169
169 -
 170
170 -
 171
171 -
 172
172 -
 173
173 -
 174
174 -
 175
175 -
 176
176 -
 177
177 -
 178
178 -
 179
179 -
180
-
181
-
182
-
183
-
184
-
185
-
186
-
187
-
188
-
189
-
190
-
191
-
192
-
193
-
194
-
195
-
196
-
197
-
198
-
199
-
200
-
201
-
202
-
203
-
204
-
205
-
206
-
207
-
208
-
209
-
210
-
211
-
212
-
213
-
214
-
215
-
216
-
217
-
218
-
219
-
220
-
221
-
222
-
223
-
224
-
225
-
226
-
227
-
228
-
229
-
230
-
231
-
232
-
233
-
234
-
235
-
236
-
237
-
238
-
239
-
240
-
241
-
242
-
243
-
244
-
245
-
246
-
247
-
248
-
249
-
250
-
251
-
252
-
253
 |
 |
4
Replacement Procedures
Satellite A210/ A215, Satellite Pro A210, EQUIUM A210, SATEGO A210 Series Maintenance Manual
4-45
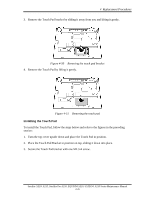
3.
Remove the Touch Pad bracket by sliding it away from you and lifting it gently.
Figure 4-50
Removing the touch pad bracket
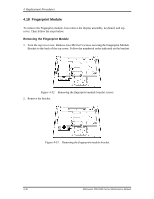
4.
Remove the Touch Pad by lifting it gently.
Figure 4-51
Removing the touch pad
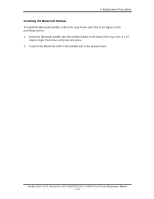
Installing the Touch Pad
To install the Touch Pad, follow the steps below and refer to the figures in the preceding
section:
1.
Turn the top cover upside down and place the Touch Pad in position.
2.
Place the Touch Pad Bracket in position on top, sliding it down into place.
3.
Secure the Touch Pad bracket with one M2.5x4 screw.