Toshiba Satellite A350 PSAL6C Users Manual Canada; English - Page 117
Modem, 1 Mode Login screen
 |
View all Toshiba Satellite A350 PSAL6C manuals
Add to My Manuals
Save this manual to your list of manuals |
Page 117 highlights
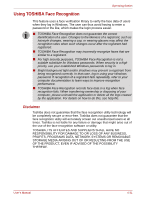
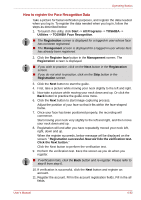
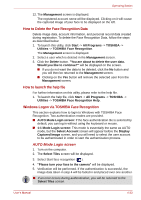
Operating Basics 6. Windows Welcome screen will be displayed, and will be logged in automatically to Windows. 1:1 Mode Login screen 1. Turn on the computer. 2. The Select Tiles screen will be displayed. 3. Select Start face recognition ( ). 4. The Select Account screen will be displayed. 5. Select the account, and click the Arrow button. 6. "Please turn your face to the camera" will be displayed. 7. Verification will be performed. If the authentication is successful, the image data taken in step 6 will be faded in and placed over one another. ■ If an error occurs during authentication, you will be returned to the Select Tiles screen. 8. Windows Welcome screen will be displayed, and will be logged in automatically to Windows. ■ If authentication was successful, but an authentication error subsequently occurred during the login to Windows, you will be asked to provide your account information. Modem This section describes how to connect and disconnect the internal modem to and from a telephone jack. ■ Connection to any communication line other than an analog phone line could cause a computer system failure. ■ Connect the built-in modem only to ordinary analog phone lines. ■ Never connect the built-in modem to a digital line (ISDN). ■ Never connect the built-in modem to the digital connector on a public telephone or to a digital private branch exchange (PBX). ■ Never connect the built-in modem to a key telephone system for residences or offices. ■ Avoid using your computer modem with the telephone cable connected during an electrical storm. There may be a remote risk of electric shock from lightning. ■ Modem functions cannot be used in models which are not equipped with a modem. ■ This information is applicable to the models equipped with a built-in modem. ■ Some models are equipped with a modem jack or FM antenna port. User's Manual 4-34
-
 1
1 -
2
-
3
-
4
-
5
-
6
-
7
-
8
-
9
-
10
-
11
-
12
-
13
-
14
-
15
-
16
-
17
-
18
-
19
-
20
-
21
-
22
-
23
-
24
-
25
-
26
-
27
-
28
-
29
-
30
-
31
-
32
-
33
-
34
-
35
-
36
-
37
-
38
-
39
-
40
-
41
-
42
-
43
-
44
-
45
-
46
-
47
-
48
-
49
-
50
-
51
-
52
-
53
-
54
-
55
-
56
-
57
-
58
-
59
-
60
-
61
-
62
-
63
-
64
-
65
-
66
-
67
-
68
-
69
-
70
-
71
-
72
-
73
-
74
-
75
-
76
-
77
-
78
-
79
-
80
-
81
-
82
-
83
-
84
-
85
-
86
-
87
-
88
-
89
-
90
-
91
-
92
-
93
-
94
-
95
-
96
-
97
-
98
-
99
-
100
-
101
-
102
-
103
-
104
-
105
-
106
-
107
-
108
-
109
-
110
-
111
-
 112
112 -
 113
113 -
 114
114 -
 115
115 -
 116
116 -
 117
117 -
 118
118 -
 119
119 -
 120
120 -
 121
121 -
 122
122 -
123
-
124
-
125
-
126
-
127
-
128
-
129
-
130
-
131
-
132
-
133
-
134
-
135
-
136
-
137
-
138
-
139
-
140
-
141
-
142
-
143
-
144
-
145
-
146
-
147
-
148
-
149
-
150
-
151
-
152
-
153
-
154
-
155
-
156
-
157
-
158
-
159
-
160
-
161
-
162
-
163
-
164
-
165
-
166
-
167
-
168
-
169
-
170
-
171
-
172
-
173
-
174
-
175
-
176
-
177
-
178
-
179
-
180
-
181
-
182
-
183
-
184
-
185
-
186
-
187
-
188
-
189
-
190
-
191
-
192
-
193
-
194
-
195
-
196
-
197
-
198
-
199
-
200
-
201
-
202
-
203
-
204
-
205
-
206
-
207
-
208
-
209
-
210
-
211
-
212
-
213
-
214
-
215
-
216
-
217
-
218
-
219
-
220
-
221
-
222
-
223
-
224
-
225
-
226
-
227
-
228
-
229
-
230
-
231
-
232
-
233
-
234
-
235
-
236
-
237
-
238
-
239
 |
 |