Toshiba Satellite L300 Maintenance Manual - Page 53
Keyboard
 |
View all Toshiba Satellite L300 manuals
Add to My Manuals
Save this manual to your list of manuals |
Page 53 highlights
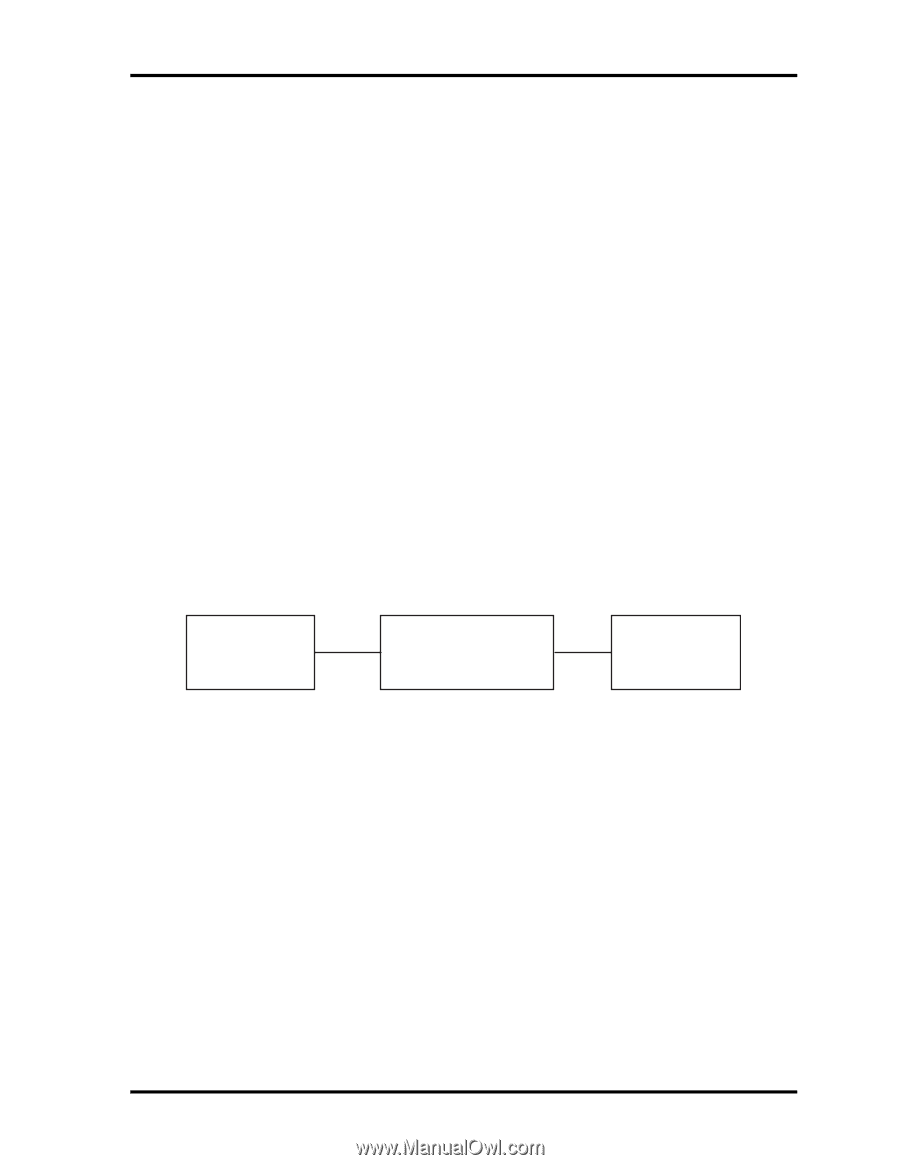
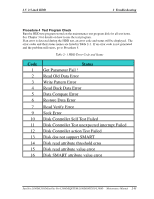
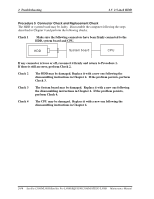
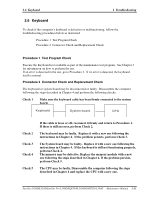
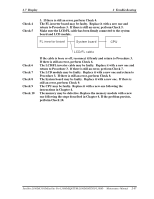
2.6 Keyboard 2 Troubleshooting 2.6 Keyboard To check if the computer's keyboard is defective or malfunctioning, follow the troubleshooting procedures below as instructed. Procedure 1 Test Program Check Procedure 2 Connector Check and Replacement Check Procedure 1 Test Program Check Execute the Keyboard test available as part of the maintenance test program. See Chapter 3 for information on how to perform the test. If an error is detected in the test, go to Procedure 2. If no error is detected, the keyboard itself is normal. Procedure 2 Connector Check and Replacement Check The keyboard or system board may be disconnected or faulty. Disassemble the computer following the steps described in Chapter 4 and perform the following checks: Check 1 Make sure the keyboard cable has been firmly connected to the system board. Keyboard System board CPU Check 2 Check 3 Check 4 Check 5 If the cable is loose or off, reconnect it firmly and return to Procedure 1. If there is still an error, perform Check 2. The keyboard may be faulty. Replace it with a new one following the instructions in Chapter 4. If the problem persists, perform Check 3. The System board may be faulty. Replace it with a new one following the instructions in Chapter 4. If the keyboard is still not functioning properly, perform Check 4. The memory may be defective. Replace the memory module with a new one following the steps described in Chapter 4. If the problem persists, perform Check 5. The CPU may be faulty. Disassemble the computer following the steps described in Chapter 4 and replace the CPU with a new one. Satellite L300D/L305D/Satellite Pro L300D/EQUIUM L300D/SATEGO L300D Maintenance Manual 2-15
-
 1
1 -
2
-
3
-
4
-
5
-
6
-
7
-
8
-
9
-
10
-
11
-
12
-
13
-
14
-
15
-
16
-
17
-
18
-
19
-
20
-
21
-
22
-
23
-
24
-
25
-
26
-
27
-
28
-
29
-
30
-
31
-
32
-
33
-
34
-
35
-
36
-
37
-
38
-
39
-
40
-
41
-
42
-
43
-
44
-
45
-
46
-
47
-
 48
48 -
 49
49 -
 50
50 -
 51
51 -
 52
52 -
 53
53 -
 54
54 -
 55
55 -
 56
56 -
 57
57 -
 58
58 -
59
-
60
-
61
-
62
-
63
-
64
-
65
-
66
-
67
-
68
-
69
-
70
-
71
-
72
-
73
-
74
-
75
-
76
-
77
-
78
-
79
-
80
-
81
-
82
-
83
-
84
-
85
-
86
-
87
-
88
-
89
-
90
-
91
-
92
-
93
-
94
-
95
-
96
-
97
-
98
-
99
-
100
-
101
-
102
-
103
-
104
-
105
-
106
-
107
-
108
-
109
-
110
-
111
-
112
-
113
-
114
-
115
-
116
-
117
-
118
-
119
-
120
-
121
-
122
-
123
-
124
-
125
-
126
-
127
-
128
-
129
-
130
-
131
-
132
-
133
-
134
-
135
-
136
-
137
-
138
-
139
-
140
-
141
-
142
-
143
-
144
-
145
-
146
-
147
-
148
-
149
-
150
-
151
-
152
-
153
-
154
-
155
-
156
-
157
-
158
-
159
-
160
-
161
-
162
-
163
-
164
-
165
-
166
-
167
-
168
-
169
-
170
-
171
-
172
-
173
-
174
-
175
-
176
-
177
-
178
-
179
-
180
-
181
-
182
-
183
-
184
-
185
-
186
-
187
-
188
-
189
-
190
-
191
-
192
-
193
-
194
-
195
-
196
-
197
-
198
-
199
-
200
-
201
-
202
-
203
-
204
-
205
-
206
-
207
-
208
-
209
-
210
-
211
-
212
-
213
-
214
-
215
-
216
-
217
-
218
-
219
-
220
-
221
-
222
-
223
-
224
-
225
-
226
-
227
-
228
-
229
-
230
-
231
-
232
-
233
-
234
-
235
-
236
-
237
-
238
-
239
-
240
-
241
-
242
-
243
-
244
 |
 |