Toshiba Satellite T135-S1300 Satellite T130/T110 (PST3AU, PST1AU) User's Guide - Page 183
Cannot use the USB Sleep and Charge function., The USB Wakeup function does not work.
 |
View all Toshiba Satellite T135-S1300 manuals
Add to My Manuals
Save this manual to your list of manuals |
Page 183 highlights
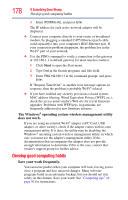
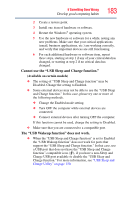
If Something Goes Wrong Develop good computing habits 183 2 Create a restore point. 3 Install one item of hardware or software. 4 Restart the Windows® operating system. 5 Use the new hardware or software for a while, noting any new problems. Make sure that your critical applications (email, business applications, etc.) are working correctly, and verify that important devices are still functioning. 6 For each additional hardware or software item, repeat these steps, starting at step 1 if any of your critical data has changed, or starting at step 2 if no critical data has changed. Cannot use the "USB Sleep and Charge function." (Available on certain models) ❖ The setting of "USB Sleep and Charge function" may be Disabled. Change the setting to Enabled. ❖ Some external devices may not be able to use the "USB Sleep and Charge function." In this case, please try one or more of the following methods. ❖ Change the Enabled mode setting. ❖ Turn OFF the computer while external devices are connected. ❖ Connect external devices after turning OFF the computer. If this function cannot be used, change the setting to Disabled. ❖ Make sure that you are connected to a compatible port. The "USB Wakeup function" does not work. ❖ When the "USB Sleep and Charge function" is set to Enabled the "USB Wakeup function" does not work for ports that support the "USB Sleep and Charge function." In that case, use a USB port that does not have the "USB Sleep and Charge function"-compatible icon ( ), if you have a non-Sleep and Charge USB port available or disable the "USB Sleep and Charge function." For more information, see "USB Sleep and Charge Utility" on page 150.
-
 1
1 -
2
-
3
-
4
-
5
-
6
-
7
-
8
-
9
-
10
-
11
-
12
-
13
-
14
-
15
-
16
-
17
-
18
-
19
-
20
-
21
-
22
-
23
-
24
-
25
-
26
-
27
-
28
-
29
-
30
-
31
-
32
-
33
-
34
-
35
-
36
-
37
-
38
-
39
-
40
-
41
-
42
-
43
-
44
-
45
-
46
-
47
-
48
-
49
-
50
-
51
-
52
-
53
-
54
-
55
-
56
-
57
-
58
-
59
-
60
-
61
-
62
-
63
-
64
-
65
-
66
-
67
-
68
-
69
-
70
-
71
-
72
-
73
-
74
-
75
-
76
-
77
-
78
-
79
-
80
-
81
-
82
-
83
-
84
-
85
-
86
-
87
-
88
-
89
-
90
-
91
-
92
-
93
-
94
-
95
-
96
-
97
-
98
-
99
-
100
-
101
-
102
-
103
-
104
-
105
-
106
-
107
-
108
-
109
-
110
-
111
-
112
-
113
-
114
-
115
-
116
-
117
-
118
-
119
-
120
-
121
-
122
-
123
-
124
-
125
-
126
-
127
-
128
-
129
-
130
-
131
-
132
-
133
-
134
-
135
-
136
-
137
-
138
-
139
-
140
-
141
-
142
-
143
-
144
-
145
-
146
-
147
-
148
-
149
-
150
-
151
-
152
-
153
-
154
-
155
-
156
-
157
-
158
-
159
-
160
-
161
-
162
-
163
-
164
-
165
-
166
-
167
-
168
-
169
-
170
-
171
-
172
-
173
-
174
-
175
-
176
-
177
-
 178
178 -
 179
179 -
 180
180 -
 181
181 -
 182
182 -
 183
183 -
 184
184 -
 185
185 -
 186
186 -
 187
187 -
 188
188 -
189
-
190
-
191
-
192
-
193
-
194
-
195
-
196
-
197
-
198
-
199
-
200
-
201
-
202
-
203
-
204
-
205
-
206
-
207
-
208
-
209
-
210
-
211
-
212
-
213
-
214
-
215
-
216
-
217
-
218
-
219
-
220
-
221
-
222
-
223
 |
 |