Toshiba Tecra A10-SP5801 Tecra A10 User Guide - Page 61
Hard Drive Recovery Utilities
 |
View all Toshiba Tecra A10-SP5801 manuals
Add to My Manuals
Save this manual to your list of manuals |
Page 61 highlights
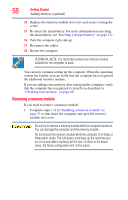
Getting Started Hard Drive Recovery Utilities 61 If the computer does not recognize the memory configuration, turn off the computer and remove the memory module slot cover (complete steps 1-8 in "Installing a memory module" on page 53), and then check that the module is inserted completely into the socket and lined up squarely with the socket latches. NOTE From time to time, Windows® will display a pop-up that says, "Windows® needs your permission to continue." This is a security feature to prevent programs or people from doing things on your computer without your permission. If you were trying to perform the action, click Continue; otherwise, click Cancel. If unsure, cancel and try again. Hard Drive Recovery Utilities Your computer has been configured with a hard disk partition to allow you to recover your hard disk drive or reinstall selected applications and software features or utilities. NOTE ❖ During the HDD Recovery Process it is strongly recommended that your computer be connected to an external power source via the AC Adaptor. ❖ It is also strongly recommended that you create recovery DVDs before using your system. For more information on creating Recovery media see "Creating Recovery DVDs" on page 62. Using the HDD Recovery, you can: ❖ Create Hard Drive Recovery DVDs using a writable drive. ❖ Recover your hard disk drive to the factory-set default. ❖ Recover just your C: drive, leaving any other partitions you may have created intact, for example, a D: drive. ❖ Recover your hard disk drive to the factory-set default without the HDD Recovery partition. ❖ Reinstall drivers and applications which were bundled with your computer.
-
 1
1 -
2
-
3
-
4
-
5
-
6
-
7
-
8
-
9
-
10
-
11
-
12
-
13
-
14
-
15
-
16
-
17
-
18
-
19
-
20
-
21
-
22
-
23
-
24
-
25
-
26
-
27
-
28
-
29
-
30
-
31
-
32
-
33
-
34
-
35
-
36
-
37
-
38
-
39
-
40
-
41
-
42
-
43
-
44
-
45
-
46
-
47
-
48
-
49
-
50
-
51
-
52
-
53
-
54
-
55
-
 56
56 -
 57
57 -
 58
58 -
 59
59 -
 60
60 -
 61
61 -
 62
62 -
 63
63 -
 64
64 -
 65
65 -
 66
66 -
67
-
68
-
69
-
70
-
71
-
72
-
73
-
74
-
75
-
76
-
77
-
78
-
79
-
80
-
81
-
82
-
83
-
84
-
85
-
86
-
87
-
88
-
89
-
90
-
91
-
92
-
93
-
94
-
95
-
96
-
97
-
98
-
99
-
100
-
101
-
102
-
103
-
104
-
105
-
106
-
107
-
108
-
109
-
110
-
111
-
112
-
113
-
114
-
115
-
116
-
117
-
118
-
119
-
120
-
121
-
122
-
123
-
124
-
125
-
126
-
127
-
128
-
129
-
130
-
131
-
132
-
133
-
134
-
135
-
136
-
137
-
138
-
139
-
140
-
141
-
142
-
143
-
144
-
145
-
146
-
147
-
148
-
149
-
150
-
151
-
152
-
153
-
154
-
155
-
156
-
157
-
158
-
159
-
160
-
161
-
162
-
163
-
164
-
165
-
166
-
167
-
168
-
169
-
170
-
171
-
172
-
173
-
174
-
175
-
176
-
177
-
178
-
179
-
180
-
181
-
182
-
183
-
184
-
185
-
186
-
187
-
188
-
189
-
190
-
191
-
192
-
193
-
194
-
195
-
196
-
197
-
198
-
199
-
200
-
201
-
202
-
203
-
204
-
205
-
206
-
207
-
208
-
209
-
210
-
211
-
212
-
213
-
214
-
215
-
216
-
217
-
218
-
219
-
220
-
221
-
222
-
223
-
224
-
225
-
226
-
227
-
228
-
229
-
230
-
231
-
232
-
233
-
234
-
235
-
236
-
237
-
238
-
239
-
240
-
241
-
242
-
243
-
244
-
245
-
246
-
247
-
248
-
249
-
250
-
251
-
252
 |
 |