Toshiba Tecra A50-C PS57BC-01X006 Users Manual Canada; English - Page 58
Windows special keys, Optical disc drive, Formats, Using the optical disc drive
 |
View all Toshiba Tecra A50-C PS57BC-01X006 manuals
Add to My Manuals
Save this manual to your list of manuals |
Page 58 highlights
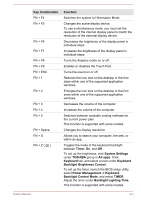
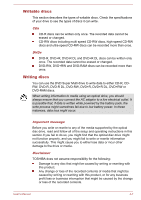
Some functions show the toast notification at the edges of the screen. Those toast notifications are enabled by default. You can disable them in the Function Key settings. To access it, click System Settings -> Function Key under TOSHIBA group in All apps. Windows special keys The keyboard provides two keys that have special functions in Windows, the Windows® logo key activates the Start menu while the application key has the same function as the secondary (right) mouse button. This key activates the Windows Start menu. This key has the same function as the secondary (right) mouse button. Optical disc drive Some models will be installed with a DVD Super Multi drive. Formats The drive supports the following formats: CD-ROM, DVD-ROM, DVDVideo, CD-DA, CD-Text, Photo CD™ (single/multi-session), CD-ROM Mode 1/Mode 2, CD-ROM XA Mode 2 (Form1, Form2), Enhanced CD (CDEXTRA), Addressing Method 2, DVD-R, DVD-RW, DVD+R, DVD+RW, DVD-RAM, DVD-R DL (Format1), DVD+R DL. Some types and formats of DVD-R DL and DVD+R DL discs might be unreadable. Using the optical disc drive The full-size drive provides high-performance execution of disc based programs. You can run either 12 cm (4.72") or 8 cm (3.15") discs without an adaptor. For precautions on writing to discs, refer to the Writing discs section. To load discs, do the following: 1. When the computer's power is on, press the eject button to open the disc tray slightly. User's Manual 4-4
-
 1
1 -
2
-
3
-
4
-
5
-
6
-
7
-
8
-
9
-
10
-
11
-
12
-
13
-
14
-
15
-
16
-
17
-
18
-
19
-
20
-
21
-
22
-
23
-
24
-
25
-
26
-
27
-
28
-
29
-
30
-
31
-
32
-
33
-
34
-
35
-
36
-
37
-
38
-
39
-
40
-
41
-
42
-
43
-
44
-
45
-
46
-
47
-
48
-
49
-
50
-
51
-
52
-
 53
53 -
 54
54 -
 55
55 -
 56
56 -
 57
57 -
 58
58 -
 59
59 -
 60
60 -
 61
61 -
 62
62 -
 63
63 -
64
-
65
-
66
-
67
-
68
-
69
-
70
-
71
-
72
-
73
-
74
-
75
-
76
-
77
-
78
-
79
-
80
-
81
-
82
-
83
-
84
-
85
-
86
-
87
-
88
-
89
-
90
-
91
-
92
-
93
-
94
-
95
-
96
-
97
-
98
-
99
-
100
-
101
-
102
-
103
-
104
-
105
-
106
-
107
-
108
-
109
-
110
-
111
-
112
-
113
-
114
-
115
-
116
-
117
-
118
-
119
-
120
-
121
-
122
-
123
-
124
-
125
-
126
-
127
-
128
-
129
-
130
-
131
-
132
-
133
-
134
-
135
-
136
-
137
-
138
-
139
-
140
-
141
-
142
-
143
-
144
-
145
-
146
-
147
-
148
-
149
-
150
-
151
-
152
-
153
-
154
-
155
-
156
-
157
 |
 |