Tripp Lite SU1500RTXL2UA Owner's Manual for SmartOnline Rack/Tower UPS 932471 - Page 5
Optional Connections - battery
 |
View all Tripp Lite SU1500RTXL2UA manuals
Add to My Manuals
Save this manual to your list of manuals |
Page 5 highlights
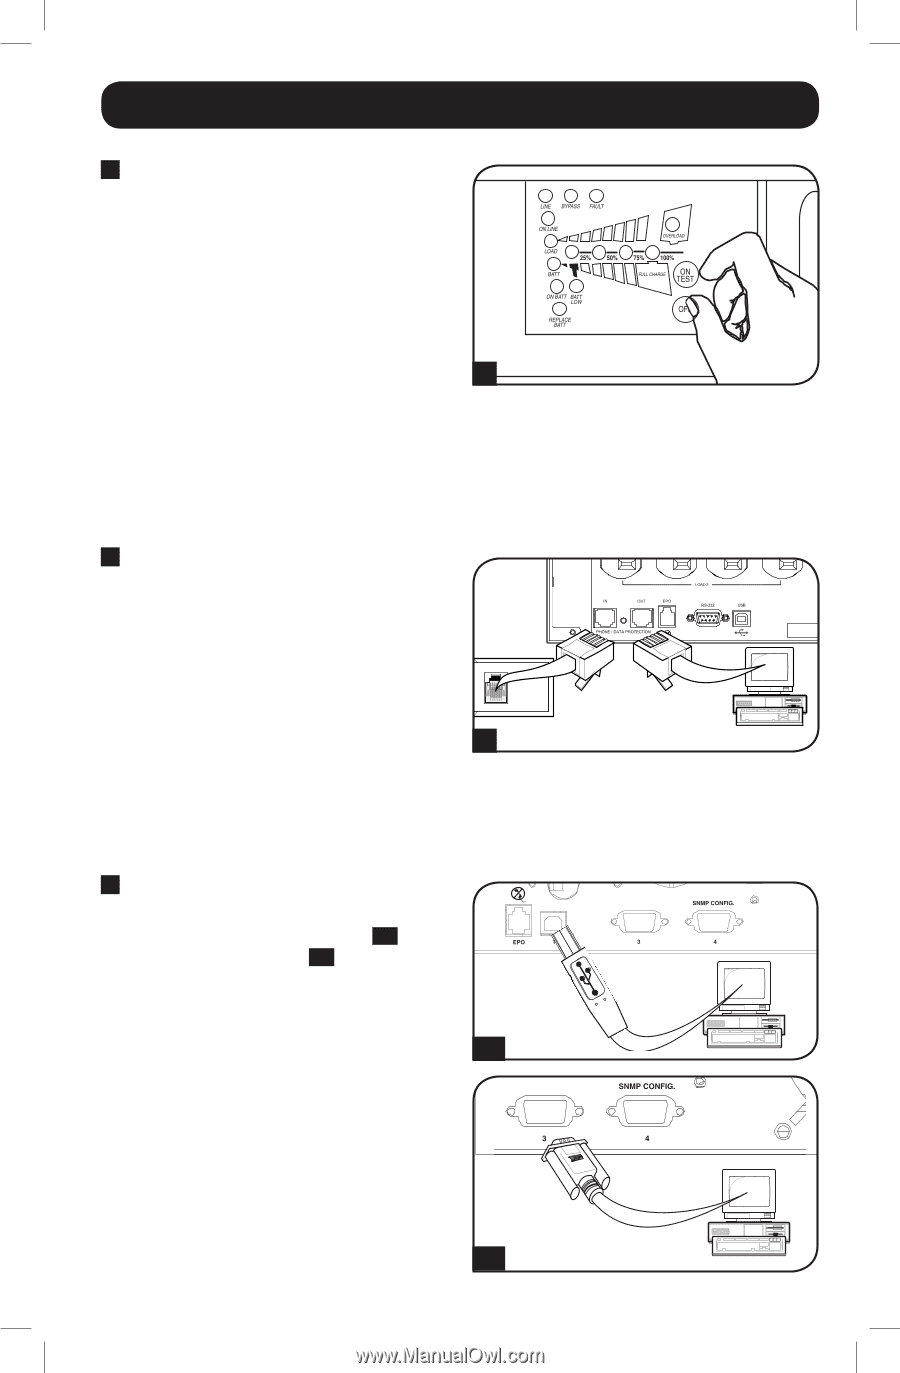
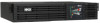
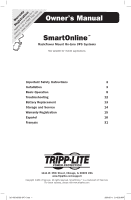
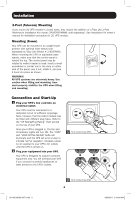
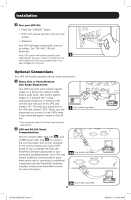
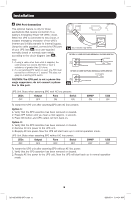
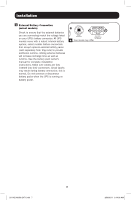
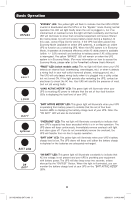
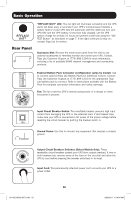
Installation 3 Turn your UPS ON: • Press the "ON/TEST" Button • Hold it for several seconds until you hear a beep • Release it Your UPS will begin providing AC power to its outlets. The "ON LINE" LED will illuminate. Note: UPS system will function properly upon 3 initial startup; however, maximum runtime for the unit's battery will only be accessible after it has been charged for 24 hours. Optional Connections Your UPS will function properly without these connections. 1 Phone Line or Phone/Network Line Surge Suppression Your UPS has jacks which protect against surges on a phone line. Select models feature jacks which also protect against surges on a network line.* Using appropriate telephone or network cords connect your wall jack to the UPS jack marked "IN." Connect your equipment to the UPS jack marked "OUT." Make sure the equipment you connect to the UPS's jacks is also protected against surges on the AC line. * Not compatible with PoE (Power Over Ethernet) applications. 2 USB and RS-232 Serial Communications Use the included USB cable (see 2a ) and/ or DB9 serial cable (see 2b ) to connect the communication port of your computer to the communication port of your UPS. Install on your computer the Tripp Lite PowerAlert Software appropriate to your computer's operating system. Your UPS may feature additional communications ports; these ports may be connected to additional computers that have PowerAlert Software installed. Consult your PowerAlert manual for more information. 1 Your model may differ. 2a Your model may differ. 201102199 93-2471.indb 5 2b Your model may differ. 5 3/30/2011 9:14:01 AM
-
 1
1 -
 2
2 -
 3
3 -
 4
4 -
 5
5 -
 6
6 -
 7
7 -
 8
8 -
 9
9 -
 10
10 -
 11
11 -
12
-
13
-
14
-
15
-
16
-
17
-
18
-
19
-
20
-
21
-
22
-
23
-
24
-
25
-
26
-
27
-
28
-
29
-
30
-
31
-
32
-
33
-
34
-
35
-
36
-
37
-
38
-
39
-
40
-
41
-
42
-
43
-
44
-
45
-
46
-
47
-
48
 |
 |