Tripp Lite SV20KM1P1B Owners Manual for WEBCARDLX English - Page 2
Features, Overview
 |
View all Tripp Lite SV20KM1P1B manuals
Add to My Manuals
Save this manual to your list of manuals |
Page 2 highlights
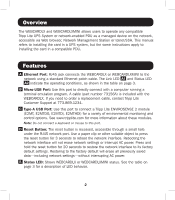
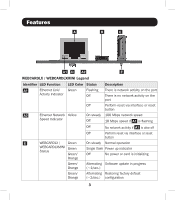
Overview The WEBCARDLX and WEBCARDLXMINI allows users to operate any compatible Tripp Lite UPS System or network-enabled PDU as a managed device on the network, accessible via Web browser, Network Management Station or telnet/SSH. This manual refers to installing the card in a UPS system, but the same instructions apply to installing the card in a compatible PDU. Features A Ethernet Port: RJ45 jack connects the WEBCARDLX or WEBCARDLXMINI to the network using a standard Ethernet patch cable. The Link LED A1 and Status LED A2 indicate the operating conditions, as shown in the table on page 3. B Micro-USB Port: Use this port to directly connect with a computer running a terminal emulation program. A cable (part number 73156A) is included with the WEBCARDLX. If you need to order a replacement cable, contact Tripp Lite Customer Support at 773.869.1234. C Type-A USB Port: Use this port to connect a Tripp Lite ENVIROSENSE 2 module (E2MT, E2MTDO, E2MTDI, E2MTHDI) for a variety of environmental monitoring and control options. See www.tripplite.com for more information about these modules. Note: Do not connect a keyboard or mouse to this port. D Reset Button: The reset button is recessed, accessible through a small hole under the RJ45 network port. Use a paper clip or other suitable object to press the reset button for 3 seconds to reboot the network interface. Rebooting the network interface will not erase network settings or interrupt AC power. Press and hold the reset button for 20 seconds to restore the network interface to its factory default settings. Restoring to the factory default will erase all previously saved data-including network settings-without interrupting AC power. E Status LED: Shows WEBCARDLX or WEBCARDLXMINI status. See the table on page 3 for a description of LED behavior. 2
-
 1
1 -
 2
2 -
 3
3 -
 4
4 -
 5
5 -
 6
6 -
 7
7 -
 8
8
 |
 |
