Troy-Bilt TB625 Operation Manual - Page 14
Checking The Oil Level
 |
View all Troy-Bilt TB625 manuals
Add to My Manuals
Save this manual to your list of manuals |
Page 14 highlights
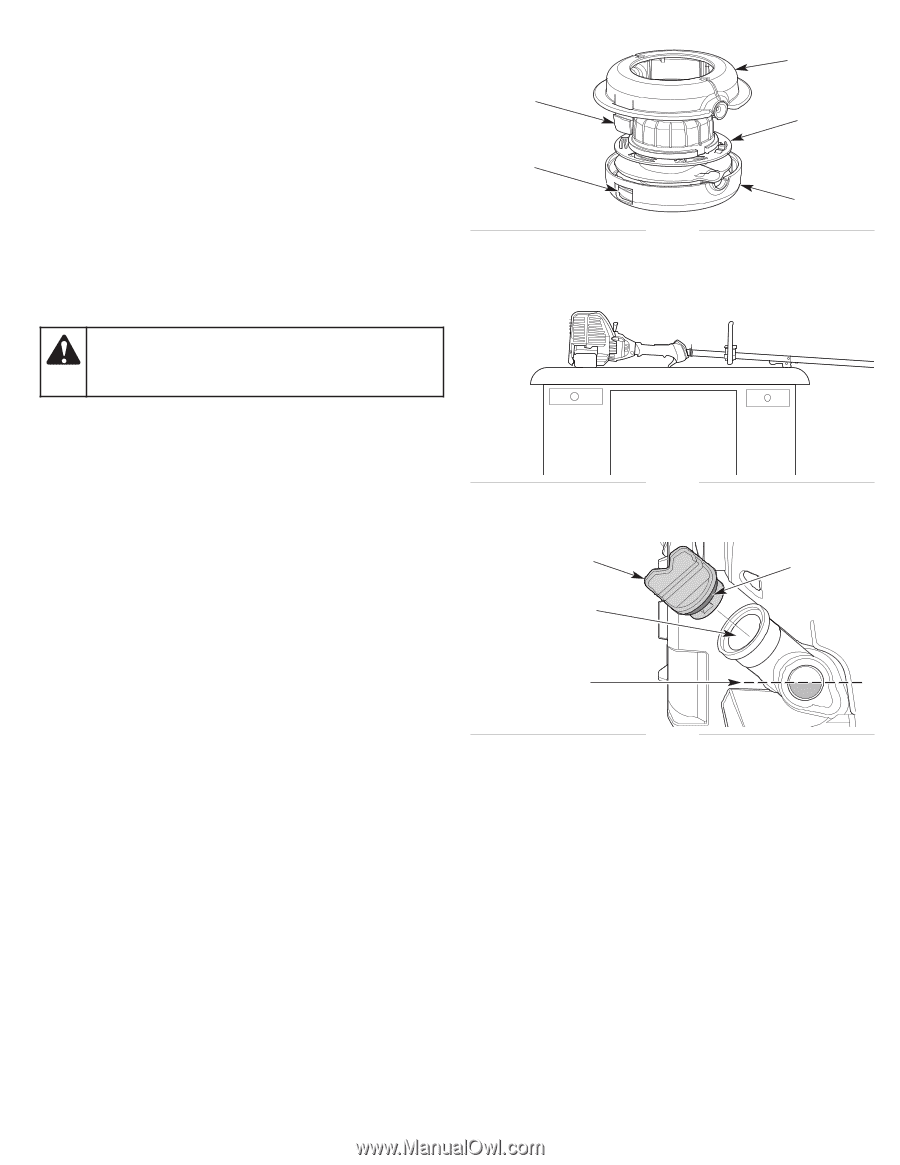
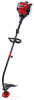
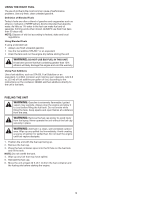
Removing Old Trimming Line and Obstructions If necessary, remove any old trimming line and/or obstructions from the cutting head. 1. Firmly press in the tabs on the cutting head (Fig. 19). 2. Remove the spool cover (Fig. 19). 3. Remove any old trimming line and/or obstructions. 4. Use a clean cloth to clean the inner reel, outer spool and spool cover (Fig. 19). 5. Align the tabs on the spool cover with the holes on the outer spool (Fig. 19). Push the spool cover onto the outer spool until the tabs securely snap into the holes. CHECKING THE OIL LEVEL WARNING: OVERFILLING THE CRANKCASE MAY CAUSE SERIOUS PERSONAL INJURY. Check the oil level before each use. The importance of maintaining the proper oil level cannot be overemphasized. Inspecting the Oil Level Window 1. Stop the engine and allow it to cool. 2. Set the unit on a flat, level surface, such as a workbench or table. The cutting head shield should hang over the edge so that the engine is level (Fig. 20). NOTE: Failure to keep the engine level may cause the oil to overfill. 3. Look into the oil level window; use a flashlight if necessary. The oil level should fill the window approximately halfway (Fig. 21). If the oil level is too low, add oil. Refer to Adding Oil. Adding Oil 1. Clean the area around the oil fill plug (Fig. 21) to prevent debris from entering the oil fill hole. 2. Unscrew the oil fill plug. 3. Add oil to the oil fill hole until the oil level is approximately halfway up the oil level window (Fig. 21). NOTE: DO NOT overfill the crankcase. 4. Wipe up any oil that may have spilled. 5. Reinstall the oil fill plug. NOTE: Make sure the O-ring is in place on the oil fill plug (Fig. 21). Tab Hole Fig. 19 Fig. 20 Oil Fill Plug Oil Fill Hole Maximum Oil Level Fig. 21 Spool Cover Inner Reel Outer Spool O-Ring 14
-
 1
1 -
2
-
3
-
4
-
5
-
6
-
7
-
8
-
 9
9 -
 10
10 -
 11
11 -
 12
12 -
 13
13 -
 14
14 -
 15
15 -
 16
16 -
 17
17 -
 18
18 -
 19
19 -
20
-
21
-
22
-
23
-
24
-
25
-
26
-
27
-
28
-
29
-
30
-
31
-
32
-
33
-
34
-
35
-
36
-
37
-
38
-
39
-
40
 |
 |