Uniden SOLARA DSC English Owners Manual - Page 11
Installing the SOLARA DSC - wiring
 |
UPC - 050633500712
View all Uniden SOLARA DSC manuals
Add to My Manuals
Save this manual to your list of manuals |
Page 11 highlights
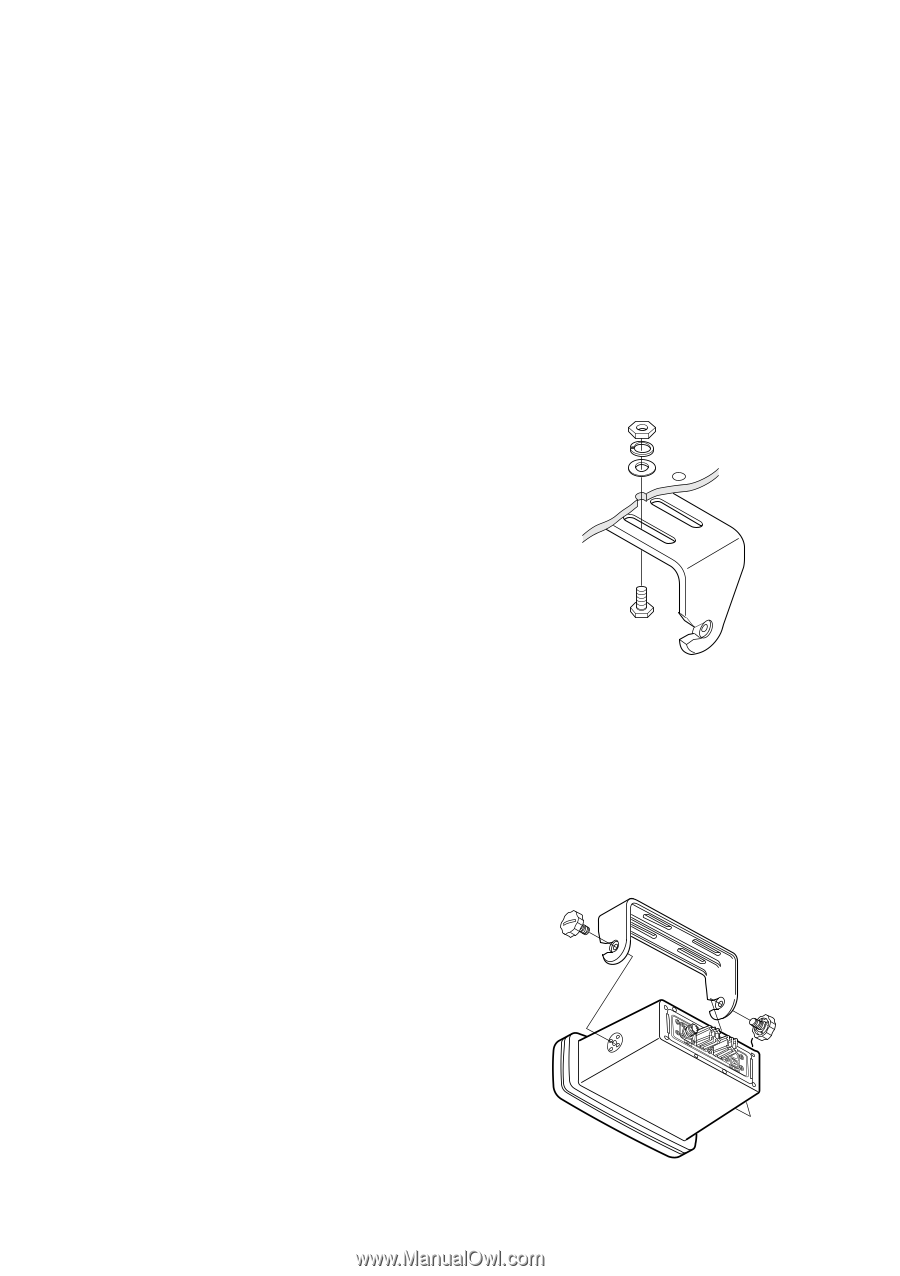
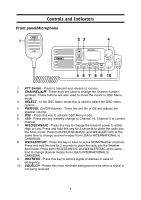
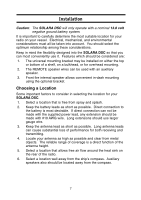
Installing the SOLARA DSC After you have carefully considered the various factors affecting your choice of location, position the radio (with the bracket, microphone, power cord, antenna and any auxiliary cables installed) into the selected location to assure there is no interference with the surrounding items. Mark the location of the mounting bracket. Remove the bracket from the radio and use it as a template to mark the holes to be drilled for the mounting hardware. Drill the holes and mount the bracket with hardware compatible with the material of the mounting surface. Note: This HEXAGON HEAD BOLT is only for mounting the bracket with hardware. Do not use it for installing the radio in the mounting bracket. Connect the red wire of the supplied power cord to the positive (+) battery supply. Connect the black wire of the power cord to the negative (-) battery supply. The power cord is equipped with a fuse to protect the radio. Use only a six (6) ampere fast blow fuse for replacement. Connect the power cord to the keyed connector on the power "pigtail". Connect the antenna and accessories. Install the radio in the mounting bracket and connect all cables and accessories to the appropriate jacks and connectors. Note: Do not use any other mounting knobs than the ones enclosed. Do not insert the knobs without attaching the bracket. 9
-
 1
1 -
2
-
3
-
4
-
5
-
 6
6 -
 7
7 -
 8
8 -
 9
9 -
 10
10 -
 11
11 -
 12
12 -
 13
13 -
 14
14 -
 15
15 -
 16
16 -
17
-
18
-
19
-
20
-
21
-
22
-
23
-
24
-
25
-
26
-
27
-
28
-
29
-
30
-
31
-
32
 |
 |