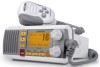
Uniden UM435 Owner s Manual - Page 38
Connecting The Accessory Cable
 |
View all Uniden UM435 manuals
Add to My Manuals
Save this manual to your list of manuals |
Page 38 highlights
CONNECTING THE ACCESSORY CABLE Use the accessory cable to connect the radio to a GPS receiver, a GPS chartplotter, and an external speaker. The wiring diagram below shows the connections for each accessory. ACCESSORY CABLE WIRES Brown: NMEA_OUT(-) Green: NMEA_IN (-) White: NMEA_OUT(+) CONNECTS TO... NMEA Data Input (-) on Chartplotter NMEA Data Output (-) or GND from GPS receiver NMEA Data Input (+) on Chartplotter Yellow: NMEA_IN (+) Orange: N/A NMEA Data Output (+) from GPS receiver Red: External Speaker (+) Bare: Shield/GND Speaker (+) Black: GND/External Speaker (-) Speaker (-)/GND Connecting to a GPS Receiver If you connect the radio to a GPS receiver, the radio can automatically transmit your current position during an automated distress call or during a normal DSC call. Your radio supports a standard NMEA0183 input from a GPS receiver. Follow the steps below to connect your radio to your GPS receiver: 1. Connect the GREEN wire of the included accessory cable to the GPS DATA OUTPUT (-) WIRE or the GROUND WIRE on your GPS receiver. 2. Connect the YELLOW wire of the included accessory cable to the GPS DATA OUTPUT (+) WIRE on your GPS receiver. 3. Be certain all wire connections are secure and that all open wires are adequately covered. ## NOTE: to extend the life of the radio, use waterproof tape to seal electrical connections. 4. Plug the accessory cable into the accessory cable pigtail on the back of your radio. GPS Verification If the GPS receiver is correctly connected and it transmits valid data, the display shows GPS Data OK. Press ENT-1W25W to open the GPS status screen and see detailed GPS data: If the GPS does not send coordinates within 30 minutes, an audible alert sounds once and the display shows Input GPS. This message remains until the coordinates are updated. 30
-
 1
1 -
2
-
3
-
4
-
5
-
6
-
7
-
8
-
9
-
10
-
11
-
12
-
13
-
14
-
15
-
16
-
17
-
18
-
19
-
20
-
21
-
22
-
23
-
24
-
25
-
26
-
27
-
28
-
29
-
30
-
31
-
32
-
 33
33 -
 34
34 -
 35
35 -
 36
36 -
 37
37 -
 38
38 -
 39
39 -
 40
40 -
 41
41 -
 42
42 -
 43
43 -
44
-
45
-
46
-
47
-
48
-
49
-
50
-
51
-
52
-
53
-
54
-
55
-
56
 |
 |
