Vaddio EasyUSB Table MicPOD EasyTalk Solutions Manual - Page 25
Optional Accessories, Rack Mounting Kit, USB 2.0 Extension Kit, EasyMic MicPOD Installation, STEP 1
 |
View all Vaddio EasyUSB Table MicPOD manuals
Add to My Manuals
Save this manual to your list of manuals |
Page 25 highlights
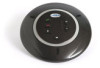
EasyTalk USB Tools Optional Accessories - The EasyUSB Mixer/Amp has two optional accessory kits: Rack Mounting Kit: The rack kit provides a method for the EasyUSB Mixer/Amp to be installed in a 1RU space within a rack. The Rack Kit includes two rack ears (one long and one short). The rack ears are mounted on the sides of the EasyUSB Mixer/Amp using the existing screws included on the device. USB 2.0 Extension Kit: An optional USB Extension Kit extends the USB 2.0 connection between the EasyUSB Mixer/Amp and the PC up to 65 feet. EasyMic MicPOD Installation: STEP 1: Pick up EasyMic MicPOD and flip it to the bottom side. STEP 2: Plug in RJ-45 cable originating from EasyUSB Mixer/Amp. STEP 3: Align RJ-45 cable into cable tray for exiting out enclosure and place unit back on table. Diagram: EasyMic MicPOD Installation Diagram (bottom view) Tuck Cable into Channel and under Tabs CAT-5e Cable Vaddio EasyTalk USB Solution - Document Number 342-0449 Rev B Page 25 of 48
-
 1
1 -
2
-
3
-
4
-
5
-
6
-
7
-
8
-
9
-
10
-
11
-
12
-
13
-
14
-
15
-
16
-
17
-
18
-
19
-
 20
20 -
 21
21 -
 22
22 -
 23
23 -
 24
24 -
 25
25 -
 26
26 -
 27
27 -
 28
28 -
 29
29 -
 30
30 -
31
-
32
-
33
-
34
-
35
-
36
-
37
-
38
-
39
-
40
-
41
-
42
-
43
-
44
-
45
-
46
-
47
-
48
 |
 |
