ViewSonic DPF8-CAM DPF8-CAM User Guide (English) - Page 13
DPF8-CAM
 |
UPC - 766907522013
View all ViewSonic DPF8-CAM manuals
Add to My Manuals
Save this manual to your list of manuals |
Page 13 highlights
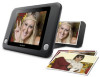
● How to Save or Cancel the pictures? After the photo is taken by the camera, the photo frame automatically enters Playback mode. Yellow frame ( ) indicates the picture size ready to be saved in the photo frame. The camera is programed to automatically detect the picture size shown in yellow frame. However, sometimes adjustment is needed. Use the Menu Navigation ( ) on the back side to move up or down to select Save, Cancel, or Adjust function. A. If the picture size is correct, select Save and press the Camera button ( ) to save the picture. B. If you don't like the picture, select Cancel and press the Camera button ( ) to cancel the picture without saving it. ● How to adjust the pictures? If the picture size in the yellow frame does not 100% match the old photos, select Adjust and press the Camera button ( ) to enter Photo Adjust mode. Crop control Use the Menu Navigation up/down/left/right to choose the side of the photo to be adjusted. Turn the crop control to move the red line for adjusting the borders of the photo. Press (Slideshow/OK button) to rotate the photo. Press (EXIT button) to exit and go back to the preview mode. Press (Camera button) to confirm. Note: Please recompose the photo first if needed, and then rotate the photo. The rotate function will only be effective for the image inside the lines. ViewSonic 8 DPF8-CAM
-
 1
1 -
2
-
3
-
4
-
5
-
6
-
7
-
 8
8 -
 9
9 -
 10
10 -
 11
11 -
 12
12 -
 13
13 -
 14
14 -
 15
15 -
 16
16 -
 17
17 -
 18
18 -
19
-
20
-
21
-
22
-
23
-
24
 |
 |
