ViewSonic N2060W User Manual
ViewSonic N2060W Manual
 |
View all ViewSonic N2060W manuals
Add to My Manuals
Save this manual to your list of manuals |
ViewSonic N2060W manual content summary:
- ViewSonic N2060W | User Manual - Page 1
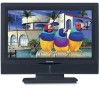
ViewSonic® N2060w LCD TV User Guide Model No. : VS11287-1G - ViewSonic N2060W | User Manual - Page 2
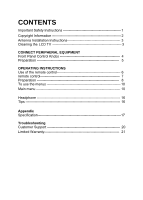
the LCD TV 3 CONNECT PERIPHERAL EQUIPMENT Front Panel Control Knobs 4 Preparation 5 OPERATING INSTRUCTIONS Use of the remote control 6 remote control 7 Preparation 8 To use the menus 10 Main menu 10 Headphone 16 Tips 16 Appendix Specification 17 Troubleshooting Customer Support 20 - ViewSonic N2060W | User Manual - Page 3
LCD TV" in this guide for further instructions a cart, stand, tripod, bracket power-supply cord or plug is damaged, if liquid is spilled onto or objects fall into the unit, if the unit is exposed to rain or moisture, or if the unit does not operate normally or has been dropped. ViewSonic 1 N2060w - ViewSonic N2060W | User Manual - Page 4
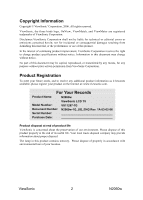
information as it becomes available, please register your product on the Internet at: www.viewsonic.com. For Your Records Product Name: N2060w ViewSonic LCD TV Model Number: VS11287-1G Document Number: N2060w-1G_UG_ENG Rev. 1A 03-02-06 Serial Number: Purchase Date: Product disposal at - ViewSonic N2060W | User Manual - Page 5
as contact with them might be fatal. Antenna Ground clamp Electric service equipment Antenna discharge unit Ground clamps Grounding conductors Power service grounding electrode system Cleaning the LCD TV • Make sure the LCD TV is turned off. • Never spray or pour any liquid directly onto - ViewSonic N2060W | User Manual - Page 6
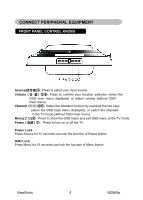
CONNECT PERIPHERAL EQUIPMENT FRONT PANEL CONTROL KNOBS Source Press to select TV mode. Power Press to turn on or off the TV. Power Lock Press Source for 10 seconds can lock the function of Power button OSD Lock Press Menu for 10 seconds can lock the function of Menu button ViewSonic 4 N2060w - ViewSonic N2060W | User Manual - Page 7
LCD TV with the screen down on a table, as it will be easier to connect your peripheral equipment. Please take precaution on page8 not to damage the screen. 1. VGA audio input 2. VGA input 3. AC power left audio track input 13. YPbPr right audio track input 14. TV signal input ViewSonic 5 N2060w - ViewSonic N2060W | User Manual - Page 8
INSTRUCTIONS USE OF THE REMOTE CONTROL POWER (电源) Press to turn on/off the TV. The TV is never completely powered off unless it is physically unplugged. Channel (频道) Press or to browse through the TV channels。 Volume (音量) Press + or - to adjust the volume. 0~9/100 Digit buttons To select a TV - ViewSonic N2060W | User Manual - Page 9
3. Remote control: Remove the cover of the battery compartment. Insert the 2 batteries supplied (Type AAA 1.5V local laws and regulations. Keep batteries away from children and pets. If the remote control will not be used for an extended period of time, remove the batteries. ViewSonic 7 N2060w - ViewSonic N2060W | User Manual - Page 10
1. Assembly Take out TV and base from carton, assembled by three pieces screws, which you could find from the accessory box. Shown in the figures below: Place the base on a solid surface Note: Lock the screw middle first, then the others, to avoid holes aiming incorrectly ViewSonic 8 N2060w - ViewSonic N2060W | User Manual - Page 11
an AC power supply. 5. Turn the TV on: You could turn on or off TV by the power key on the peak of TV, or by the power key on remote control. The indicator light in the front of TV is dark when the TV is 'OFF'. The indicator light in the front of TV is blue when the TV is 'ON'. ViewSonic 9 N2060w - ViewSonic N2060W | User Manual - Page 12
(On Screen Display). Adjust items including Sound Setup, Picture Setup, Function Setup and TV setup. When the input source is PC, YPbPr, AV or S-VIDEO mode, is TV mode, the Sound Setup, Picture Setup, Function Setup and TV setup can be selected, shown in the figure below: ViewSonic 10 N2060w - ViewSonic N2060W | User Manual - Page 13
of adjusting volume, bass and treble is from 0~100. 2. Select "ON" or "OFF" in Audio selection to control the sound output. 3. The range of adjusting Balance is -50~+50; when adjusting from 0 to -50, the sound To Default: Reset the sound setting to the factory default value. ViewSonic 11 N2060w - ViewSonic N2060W | User Manual - Page 14
color temperatures of Cold, normal and warm, or manually adjust manually red, green or blue in the personal setting (you can only adjust red, green and blue in the personal setting). 8. Reset to default: It is used to reset the picture settings to the factory default mode. ViewSonic 12 N2060w - ViewSonic N2060W | User Manual - Page 15
When the input source is TV, YPbPr, AV or S-VIDEO mode, users - warm, normal and cold. 7. Zoom: There are three options --4: 3, fullscreen and widescreen provided for zoom in/zoom out. 8. Reset to default: It is used to reset the picture settings to the factory default mode. ViewSonic 13 N2060w - ViewSonic N2060W | User Manual - Page 16
one minute left before enter standby 2. Reminder timer: Could not be set by personal, to show the time after which the product will enter standby ViewSonic 14 N2060w - ViewSonic N2060W | User Manual - Page 17
be set to ON or OFF. When it is set to ON, the TV will search the TV signal automatically; when there is any offset in the signal, it will automatically key on the remote control or on the front panel can skip a channel. 8. Reset to default: Reset to the factory default value. ViewSonic 15 N2060w - ViewSonic N2060W | User Manual - Page 18
HEADPHONE 1. The headphone jack is located at the right side of the TV. 2. The MUTE key on the remote control works on both internal speaker and the headphone. 3. Use volume key to adjust the of. Please ensure you dispose of your old receiver according to local regulations. ViewSonic 16 N2060w - ViewSonic N2060W | User Manual - Page 19
20" TFT-LCD Active Matrix wide-XGA, 1360x 768 Viewing angles Input signal Compatibility Resolution Speaker output Power Operating conditions Color Video Audio PC Supported Voltage Temperature Humidity Anti-glare coating 160° H/ 160° V Fh: 32-48KHz, Fv: 50-60Hz VGA input*1 TV ViewSonic 17 N2060w - ViewSonic N2060W | User Manual - Page 20
180.83mm(D) 20.55"(W) x 16.52"(H) x 7.12"(D) Package 595mm(W) x 512mm(H) x 226mm(D) 23.4"(W) x 20.2"(H) x 8.9"(D) Net Gross 6.9Kg (15.2 Ib.) 9 Kg (19.9 Ib.) CB, CCC Power saving On damage to the LCD. Note: Product specifications are subject to change without notice. ViewSonic 18 N2060w - ViewSonic N2060W | User Manual - Page 21
Troubleshooting No power • Make sure the LCD TV is properly connected. • Make sure the AC power cord is properly connected. • Make sure the AC power is ON, DC power button is ON (Green LED). • Plug another electrical device (like a radio) to the power outlet to verify that the outlet is supplying - ViewSonic N2060W | User Manual - Page 22
Cusomer Support For technical support or product service, see the table below or contact your reseller. Note: You will need the product serial number. Country/ Region China Web Site www.viewsonic.com.cn Telephone 800 820 3870 Email [email protected] ViewSonic 20 N2060w - ViewSonic N2060W | User Manual - Page 23
you. Sales outside the U.S.A. and Canada: For warranty information and service on ViewSonic products sold outside of the U.S.A. and Canada, contact ViewSonic or your local ViewSonic dealer. Warranty_LCDTV 4.3: ViewSonic LCD TV Warranty Rev. 1a 1 of 1 Release Date: 03-31-05 ViewSonic 21 N2060w - ViewSonic N2060W | User Manual - Page 24
-
 1
1 -
 2
2 -
 3
3 -
 4
4 -
 5
5 -
 6
6 -
 7
7 -
8
-
9
-
10
-
11
-
12
-
13
-
14
-
15
-
16
-
17
-
18
-
19
-
20
-
21
-
22
-
23
-
24
 |
 |

ViewSonic
®
-
User
Guide
-
使用手冊
N2
06
0w
LCD TV
Model No. :
VS11287-1G
-