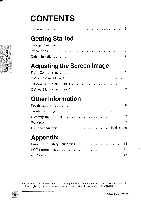
ViewSonic PF790 User Manual - Page 6
Front, Control, Panel, OnView®
 |
UPC - 766907143119
View all ViewSonic PF790 manuals
Add to My Manuals
Save this manual to your list of manuals |
Page 6 highlights
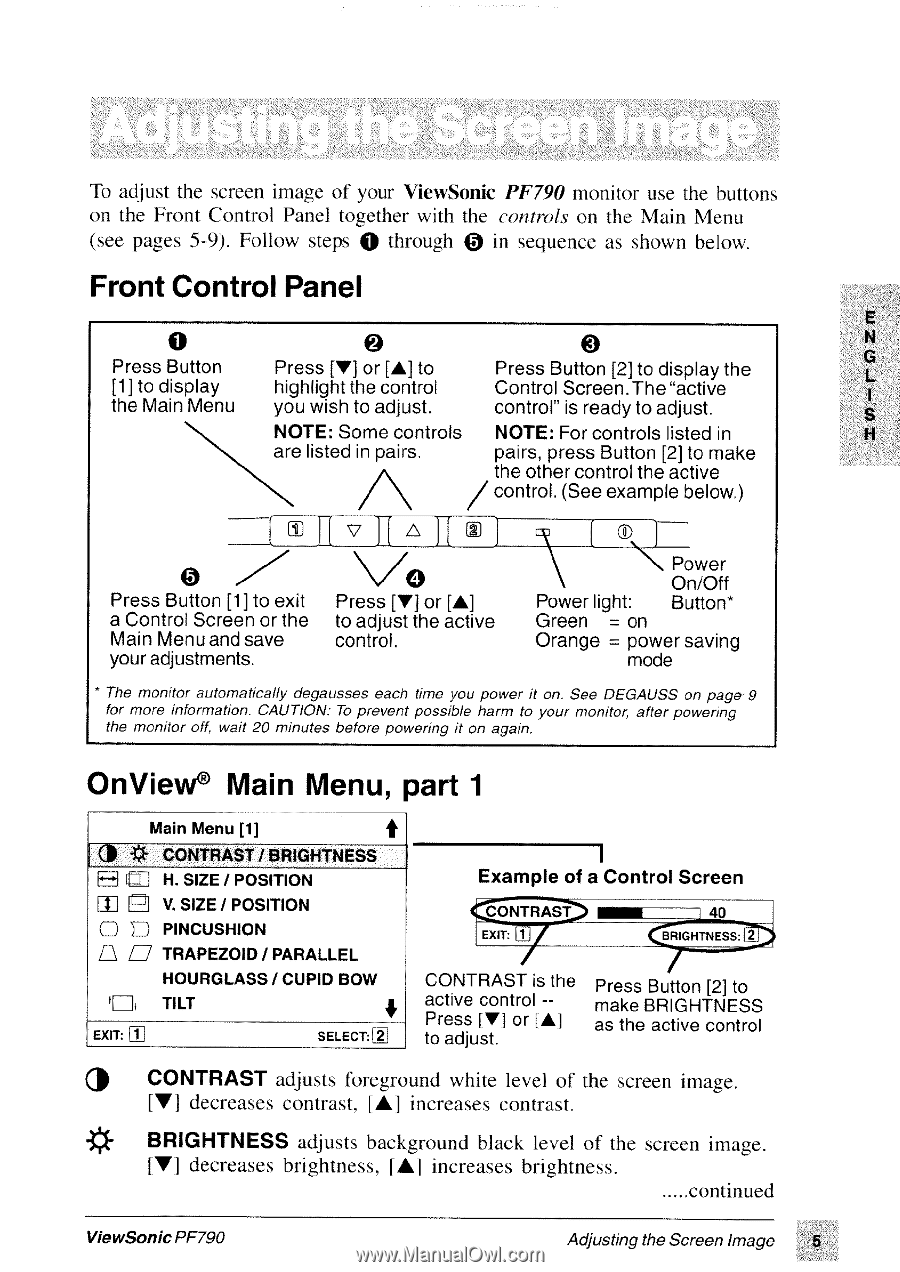
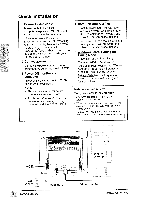
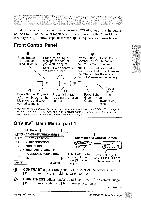
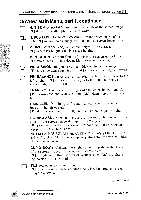
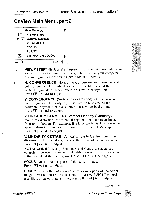
To adjust the screen image of your ViewSonic PF790 monitor use the buttons on the Front Control Panel together with the controls on the Main Menu (see pages 5-9). Follow steps 0 through 0 in sequence as shown below. Front Control Panel E O 0 N G Press Button Press [V] or [A] to Press Button [2] to display the L [1] to display highlight the control Control Screen.The "active the Main Menu you wish to adjust. control" is ready to adjust. N NOTE: Some controls NOTE: For controls listed in NNN are listed in pairs. pairs, press Button [2] to make the other control the active / control. (See example below.) Press Button [1] to exit a Control Screen or the Main Menu and save your adjustments. vo Press [V] or [A] to adjust the active control. 0 Power On/Off Power light: Button* Green = on Orange = power saving mode * The monitor automatically degausses each time you power it on. See DEGAUSS on page 9 for more information. CAUTION: To prevent possible harm to your monitor, after powering the monitor off, wait 20 minutes before powering it on again. OnView® Main Menu, part 1 Main Menu [1] -CU* CONTRAST / BRIGHTNESS H f H. SIZE / POSITION 2 V. SIZE / POSITION O E) PINCUSHION ri TRAPEZOID/PARALLEL HOURGLASS / CUPID BOW 1714 TILT EXIT: SELECT: Example of a Control Screen CONTRAST EXIT: CONTRAST is the active control -Press IVI or [Al to adjust. 40 BRIGHTNESS: 7 Press Button [2] to make BRIGHTNESS as the active control (10 CONTRAST adjusts foreground white level of the screen image. [V] decreases contrast, [A] increases contrast. BRIGHTNESS adjusts background black level of the screen image. [V] decreases brightness, [Al increases brightness. continued ViewSonic PF790 Adjusting the Screen Image 5
-
 1
1 -
 2
2 -
 3
3 -
 4
4 -
 5
5 -
 6
6 -
 7
7 -
 8
8 -
 9
9 -
 10
10 -
 11
11 -
 12
12 -
13
-
14
-
15
-
16
-
17
-
18
 |
 |