ViewSonic PJD5234L PJD5132, PJD5232L, PJD5134, PJD5234L, PJD5533W User Guide ( - Page 34
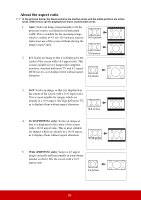
About the aspect ratio
 |
View all ViewSonic PJD5234L manuals
Add to My Manuals
Save this manual to your list of manuals |
Page 34 highlights
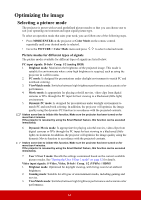
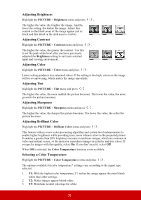
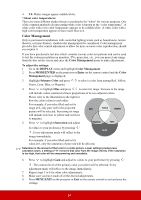
About the aspect ratio In the pictures below, the black portions are inactive areas and the white portions are active areas. OSD menus can be displayed on those unused black areas. 1. Auto: Scales an image proportionally to fit the projector's native resolution in its horizontal width. This is suitable for the incoming image which is neither in 4:3 nor 16:9 and you want to 16:10 picture make most use of the screen without altering the image's aspect ratio. 15:9 picture 2. 4:3: Scales an image so that it is displayed in the center of the screen with a 4:3 aspect ratio. This is most suitable for 4:3 images like computer monitors, standard definition TV and 4:3 aspect DVD movies, as it displays them without aspect alteration. 4:3 picture 3. 16:9: Scales an image so that it is displayed in the center of the screen with a 16:9 aspect ratio. This is most suitable for images which are already in a 16:9 aspect, like high definition TV, as it displays them without aspect alteration. 16:9 picture 4. 16:10 (PJD5533w only): Scales an image so that it is displayed in the center of the screen with a 16:10 aspect ratio. This is most suitable for images which are already in a 16:10 aspect, as it displays them without aspect alteration. 16:10 picture 5. Wide (PJD5533w only): Scales a 4:3 aspect image vertically and horizontally in a non-linear manner so that it fills the screen with a 16:9 aspect ratio. 4:3 picture 29
-
 1
1 -
2
-
3
-
4
-
5
-
6
-
7
-
8
-
9
-
10
-
11
-
12
-
13
-
14
-
15
-
16
-
17
-
18
-
19
-
20
-
21
-
22
-
23
-
24
-
25
-
26
-
27
-
28
-
 29
29 -
 30
30 -
 31
31 -
 32
32 -
 33
33 -
 34
34 -
 35
35 -
 36
36 -
 37
37 -
 38
38 -
 39
39 -
40
-
41
-
42
-
43
-
44
-
45
-
46
-
47
-
48
-
49
-
50
-
51
-
52
-
53
-
54
-
55
-
56
-
57
-
58
-
59
-
60
-
61
-
62
-
63
-
64
-
65
-
66
-
67
-
68
-
69
-
70
-
71
-
72
-
73
-
74
-
75
-
76
-
77
-
78
-
79
-
80
-
81
 |
 |
