ViewSonic Pro9800WUL PRO9510L User Guide English
ViewSonic Pro9800WUL Manual
 |
View all ViewSonic Pro9800WUL manuals
Add to My Manuals
Save this manual to your list of manuals |
ViewSonic Pro9800WUL manual content summary:
- ViewSonic Pro9800WUL | PRO9510L User Guide English - Page 1
/ Pro9530HDL/Pro9800WUL DLP Projector User Guide IMPORTANT: Please read this User Guide to obtain important information on installing and using your product in a safe manner, as well as registering your product for future service. Warranty information contained in this User Guide will describe - ViewSonic Pro9800WUL | PRO9510L User Guide English - Page 2
, including interference that may cause undesired operation. This equipment has been tested and found to comply with the limits for a Class B digital device and if not installed and used in accordance with the instructions, may cause harmful interference to radio communications. However, there - ViewSonic Pro9800WUL | PRO9510L User Guide English - Page 3
ventilation openings. Install the unit in accordance with the manufacturer's instructions. 8. Do not install near any heat sources such as radiators unused for long periods of time. 14. Refer all servicing to qualified service personnel. Servicing is required when the unit has been damaged in any - ViewSonic Pro9800WUL | PRO9510L User Guide English - Page 4
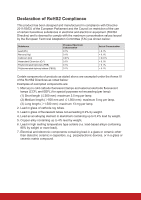
: Examples of exempted components are: 1. Mercury in cold cathode fluorescent lamps and external electrode fluorescent lamps (CCFL and EEFL) for special purposes not exceeding (per lamp): (1) Short length (≦500 mm): maximum 3.5 mg per lamp. (2) Medium length (>500 mm and ≦1,500 mm): maximum 5 mg per - ViewSonic Pro9800WUL | PRO9510L User Guide English - Page 5
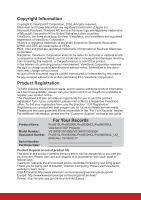
. For additional information, please see the "Customer Support" section in this guide. Product Name: Model Number: Document Number: Serial Number: Purchase Date: For Your Records Pro9510L/Pro9520WL/Pro9530HDL/Pro9800WUL ViewSonic DLP Projector VS16505/VS16506/VS16507/VS16508 Pro9510L/Pro9520WL - ViewSonic Pro9800WUL | PRO9510L User Guide English - Page 6
This publication, including all photographs, illustrations and software, is protected under international copyright laws, with all rights reserved. Neither this manual, nor any of the material contained herein, may be reproduced without written consent of the author. © Copyright 2016 Disclaimer The - ViewSonic Pro9800WUL | PRO9510L User Guide English - Page 7
Important: It is strongly recommended that you read this section carefully before using the projector. These safety and usage instructions will ensure that you enjoy many years of safe use of the projector. Keep this manual for future reference. Symbols Used Warning symbols are used on the unit and - ViewSonic Pro9800WUL | PRO9510L User Guide English - Page 8
Installation Notice Do not tilt the projector to the left or right, otherwise lamp life could decrease dramatically, and may lead to . All enclosures should pass a certified thermal evaluation to ensure that the projector does not recycle exhaust air, as this may cause the device to shutdown - ViewSonic Pro9800WUL | PRO9510L User Guide English - Page 9
heavy dust locations. Keep your product away from fluorescent lamps (>1 Meter) to avoid malfunction caused by IR interference The it may cause damage to the projector. In the meantime, the delayed heat radiating will also affect the service life of the projector. The shutdown process may vary - ViewSonic Pro9800WUL | PRO9510L User Guide English - Page 10
and using the projector, read the regulatory notices in the Regulatory Compliance on page 75. Important Recycle Instructions: Lamp(s) inside this lamp specific disposal information check WWW.LAMPRECYCLE.ORG. Symbol Explanations DISPOSAL: Do not use household or municipal waste collection services - ViewSonic Pro9800WUL | PRO9510L User Guide English - Page 11
any environment. Supports resolutions up to WUXGA lamp cover for simple lamp removal and insertion. Anti-theft security features include: Kensington security slot, security bar. About this Manual This manual is intended for end users and describes how to install and operate the DLP projector - ViewSonic Pro9800WUL | PRO9510L User Guide English - Page 12
PROJECTION LAMP ...55 Resetting the Lamp Time ...58 CLEANING THE PROJECTOR ...59 Cleaning the Lens...59 Cleaning the Case ...59 Cleaning the Air Filter ...60 USING THE PHYSICAL LOCK ...62 Using the Kensington Security Slot ...62 Using the Security Bar Lock ...62 TROUBLESHOOTING ...63 COMMON PROBLEMS - ViewSonic Pro9800WUL | PRO9510L User Guide English - Page 13
...64 IMAGE PROBLEMS ...65 LAMP PROBLEMS...65 REMOTE CONTROL PROBLEMS...66 AUDIO PROBLEMS ...66 HAVING THE PROJECTOR SERVICED ...66 HDMI Q & A ...67 SPECIFICATIONS...68 SPECIFICATIONS ...68 PROJECTION DISTANCE VS. PROJECTION SIZE ...70 PRO9510L / PRO9520WL / PRO9530HDL / PRO9800WUL 70 TIMING MODE - ViewSonic Pro9800WUL | PRO9510L User Guide English - Page 14
's Manual) Quick Start Guide Contact your dealer immediately if any items are missing, appear damaged, or if the unit does not work. It is recommend that you keep the original packing material should you ever need to return the equipment for warranty service. Caution: Avoid using the projector in - ViewSonic Pro9800WUL | PRO9510L User Guide English - Page 15
10. Focus Ring 11. Function Keys 45 2 DESCRIPTION Remove cover to replace lamp. Rotate adjuster lever to adjust angle position. Projection Lens. Receives IR signal from remote control. Displays the projector status. Cool air intake. Adjusts the image position vertically. Adjusts the image position - ViewSonic Pro9800WUL | PRO9510L User Guide English - Page 16
Button) 13. 5 6 7 8 9 10 11 12 13 DESCRIPTION Display the power on/off sequence status. Display the lamp status. Display the thermal status. Display the filter replacing warning message. Turn the projector on or off. Opens and exits OSD menus. Navigates and changes settings in the OSD. Quick Menu - ViewSonic Pro9800WUL | PRO9510L User Guide English - Page 17
em ote Out S-Video Audio Video In L Audio R DV I-D In 1 In 2 In Audi o Service MIC Out L R Audi o Out 12V Out IR 24 2322212019 1817161514 13 ITEM LABEL 1. HDMI 1 cable for USB host. Note: Support 5V/1.0A for each port output as long as the projector Power On. Connect 3D IR glasses - ViewSonic Pro9800WUL | PRO9510L User Guide English - Page 18
the connector before turn on/off the projector. Screen controllers are supplied and supported by screen manufacturers. Do not use Remote Out S-Video Audio Video In L Audio R D V I-D In 1 In 2 In Audio Service MIC Out L R Audio Out 12V Out IR 14 3 13 12 11 1. Composite Video Cable - ViewSonic Pro9800WUL | PRO9510L User Guide English - Page 19
Mount Holes DESCRIPTION SEE PAGE Rotate adjuster lever to adjust angle position. 16 Contact your dealer for information on mounting the projector on a ceiling. Note: When installing, ensure that you use only UL Listed ceiling mounts. For ceiling installations, use approved mounting hardware - ViewSonic Pro9800WUL | PRO9510L User Guide English - Page 20
, you can bounce the signal off certain reflective surfaces such as projector screens. 3. The buttons and keys on the projector have the same functions as the corresponding buttons on the remote control. This user's manual describes the functions based on the remote control. Note: Complies with - ViewSonic Pro9800WUL | PRO9510L User Guide English - Page 21
. BNC 27. Freeze DESCRIPTION SEE PAGE Transmits signals to projector. Turns the projector on. 12 Displays the HDMI 2 source. Displays the the display aspect ratio. Displays the presentation timer settings menu. Selects a lamp mode. Activates panel key lock. Use as on-screen pointer. DO NOT - ViewSonic Pro9800WUL | PRO9510L User Guide English - Page 22
is activated. Number for Remote ID setting used. Displays embedded test pattern. Number for Remote ID setting used. Increase the volume switched to 8, the remote control can control every projector. Note: If different codes are set on the projector and remote control, there will be no response from - ViewSonic Pro9800WUL | PRO9510L User Guide English - Page 23
the remote mouse control The capability of operating your computer with the remote control gives you more flexibility when delivering presentations. 1. Connect the projector to your PC or notebook with a USB cable prior to using the remote control in place of your computer's mouse. 2. Set the input - ViewSonic Pro9800WUL | PRO9510L User Guide English - Page 24
. Caution: 1. Only use AAA batteries (Alkaline batteries are recommended). 2. Dispose of used batteries according to local ordinance regulations. 3. Remove the batteries when not using the projector for prolonged periods. 11 - ViewSonic Pro9800WUL | PRO9510L User Guide English - Page 25
connect the power cord and signal cable. When connected, the power led will flash green to solid green. 2. Turn on the lamp by pressing " " button on the top of the projector or " " on the remote control. The PWR LED will now flash green. The startup screen will display in approximately 30 seconds - ViewSonic Pro9800WUL | PRO9510L User Guide English - Page 26
the SOURCE button and use ▲▼ to scroll among devices. (Component is supported through the RGB to Component adapter.) 4. When the "Power Off? /Press Power again" message appears, press the POWER button. The projector turns off. HDMI 1 / MHL: High-Definition Multimedia Interface and Mobile High - ViewSonic Pro9800WUL | PRO9510L User Guide English - Page 27
24 for help on using OSD menus.) Important: Keep the password in a safe place. Without the password, you will not be able to use the projector. If you lose the password, contact your reseller for information on clearing the password. 1. Press the MENU button to open the OSD menu. 2. Press the - ViewSonic Pro9800WUL | PRO9510L User Guide English - Page 28
the Security Lock is enabled. Enter the password in the order you set it at step 6. In case you forget the password, please contact the service center. Service center will validate the owner and help reset the password. 15 - ViewSonic Pro9800WUL | PRO9510L User Guide English - Page 29
when setting up the projector: The projector table or stand should be level and sturdy. Position the projector so that it is perpendicular to the screen. Ensure the cables are in a safe location. You could trip over them. 1. To raise the level of the projector, twist the adjusters counter - ViewSonic Pro9800WUL | PRO9510L User Guide English - Page 30
Adjusting Projected Image Position Using Lens Shift FOCUS ZOOM LENS SHIFT MENU EXIT ENTER SOURCE The Lens Shift feature provides a lens shift function that can be used to adjust the position of the projected image either horizontally or vertically within the range detailed below. Note: Do not - ViewSonic Pro9800WUL | PRO9510L User Guide English - Page 31
Adjusting the vertical image position The vertical image height can be adjusted between 141.2% and 104.65% for WXGA, 115.35% and 101.85% for XGA, 146.7% and 104.5% for 1080P, 132% and 99.1% for WUXGA of image height. Note that the maximum vertical image height adjustment can be limited by the - ViewSonic Pro9800WUL | PRO9510L User Guide English - Page 32
Screen Height PRO9530HDL Screen H H x 4.5% PRO9800WUL Distance (L) Screen H Screen Height H x 0.9% Distance (L) 104.5% offset 146.7% offset 99.1% offset 132% offset 19 - ViewSonic Pro9800WUL | PRO9510L User Guide English - Page 33
Adjusting the horizontal image position With the lens in the center position the horizontal image position can be adjusted to the left or right by up to a maximum of 10.9% for WXGA, 3.8% for XGA, 10.3% for 1080P, 10.3% for WUXGA of the image width. Note that the maximum horizontal image height - ViewSonic Pro9800WUL | PRO9510L User Guide English - Page 34
only) to resize the projected image and screen size. 2. Use the Image-focus control (on the projector only) to sharpen the projected image. 3. Press the / / / buttons (on the projector or the remote control) to correct vertical or horizontal image-trapezoid . 4. The keystone control appears on - ViewSonic Pro9800WUL | PRO9510L User Guide English - Page 35
Adjusting the Volume 8. Press the / remote control. buttons on the The volume control appears on the display. 9. Press the / buttons on the remote control or ◄ / ► buttons on the keypad to adjust Volume +/-. 10.Press the button to turn off the volume (This feature is available only on - ViewSonic Pro9800WUL | PRO9510L User Guide English - Page 36
OSD You can use the remote control cursor buttons or the buttons on the top of the projector to navigate and make changes to the OSD. The following illustration shows the corresponding buttons on the projector. MENU EXIT ENTER SOURCE 1. To enter the OSD, press the MENU button. 2. There are five - ViewSonic Pro9800WUL | PRO9510L User Guide English - Page 37
Setting the OSD Language Set the OSD language to your preference before continuing. 1. Press the MENU button. Press the cursor ◄► button to navigate to Basic. 2. Press the cursor ▲▼ button until Language is highlighted. 3. Press the cursor ◄► button until the language you want is highlighted. 4. - ViewSonic Pro9800WUL | PRO9510L User Guide English - Page 38
OSD Menu Overview Use the following illustration to quickly find a setting or determine the range for a setting. MAIN MENU SUB MENU Image Color Mode Brilliant Color Brightness Contrast Sharpness Gamma Advanced Display Video / Audio Reset Horizontal Position Vertical Position Frequency Tracking - ViewSonic Pro9800WUL | PRO9510L User Guide English - Page 39
key lock Digital Zoom Presentation Timer Corner Adj. Projector ID Remote Control Code Timer Preset Time Timer , Screen Capture, Auto, 3D, Status, OSD Message, Projection Position. Off, Test Card, Note Pad, World map, Stave, Trellis chart ViewSonic, Off, Red, Green, Blue, User H: -25 ~ +25 V: -30 - ViewSonic Pro9800WUL | PRO9510L User Guide English - Page 40
) 3D 3D 3D Sync Invert 3D Format Network Setting Network State DHCP IP Address Subnet Mask Gateway DNS Apply Active Source Video Information Lamp Time (Eco, Normal, Dynamic Eco) Software Version Serial Number Air Filter Hour Off, On 0~180 Off, On Normal, High Altitude ECO., Normal, Dynamic - ViewSonic Pro9800WUL | PRO9510L User Guide English - Page 41
Image Menu Press the MENU button to open the OSD menu. Press the cursor ◄► button to move to the Image Menu. Press the cursor ▲▼ button to move up and down in the Image menu. Press ◄► to change values for settings. ITEM Color Mode Brilliant Color Brightness Contrast Sharpness Gamma Advanced Reset - ViewSonic Pro9800WUL | PRO9510L User Guide English - Page 42
Advanced Feature Press the Menu button to open the OSD menu. Press ◄► to move to the Image menu. Press ▼▲ to move to the Advanced menu and then press (Enter) or ►. Press ▼▲ to move up and down in the Advanced menu. ITEM Color Temperature Color Management White Balance DESCRIPTION Press the cursor - ViewSonic Pro9800WUL | PRO9510L User Guide English - Page 43
Color Management Press (Enter) / ► to enter the Color Manager sub menu. ITEM Red Green Blue Cyan Magenta Yellow White DESCRIPTION Select to enter the Red Color Manager. Press the ◄► buttons to adjust the Hue, Saturation, and Gain. Select to enter the Green Color Manager. Press the ◄► buttons to - ViewSonic Pro9800WUL | PRO9510L User Guide English - Page 44
White Balance Press the (Enter) / ► button to enter the White Balance sub menu. ITEM R Gain G Gain B Gain R Offset G Offset B Offset DESCRIPTION Press the ◄► buttons to adjust the Red Gain. Press the ◄► buttons to adjust the Green Gain. Press the ◄► buttons to adjust the Blue Gain. Press the ◄► - ViewSonic Pro9800WUL | PRO9510L User Guide English - Page 45
Display Menu Press the MENU button to open the OSD menu. Press the cursor ◄► button to move to the Display menu. Press the cursor ▲▼ button to move up and down in the Display menu. Press ◄► to change values for settings. ITEM DESCRIPTION Horizontal Position Press the cursor ◄► button to adjust - ViewSonic Pro9800WUL | PRO9510L User Guide English - Page 46
Video/Audio Menu Press the MENU button to open the OSD menu. Press the cursor ◄► button to move to the Video/Audio menu. Press the cursor ▲▼ button to move up and down in the Video/Audio menu. Press ◄► to change values for settings. ITEM AGC Saturation Tint Overscan Closed Caption Audio Reset - ViewSonic Pro9800WUL | PRO9510L User Guide English - Page 47
Audio Press (Enter) / ► to enter the Audio sub menu. ITEM Volume Mute Active audio out DESCRIPTION Press the ◄► buttons to enter and adjust the audio volume. Press the ◄► buttons to enter and turn on or off the speaker. Press the ◄► buttons to select audio output connector. Note: When select Off, - ViewSonic Pro9800WUL | PRO9510L User Guide English - Page 48
Basic Menu Press the MENU button to open the OSD menu. Press the cursor ◄► button to move to the Basic menu. Press the cursor ▲▼ button to move up and down in the Basic menu. Press ◄► to change values for settings. ITEM Language Projection Position Aspect ratio My Button Splash screen HV Keystone - ViewSonic Pro9800WUL | PRO9510L User Guide English - Page 49
Splash screen Press (Enter) / ► to enter the Logo sub menu. ITEM Pattern Splash screen Screen Capture DESCRIPTION Press the ◄► buttons to select different Pattern Press the ◄► buttons to choose start up Logo. Press (Enter) / ► to capture screen on current display immediately. HV Keystone Press - ViewSonic Pro9800WUL | PRO9510L User Guide English - Page 50
down in the Advanced menu. Press ◄► to change values for setting. ITEM Security Lock Panel key lock Digital Zoom Presentation Timer Corner Adj. Projector ID Remote control code DESCRIPTION Press the cursor ◄► button to enable or disable security lock function. Press the cursor ◄► button to lock or - ViewSonic Pro9800WUL | PRO9510L User Guide English - Page 51
Presentation Timer The Presentation Timer function can indicate the presentation time on the screen to help you achieve better time management when giving presentations. ITEM Timer Preset Time Timer Reset DESCRIPTION Press the cursor ◄► button to enable or disable presentation timer. Press the - ViewSonic Pro9800WUL | PRO9510L User Guide English - Page 52
Corner Adj. Press (Enter) / ► to enter the Corner Adj. sub menu. 1. Press the cursor ▲ / ▼ buttons to select a corner and press ENTER. 2. Press the cursor ▲ / ▼ buttons to adjust vertical and press the cursor ◄ / ► buttons to adjust horizontal. 3. Press MENU to save and Exit the settings. 39 - ViewSonic Pro9800WUL | PRO9510L User Guide English - Page 53
cursor ▲▼ button to move up and down in the Advanced menu. ITEM Quick Auto Search Auto Power Off (min.) Direct Power On High Altitude Lamp Mode Advanced Reset All Status DESCRIPTION Press the cursor ◄► button to enable or disable automatic source detection. Press the cursor ◄► button to enable or - ViewSonic Pro9800WUL | PRO9510L User Guide English - Page 54
to change values for setting. ITEM OSD Menu Setting Air filter timer reset Lamp Hour Reset Low Power Mode Sleep Timer (min) 3D Network setting DESCRIPTION Press information on Network Setting. Note: About "On By Lan", RJ45 will support to be waked up in this mode(Under 6W) but scalar won't. - ViewSonic Pro9800WUL | PRO9510L User Guide English - Page 55
Menu Display DESCRIPTION Press ◄► button to select different OSD location. Press ◄► button to select OSD background translucent level. Press ◄► button to select OSD timeout delay. Lamp Hour Reset Please refer to Resetting the Lamp Time on page 58 to reset the - ViewSonic Pro9800WUL | PRO9510L User Guide English - Page 56
3D ITEM 3D 3D Sync Invert 3D Format DESCRIPTION Press ◄► to select Off, DLP-Link or IR. Press ◄► to turn 3D Sync Invert On or Off. Press ◄► to enable or disable 3D Format. Network Setting ITEM Network State DHCP IP Address Subnet Mask Gateway DNS Apply DESCRIPTION Displays the network - ViewSonic Pro9800WUL | PRO9510L User Guide English - Page 57
/ For more detail of information about the diverse types of external devices which can be connected to the LAN/RJ45 port and remote/control the projector, as well as the related control commands supporting for each external device, kindly please get contact with the Support-Service team directly. 44 - ViewSonic Pro9800WUL | PRO9510L User Guide English - Page 58
LAN_RJ45 1. Connect an RJ45 cable to RJ45 ports on the projector and the PC (Laptop). HDM I 1 / MH L HDM I 2 DV I-D Computer Ou t C omputer In 1 C omputer In 2 LA N US B 3D VE SA RS -232 R G B H V Wi re d In R emo - ViewSonic Pro9800WUL | PRO9510L User Guide English - Page 59
3. Right-click on Local Area Connection, and select Properties. 4. In the Properties window, select the Networking tab, and select Internet Protocol (TCP/IP). 5. Click Properties. 6. Click Use the following IP address and fill in the IP address and Subnet mask, then click OK. 46 - ViewSonic Pro9800WUL | PRO9510L User Guide English - Page 60
7. Press the Menu button on the projector. 8. Select Advanced→ Advanced → Network Setting 9. After getting into Network Setting, input the following: input the IP address: 10.10.10.10. 12. Press (Enter) / ►. The projector is setup for remote management. The LAN/RJ45 function displays as follows. 47 - ViewSonic Pro9800WUL | PRO9510L User Guide English - Page 61
CATEGORY ITEM IP Address Crestron Control IP ID Port Projector Name Projector Location Assigned To DHCP (Enabled) IP Address Network Configuration Subnet Mask Default Gateway DNS Server Enabled User Password New Password Confirm Enabled Admin Password New - ViewSonic Pro9800WUL | PRO9510L User Guide English - Page 62
Preparing Email Alerts 1. Make sure that user can access the homepage of LAN RJ45 function by web browser (for ex-ample, Microsoft Internet Explorer v6.01/v8.0). 2. From the Homepage of LAN/RJ45, click Alert Settings. 3. By default, these input boxes in Alert Settings are blank. 49 - ViewSonic Pro9800WUL | PRO9510L User Guide English - Page 63
administrator's assistant). From field is the sender's email address (for example, the projector administrator). This is a required field. Note: Fill in all fields as specified. User can click Send Test Mail to test what setting is correct. For successful sending an e-mail alert, you must select - ViewSonic Pro9800WUL | PRO9510L User Guide English - Page 64
way, so called "RS232 by TELNET" for LAN/RJ45 interface. Quick Start-Guide for "RS232 by TELNET" Check and get the IP-Address on OSD of the projector. Make sure that laptop/PC can access the web-page of the projector. Make sure that "Windows Firewall" setting to be disabled in case of - ViewSonic Pro9800WUL | PRO9510L User Guide English - Page 65
Input the command format like the below: telnet ttt.xxx.yyy.zzz 23 ("Enter" key pressed) (ttt.xxx.yyy.zzz: IP-Address of the projector) If Telnet-Connection ready, and user can have RS232 command input, then "Enter" key pressed, the RS232 command will be workable. How to have TELNET - ViewSonic Pro9800WUL | PRO9510L User Guide English - Page 66
"OK" button. Specsheet for "RS232 by TELNET" : 1. Telnet: TCP 2. Telnet port: 23 (for more detail, kindly please get contact with the service agent or team) 3. Telnet utility: Windows "TELNET.exe" (console mode) 4. Disconnection for RS232-by-Telnet control normally: Close Windows Telnet utility - ViewSonic Pro9800WUL | PRO9510L User Guide English - Page 67
Number Air filter hour DESCRIPTION Display the activated source. Displays resolution/video information for RGB source and color standard for Video source. Lamp Time used information is displayed. Showing system software version. Showing serial number of product. Displays the number of hours the air - ViewSonic Pro9800WUL | PRO9510L User Guide English - Page 68
suffer from the gas and broken shards of the lamp. When removing the lamp from a ceiling-mounted projector, make sure that no one is under the projector. Glass fragments could fall if the lamp has been burned out. IF A LAMP EXPLODES If a lamp explodes, the gas and broken shards may scatter inside - ViewSonic Pro9800WUL | PRO9510L User Guide English - Page 69
4. Unlock the lamp cover. 5. Pull up and remove the cover. 6. Use a screwdriver to remove the screws from the lamp module. 7. Pull out the lamp module. 56 - ViewSonic Pro9800WUL | PRO9510L User Guide English - Page 70
8. Reverse steps 1 to 7 to install the new lamp module. While installing, align the lamp module with the connector and ensure it is level to avoid damage. Note: The lamp module must sit securely in place and the lamp connector must be connected properly before tightening the screws. 57 - ViewSonic Pro9800WUL | PRO9510L User Guide English - Page 71
Time After replacing the lamp, you should reset the lamp hour counter to zero. Refer to the following: 2. Press the MENU down to Advanced. 4. Press the cursor ▼▲ button to move down to Lamp Hour Reset. 5. Press the cursor (Enter) / ► button. A message screen appears. 6. Press buttons to reset the - ViewSonic Pro9800WUL | PRO9510L User Guide English - Page 72
dust and grime will help ensure trouble-free operation. Warning: 1. Be sure to turn off and unplug the projector at least 30 minutes before cleaning 4. If a lot of water gets into the projector interior when cleaning, have the projector serviced. Cleaning the Lens You can purchase optic lens cleaner - ViewSonic Pro9800WUL | PRO9510L User Guide English - Page 73
Cleaning the Air Filter Refer to the following to clean the air filter. 1. Open the latch to open the filter door. 2. Remove the filter. 3. Use a vacuum cleaner to vacuum the dust inside. Note: 1. Use the soft brush attachment when you vacuum the filter to avoid damage it. 2. Do not wash the filter - ViewSonic Pro9800WUL | PRO9510L User Guide English - Page 74
. 5. Close the filter door and lock the latch. 6. Turn on the projector and reset the Air Filter Timer after the Air Filter is replaced. Air Filter / ► to reset timer. Important: The Filter LED lights when the filter service time is on (1000 hours). If the filter is broken, please use a new one. 61 - ViewSonic Pro9800WUL | PRO9510L User Guide English - Page 75
password protection function and the Kensington lock, the Security Bar Opening helps protect the projector from unauthorized use. See the following picture. HDMI 1/ MHL HDMI2 DVI-D Com S-Video Audoi Video In L Audoi R DVI-D nI1 In2 In Audio Service MIC Out L R Audio Out 12V Out IR 62 - ViewSonic Pro9800WUL | PRO9510L User Guide English - Page 76
parts. For example, if you replace batteries and the problem remains, put the original batteries back and go to the next step. Keep a record of the steps you take when troubleshooting: The information may be useful when calling for technical support or for passing on to service personnel. 63 - ViewSonic Pro9800WUL | PRO9510L User Guide English - Page 77
blinks 4 blinks OFF OFF Lamp fail 5 blinks OFF OFF OFF Ballast temp over lamp fail 1 5 blinks 12 blinks OFF OFF Restrike lamp fail 2 5 blinks 13 blinks OFF OFF Lamp fail 1 5 blinks 14 blinks OFF OFF Lamp projector. If the Power or Lamp LEDs are still blinking or the Over Temp LED - ViewSonic Pro9800WUL | PRO9510L User Guide English - Page 78
LED is on. 4. If you have replaced the lamp recently, try resetting the lamp connections. 5. Replace the lamp module. 6. Put the old lamp back in the projector and have the projector serviced. Problem: The lamp goes off 1. Power surges can cause the lamp to turn off. Re-plug power cord. When the - ViewSonic Pro9800WUL | PRO9510L User Guide English - Page 79
5. Have the projector serviced. Problem: The sound is distorted 1. Check the audio cable connection. 2. Test the source audio output with other speakers. 3. Have the projector serviced. Having the Projector Serviced If you are unable to solve the problem, you should have the projector serviced. Pack - ViewSonic Pro9800WUL | PRO9510L User Guide English - Page 80
perform at speeds of 75Mhz or up to 2.25Gbps, which is the equivalent of a 720p/1080i signal. ˙High Speed (or "category 2") HDMI cables have been tested to perform at speeds of 340Mhz or up to 10.2Gbps, which is the highest bandwidth currently available over an HDMI cable and can successfully - ViewSonic Pro9800WUL | PRO9510L User Guide English - Page 81
Relative Humidity Operating Altitude Environmental Storage Condition Dimensions Weight Power Supply Power Consumption Lamp Audio Speaker Input Terminals PRO9510L PRO9520WL PRO9530HDL PRO9800WUL 0.7" XGA, S600HB 1024x768 0.65" WXGA, S450 1280x800 0.65" 1080P, S600 1920x1080p 0.67" WUXGA - ViewSonic Pro9800WUL | PRO9510L User Guide English - Page 82
x 1 3D-Sync x 1 RS-232C x 1 RJ45 x 1 Screen Trigger : DC Jack x 1 (DC12V 200mA output function) Wired Remote In x 1 Wired Remote Out x 1 USB Type B for service x 1 Kensington Security Slot Security Bar Note: For questions regarding product specifications, please contact your local distributor. 69 - ViewSonic Pro9800WUL | PRO9510L User Guide English - Page 83
Projection Distance vs. Projection Size PRO9510L / PRO9520WL / PRO9530HDL / PRO9800WUL (b) (a) (d) (c) (f) (e) (a) (c) (d) (e) (f) (b) (e): Screen (f): Center of lens (a) Screen Size [inch (m)] 26.7 30.0 40.0 50.0 60.0 70.0 80.0 90.0 100.0 120.0 150.0 200.0 250.0 300.0 378.6 (0.7) (0.8) - ViewSonic Pro9800WUL | PRO9510L User Guide English - Page 84
26.2 30.0 40.0 50.0 60.0 70.0 80.0 90.0 100.0 120.0 150.0 200.0 250.0 300.0 371.4 (0.7) (0.8) (1.0) (1.3) (1.5) (1.8) (2.0) (2.3) (2.5) (3.0) (3.8) (5.1) (6.4) (7.6) (9.4) PRO9800WUL (WUXGA) 16:10 image on a 16:10 Screen (b) Projection distance [m (inch)] min. max. (c) Image height [cm (inch - ViewSonic Pro9800WUL | PRO9510L User Guide English - Page 85
can display several resolutions. The following table outlines the resolutions that can be displayed by the projector. SIGNAL NTSC PAL/SECAM VESA RESOLUTION - - 720 x 400 720 x 400 640 x 480 640 x 480 640 x 480 640 x 480 800 x 600 * 800 x 600 800 x 600 800 x - ViewSonic Pro9800WUL | PRO9510L User Guide English - Page 86
60.0 50.0 24.0 25.0 30.0 50.0 60.0 COMPOSITE S_VIDEO COMPONENT RGB (ANALOG) HDMI (DIGITAL) O: Frequency supported -: Frequency not supported 3D note: "" It means the timing can support non-3D and 3D signal with Frame Sequential and TopBottom format. ""It means the timing can - ViewSonic Pro9800WUL | PRO9510L User Guide English - Page 87
7 4 FOCU S ZO OM LENS SHIF T 325.5mm(12.8" ) MENU EXI T ENTER SOURCE 445mm(17.5" ) Projector Dimensions - ViewSonic Pro9800WUL | PRO9510L User Guide English - Page 88
REGULATORY COMPLIANCE FCC Warning This equipment has been tested and found to comply with the limits for a Class B radio frequency energy and, if not installed and used in accordance with the instruction manual, may cause harmful interference to radio communications. Operation of this equipment in a - ViewSonic Pro9800WUL | PRO9510L User Guide English - Page 89
IR code table Key No. 1 2 3 4 5 6 7 8 9 10 11 12 13 14 15 16 17 18 19 20 21 22 23 24 25 26 27 28 29 30 31 32 33 34 35 Key Power ON My Button COMP HDMI HDMI/MHL VIDEO BNC Source Auto SYNC Up /V keystone + Freeze Left /H keystone Enter Right H keystone + MENU Down/V keystone EXIT MOUSE Mouse Left - ViewSonic Pro9800WUL | PRO9510L User Guide English - Page 90
of the commands are structured except some for the compatibility issue with other projectors. HEX ASCII Header code 'V' Command code Data code End code Command 0Dh Resync P/F SXXG0004 53h Xh Xh 47h 30h 30h 30h 34h 0Dh Get Lamp Hours Pn/F SXXG0005 53h Xh Xh 47h 30h 30h 30h 35h 0Dh Get Air - ViewSonic Pro9800WUL | PRO9510L User Guide English - Page 91
Command Group 01 ASCII HEX Function SXXG0101 53h Xh Xh 47h 30h 31h 30h 31h 0Dh Get Brightness SXXS0101n 53h Xh Xh 53h 30h 31h 30h 31h nh 0Dh Set Brightness SXXG0102 53h Xh Xh 47h 30h 31h 30h 32h 0Dh Get Contrast SXXS0102n 53h Xh Xh 53h 30h 31h 30h 32h nh 0Dh Set Contrast SXXG0103 53h Xh Xh - ViewSonic Pro9800WUL | PRO9510L User Guide English - Page 92
Command Group 02 ASCII HEX Function Description SXXS0201 53h Xh Xh 53h 30h 32h 30h 31h 0Dh Select RGB SXXS0202 53h Xh Xh 53h 30h 32h 30h 32h 0Dh Select RGB2 SXXS0203 53h Xh Xh 53h 30h 32h 30h 33h 0Dh Select DVI SXXS0204 53h Xh Xh 53h 30h 32h 30h 34h 0Dh Select Video SXXS0205 53h Xh Xh 53h - ViewSonic Pro9800WUL | PRO9510L User Guide English - Page 93
Command Group 03 ASCII HEX Function Description Return Value SXXS0307n 53h Xh Xh 53h 30h 33h 30h 37h nh 0Dh Bass n=0~16 P/F SXXG0308 53h Xh Xh 47h 30h 33h 30h 38h 0Dh Projection Mode SXXS0308n 53h Xh Xh 53h 30h 33h 30h 38h nh 0Dh Projection Mode SXXG0309 53h Xh Xh 47h 30h 33h 30h 39h 0Dh - ViewSonic Pro9800WUL | PRO9510L User Guide English - Page 94
47h 30h 33h 31h 38h 0Dh Lamp Mode SXXS0319n 53h 39h 39h 53h 30h 33h 31h 38h n 0Dh Lamp Mode SXXS0320 53h 39h 39h 53h Description 0:Eco 1:Normal 2:Dynamic Eco 0:Eco 1:Normal 2:Dynamic Eco 0:ViewSonic 1:Off 2: Red 3:Green 4:Blue 5:User 0:ViewSonic 1:Off 2: Red 3:Green 4:Blue 5:User 0:Normal 1:High 0: - ViewSonic Pro9800WUL | PRO9510L User Guide English - Page 95
http://www.viewsoniceurope.com/eu/support/call-desk/ Hong Kong www.hk.viewsonic.com T= 852 3102 2900 [email protected] India www.in.viewsonic.com T= 1800 419 0959 [email protected] Korea ap.viewsonic.com/kr/ T= 080 333 2131 [email protected] Latin America (Argentina - ViewSonic Pro9800WUL | PRO9510L User Guide English - Page 96
lamp from the date of the first consumer purchase. Other regions or countries: Please check with your local dealer or local ViewSonic office for the warranty information. Limited One (1) year Heavy Usage Warranty: Under heavy usage settings, where a projector instructions authorized by ViewSonic. e. - ViewSonic Pro9800WUL | PRO9510L User Guide English - Page 97
, contact ViewSonic Customer Support (please refer to "Customer Support" page). You will need to provide your product's serial number. 2. To obtain warranted service, you will be required to provide (a) the original dated sales slip, (b) your name, (c) your address, (d) a description of the problem - ViewSonic Pro9800WUL | PRO9510L User Guide English - Page 98
lamp, 3 years for labor, 1 year for the original lamp from the date of the first consumer purchase. Lamp instructions service charges. How to get service: For information about receiving service under warranty, contact ViewSonic Customer Support (Please refer to the attached Customer Support - ViewSonic Pro9800WUL | PRO9510L User Guide English - Page 99
39300 Acapulco, Guerrero Tel: 744-48-32627 Monterrey: Global Product Services Mar Caribe # 1987, Esquina con Golfo Pérsico Fracc. Bernardo Sonora #3780 L-C Col 20 de Noviembre Tijuana, Mexico FOR USA SUPPORT: ViewSonic Corporation 14035 Pipeline Ave. Chino, CA 91710, USA Tel: 800-688-6688 (English - ViewSonic Pro9800WUL | PRO9510L User Guide English - Page 100
-
 1
1 -
 2
2 -
 3
3 -
 4
4 -
 5
5 -
 6
6 -
 7
7 -
8
-
9
-
10
-
11
-
12
-
13
-
14
-
15
-
16
-
17
-
18
-
19
-
20
-
21
-
22
-
23
-
24
-
25
-
26
-
27
-
28
-
29
-
30
-
31
-
32
-
33
-
34
-
35
-
36
-
37
-
38
-
39
-
40
-
41
-
42
-
43
-
44
-
45
-
46
-
47
-
48
-
49
-
50
-
51
-
52
-
53
-
54
-
55
-
56
-
57
-
58
-
59
-
60
-
61
-
62
-
63
-
64
-
65
-
66
-
67
-
68
-
69
-
70
-
71
-
72
-
73
-
74
-
75
-
76
-
77
-
78
-
79
-
80
-
81
-
82
-
83
-
84
-
85
-
86
-
87
-
88
-
89
-
90
-
91
-
92
-
93
-
94
-
95
-
96
-
97
-
98
-
99
-
100
 |
 |

Pro9510L/Pro9520WL/
Pro9530HDL/Pro9800WUL
DLP Projector
User Guide
Model No. VS16505/VS16506/VS16507/VS16508
IMPORTANT: Please read this User Guide to obtain important information on installing
and using your product in a safe manner, as well as registering your product for future
service.
Warranty information contained in this User Guide will describe your limited
coverage from ViewSonic Corporation, which is also found on our web site at http://
www.viewsonic.com in English, or in specific languages using the Regional selection
box in the upper right corner of our website. “Antes de operar su equipo lea cu
idadosamente las instrucciones en este manual”