ViewSonic VP2468_H2 VP2468 User Guide English - Page 28
Monitor Optimization, 3. Driver Installation Windows 10 Setup
 |
View all ViewSonic VP2468_H2 manuals
Add to My Manuals
Save this manual to your list of manuals |
Page 28 highlights
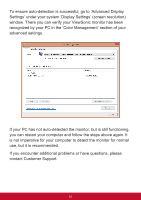
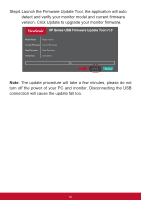
3-2. Monitor Optimization • Adjust the computer's graphics card to support a recommended timing mode (refer to "Specifications" page for recommended resolution setting specific to your LCD monitor). To find instructions on "changing the refresh rate", please refer to the graphics card's user guide. 3-3. Driver Installation (Windows 10 Setup) In order to install the driver, first connect your monitor to your PC, boot up your PC (make sure to first turn on the monitor first) and when the PC has finished booting up, your PC should auto- detect the monitor. If your monitor came with a ViewSonic driver installation CD, now is the time to insert the CD into your CD-ROM and follow the steps when prompted. If the CD does not properly install the driver, please download the driver from the ViewSonic website or visit a ViewSonic service center. If your PC did not come with an installation CD, your PC will automatically install the monitor driver, recognizing your ViewSonic monitor. 24
-
 1
1 -
2
-
3
-
4
-
5
-
6
-
7
-
8
-
9
-
10
-
11
-
12
-
13
-
14
-
15
-
16
-
17
-
18
-
19
-
20
-
21
-
22
-
 23
23 -
 24
24 -
 25
25 -
 26
26 -
 27
27 -
 28
28 -
 29
29 -
 30
30 -
 31
31 -
 32
32 -
 33
33 -
34
-
35
-
36
-
37
-
38
-
39
-
40
-
41
-
42
-
43
-
44
-
45
-
46
-
47
-
48
-
49
-
50
-
51
-
52
-
53
-
54
-
55
-
56
-
57
-
58
-
59
-
60
-
61
-
62
-
63
-
64
-
65
-
66
-
67
-
68
-
69
-
70
-
71
-
72
-
73
-
74
-
75
-
76
-
77
-
78
-
79
-
80
-
81
 |
 |