Viking 30inch 500 VGBQ Use and Care Manual - Page 15
Infrared Rotisserie Burner, Battery Replacement
 |
View all Viking 30inch 500 VGBQ manuals
Add to My Manuals
Save this manual to your list of manuals |
Page 15 highlights
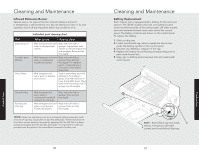
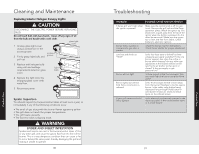
Product Care Cleaning and Maintenance Infrared Rotisserie Burner Special care is not required for the infrared rotisserie burner. It is designed as a self-contained unit. Do not attempt to clean it. Its own operation burns off any impurities which may condense on it. Part Stainless steel* Porcelain parts (Grates) Flavor Plates Individual part cleaning chart What to use How to clean Mild detergent and warm Wipe with soft cloth or water or stainless steel sponge. Use stainless steel cleaner cleaner to remove fingerprints and smudges. Rinse and dry thoroughly. Mild detergent and warm Wipe with soft cloth or water or nonabrasive sponge. Rinse and dry household cleaners. thoroughly. For stubborn spots, occasionally use a non-caustic oven cleaner (fume free). Mild detergent and warm water or stainless steel cleaner Soak in warm water and mild detergent. For stubborn spots, scrub with stainless or brass bristle BBQ brush. Wipe down with heavy-duty cloth or sponge. Dry thoroughly. Control knobs Painted parts (Canopy) Mild detergent and warm water or nonabrasive household cleaners. Do not soak. Wipe with soft cloth or sponge. Rinse and dry thoroughly. Mild detergent and warm Wipe with soft cloth or water or nonabrasive sponge. Rinse and dry household cleaners thoroughly. *NOTE: Under rare conditions, such as an extremely salty environment, small amounts of rust may accumulate on stainless steel parts. These small amounts of surface rust can easily be removed by applying Soft Scrub® Gel to a damp sponge and wiping with the stainless steel grain. It is important to make sure you wipe with the grain for the most efficient removal of surface rust. 28 Cleaning and Maintenance Battery Replacement Each T-Series grill is equipped with a battery for the electronic ignition. The 30"W. models only have one battery located under the left hand side of the control panel. All other models have two batteries located under each end of the control panel. The battery locations are shown on the control panel. To replace the battery: 1. Slide out drip tray. 2. Locate round black cap, which is inside the burner box under the battery symbol on the control panel. 3. Unscrew cap. Battery is snapped in the cap. 4. Replace the battery by connecting corresponding post to post inside burner box. 5. Snap cap on battery and screw back into slot underneath control panel. Battery Battery cap NOTE: Round black cap that holds battery is located underneath control panel and behind drip tray. 29 Product Care
-
 1
1 -
2
-
3
-
4
-
5
-
6
-
7
-
8
-
9
-
 10
10 -
 11
11 -
 12
12 -
 13
13 -
 14
14 -
 15
15 -
 16
16 -
 17
17 -
 18
18
 |
 |
