Viking FDWU524WS Use and Care Manual - Page 26
Cleaning The Hose Filter, 5 Cleaning The Wash Arms
 |
View all Viking FDWU524WS manuals
Add to My Manuals
Save this manual to your list of manuals |
Page 26 highlights
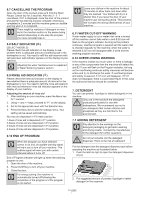
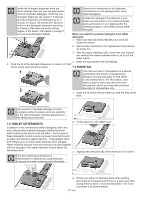
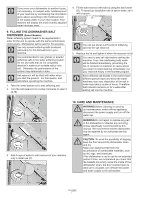
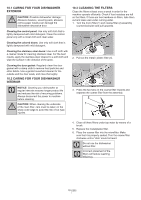
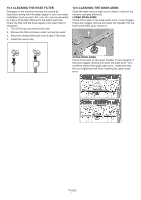
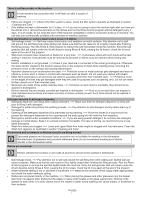
10.4 CLEANING THE HOSE FILTER Damages on the machine that may be caused by impurities coming from the water supply or your own water installation (such as sand, dirt, rust, etc.) can be prevented by means of the filter attached to the water inlet hose. Check the filter and the hose regularly and clean them if necessary. 1. Turn off the tap and remove the hose. 2. Remove the filter and clean under running tap water. 3. Place the cleaned filter back into its seat in the hose. 4. Install the hose to tap. 10.5 CLEANING THE WASH ARMS Clean the wash arms at least once a week in order for the machine operates efficiently. LOWER WASH ARMS Check if the holes on the lower wash arms (1) are clogged. If they are clogged, remove and clean the impeller. Pull the lower wash arms up to remove it. UPPER WASH ARMS Check if the holes on the upper impeller (1) are clogged. If they are clogged, remove and clean the wash arms. Turn nut left to remove the upper wash arms. Make sure that the nut is tightened well when installing the upper wash arms. 26 USA
-
 1
1 -
2
-
3
-
4
-
5
-
6
-
7
-
8
-
9
-
10
-
11
-
12
-
13
-
14
-
15
-
16
-
17
-
18
-
19
-
20
-
 21
21 -
 22
22 -
 23
23 -
 24
24 -
 25
25 -
 26
26 -
 27
27 -
 28
28 -
 29
29 -
 30
30 -
 31
31 -
32
 |
 |
