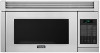
Viking RVMHC Installation Instructions - Page 9
Checklist for Installation, Oven Installation
 |
View all Viking RVMHC manuals
Add to My Manuals
Save this manual to your list of manuals |
Page 9 highlights
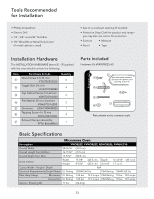
(B) Oven Installation figure figure ffiigguurree MOUNTING OVEN TO THE WALL: Install Grease Filters by fitting into the opening. Push back and up into place. (C) (D) Deflector MOUNTING DEFLECTOR: Secure the deflector with 3 Tapping Screws 4 x 12mm, packed in the Installation Hardware. figure (C) (D) MOUNTING OVEN TO THE WALL: Use the two Top Cabinet Screws (C) and two Flat Washers (D), supplied in the INSTALLATION HARDWARE, to attach the unit to the top cabinet. Checklist for Installation • Make sure the unit has been installed according to all of the Installation Instructions and the Wall and Top Cabinet Templates. • Plug in the power cord. • Keep the Operation Manual. Viking Range, LLC 111 Front Street Greenwood, Mississippi 38930 USA (662) 455-1200 For product information, call 1-888-845-4641 E8
-
 1
1 -
2
-
3
-
 4
4 -
 5
5 -
 6
6 -
 7
7 -
 8
8 -
 9
9 -
 10
10 -
 11
11 -
 12
12 -
 13
13 -
 14
14 -
15
-
16
-
17
-
18
-
19
-
20
-
21
-
22
-
23
-
24
-
25
-
26
-
27
-
28
 |
 |
