Viking VDB450SS Installation Instructions - Page 11
Performance Checklist - parts
 |
View all Viking VDB450SS manuals
Add to My Manuals
Save this manual to your list of manuals |
Page 11 highlights
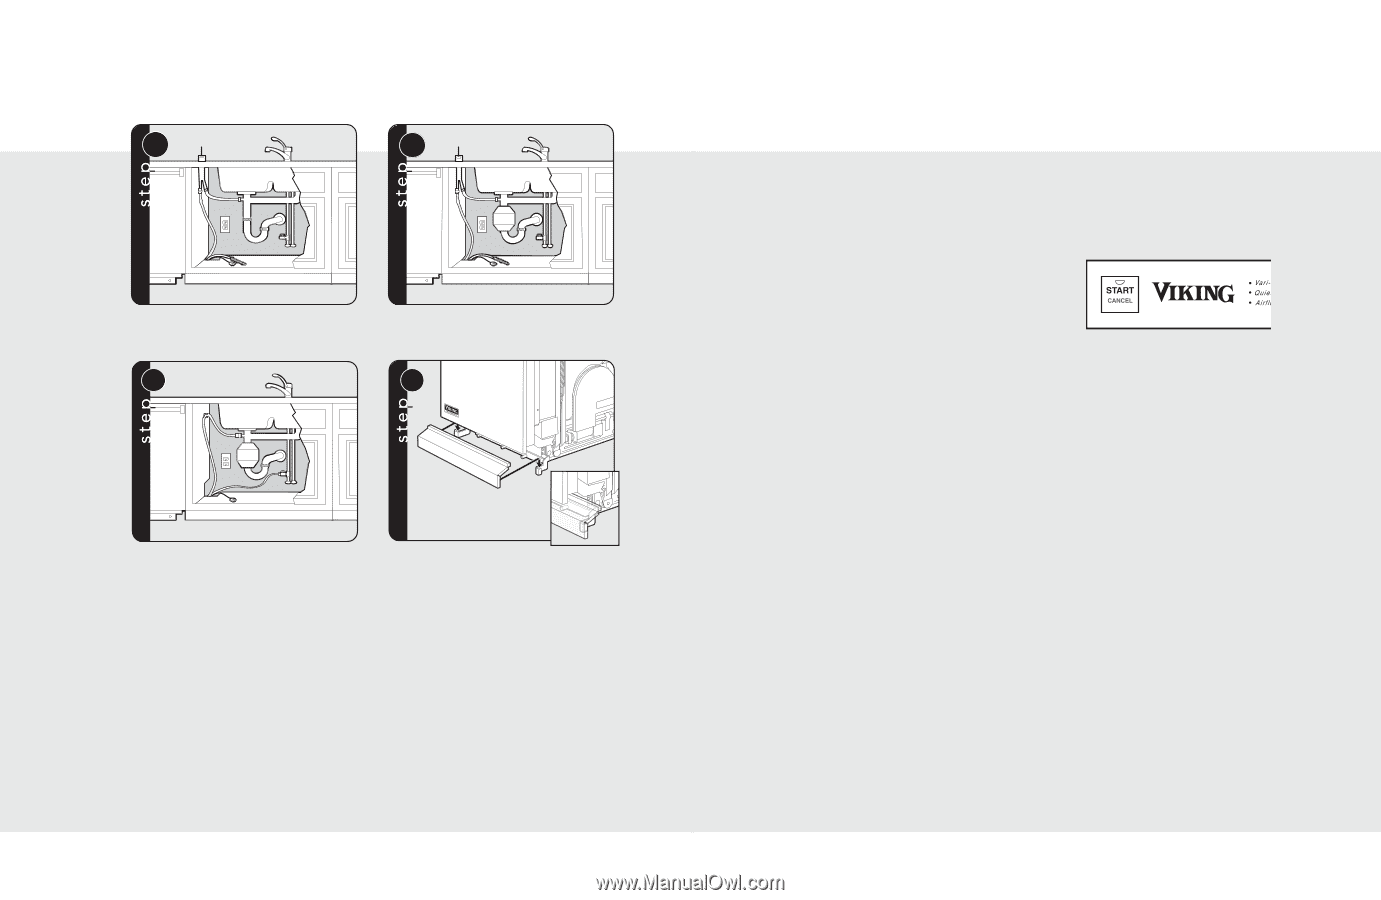
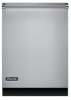
Installation Procedure (cont'd.) 11A Air Gap 11B Air Gap (Discharge with air gap) 12 (Discharge with food waste disposer and air gap) 13 Connect water line. Plug LED light into dishwasher (select models only) and install kick plate. Performance Checklist Testing for Leaks A qualified installer should carry out the following checks: h Remove packaging and parts. h Turn on the water supply and check for leaks. h Turn the power on at breaker/fuse box and test the dishwasher operation by running a rinse and hold cycle. (This should take about 12 minutes.) h Turn off the electrical power and check for leaks under the dishwasher. h Make sure that no kinks have developed in the drain lines. Final Preparation • Some stainless steel parts may have a plastic protective wrap which must be peeled off. Unit Reset • If the unit should need to be reset for any reason, push and hold the "START" button for 4 seconds. 20 21
-
 1
1 -
2
-
3
-
4
-
5
-
 6
6 -
 7
7 -
 8
8 -
 9
9 -
 10
10 -
 11
11 -
 12
12
 |
 |