Viking VDSC536T Use and Care Manual - Page 30
Meat Probe
 |
View all Viking VDSC536T manuals
Add to My Manuals
Save this manual to your list of manuals |
Page 30 highlights
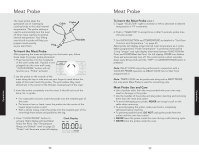
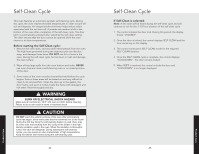
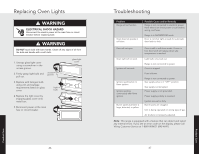
Operation Meat Probe The meat probe takes the guesswork out of roasting by cooking foods to the ideal internal temperature. The probe setting is used to automatically turn the oven off when meat reaches its optimal internal temperature. Your Viking oven's built-in probe will help you prepare meats exactly as you want them. Plug Cable Probe Handles To Insert the Meat Probe: After preparing the meat and placing it on the broiler pan, follow these steps for proper probe placement: 1. Plug meat probe into the receptacle in the oven cavity wall. If probe is not plugged into the oven wall cavity, "CLOCK/PROBE" button will not function as a "Probe" activator. CLOCK/ PROBE MIN/SEC TIMER COOK TIME STOP TIME OVEN FUNC OVEN TEMP OFF CLEAN/ SETTINGS 2. Lay the probe on the outside of the meat along the top or side and use your finger to mark where the edge of the meat meets the probe. The point where they meet should rest in the center of the thickest, meatiest part of the roast. 3. Insert the probe completely into the meat. It should not touch the bone, fat, or gristle. • For roasts with no bone, insert the probe into the meatiest part of the roast. • For bone-in ham or lamb, insert the probe into the center of the lowest large muscle or joint. • With a whole turkey, insert the probe into the meatiest part of the inner thigh from below and parallel to the leg. 4. Press "CLOCK/PROBE" button to activate. Right display will read Meat Probe Set Point. See "Temperature Range and Default" chart on page 25. "Probe" will illuminate under left display. Clock Display SET HR MIN 00:00 AM PM STOP TIMER NO PROBE COOK TIME ON DELAY 58 Meat Probe To Insert the Meat Probe (cont.) 5. Toggle "SELECTOR" right to increase or left to decrease to desired temperature in 1ºF increments. 6. Push in "SELECTOR" to accept time or after 5 seconds, probe time will auto-accept. 7. Set OVEN FUNCTION and TEMPERATURE as detailed in "Set Oven Function and Temperature " on page 23. (Meat probe will display actual internal meat temperature as it cooks. When programmed "Probe Temperature" is achieved, there will be 3 long "beeps" and right display alternates between FUNCTION/Set Point and DONE/Meat Set Point. On left display, PROBE icon flashes. Oven will automatically turn off. The control emits a short reminder beep every 60 seconds until the "OFF" or CLEAR/SETTINGS button is pressed.) Note: DELAY COOK cannot be performed in conjunction with a COOK BY PROBE operation as DELAY COOK has no Start Time programmed in. Note: TIMED COOK can be performed along with a MEAT PROBE, but only when Meat Probe is used for monitoring only. Meat Probe Use and Care • Use of probes other than the one provided with your oven may result in damage to the probe. • Use the handles of the probe and plug when inserting and removing them from the meat and outlet. • To avoid damaging your probe, NEVER use tongs to pull on the cable when removing. • To avoid breaking the probe, make sure food is completely defrosted before inserting. • To prevent possible burns, DO NOT unplug the probe from the outlet until the oven has cooled. • NEVER leave the probe inside the oven during a self-cleaning cycle. • NEVER store the probe inside the oven. 59 Operation
-
 1
1 -
2
-
3
-
4
-
5
-
6
-
7
-
8
-
9
-
10
-
11
-
12
-
13
-
14
-
15
-
16
-
17
-
18
-
19
-
20
-
21
-
22
-
23
-
24
-
 25
25 -
 26
26 -
 27
27 -
 28
28 -
 29
29 -
 30
30 -
 31
31 -
 32
32 -
 33
33 -
 34
34 -
 35
35 -
36
 |
 |
