Viking VGIC5366BSS Installation Instructions - Page 11
Door Replacement and Adjustment, Final Installation
 |
View all Viking VGIC5366BSS manuals
Add to My Manuals
Save this manual to your list of manuals |
Page 11 highlights
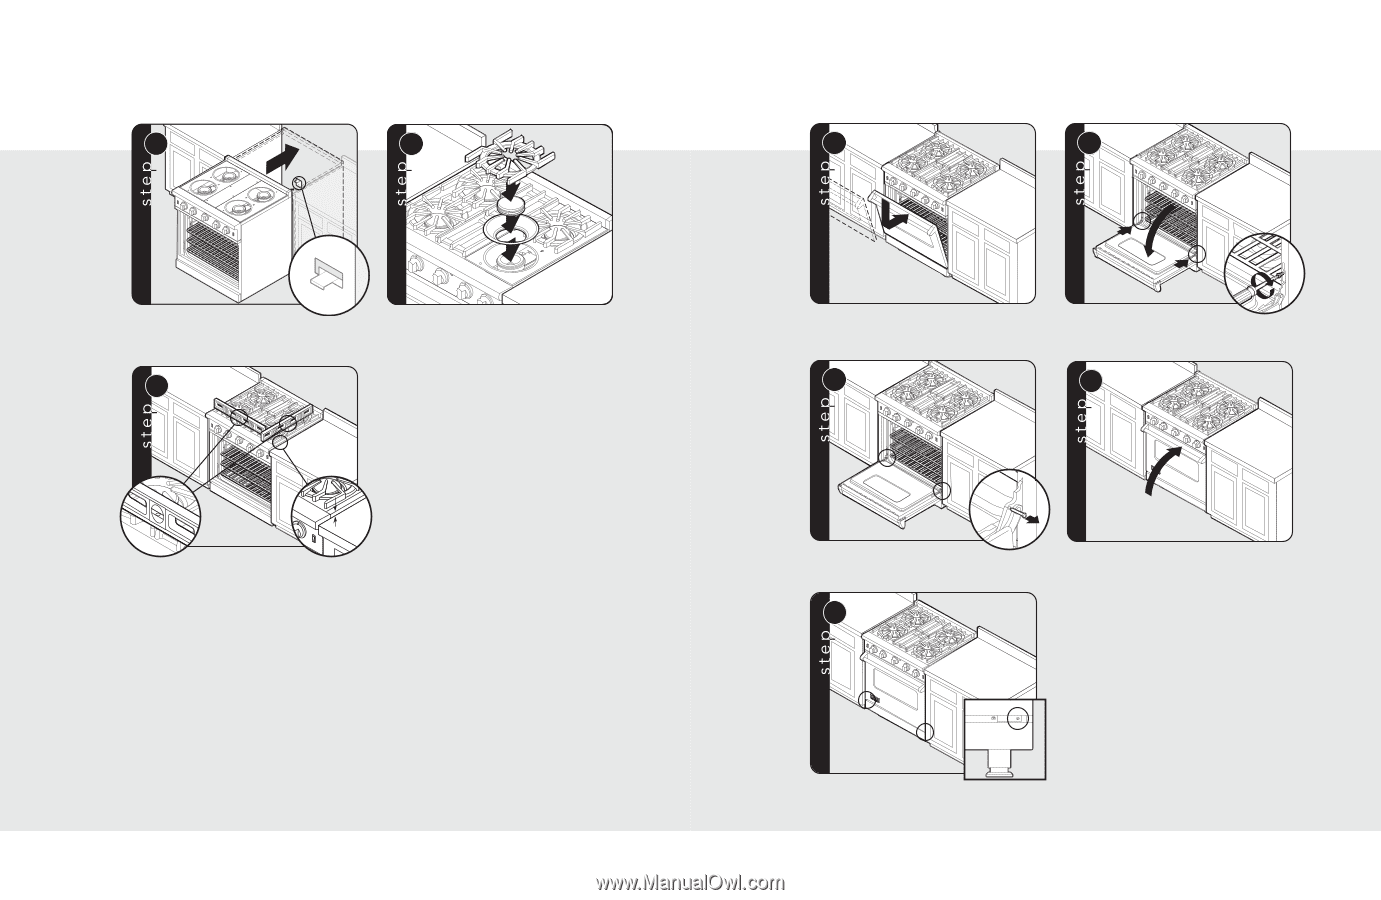
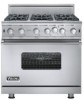
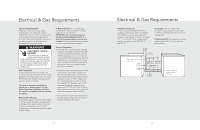
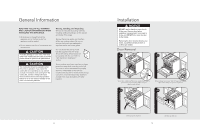
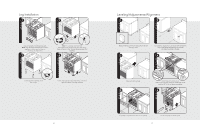
Final Installation 1 2 Slide range into place. Be sure anti-tip bracket slides into the anti-tip opening. 3 Burner caps and burner bowls are packed in styrofoam top pack with the grates. Place burner bowl in grate support and burner cap on top of burner. Place burner grate over burner cap and on top of grate support. (03.9/58"cm) Check that unit is level side to side and front to back. The side trim must be 3/8" (0.95 cm) above countertop. If unit is not level repeat steps 5-7 of "Leveling/Adjustments/Alignment" section. 20 Door Replacement and Adjustment 1 2 Reattach door to range. 3 Open door completely. Reattach hinge trim. 4 Remove pins from hole in hinges. 5 Close door. If the door needs to be adjusted, loosen hinge trim screws located in step 2. Adjust the screws located between the door and kickplate using a 5/32" hex head allen wrench. After adjustment, tighten hinge trim screws. 21
-
 1
1 -
2
-
3
-
4
-
5
-
 6
6 -
 7
7 -
 8
8 -
 9
9 -
 10
10 -
 11
11 -
 12
12
 |
 |