Vizio XVT3D580CM XVT3D580CM User Manual - Page 27
Activating the Sleep Timer, Using the Network Connection Menu
 |
View all Vizio XVT3D580CM manuals
Add to My Manuals
Save this manual to your list of manuals |
Page 27 highlights
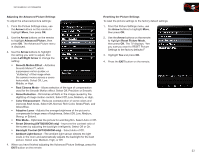
5 XVT3D500CM / XVT3D580CM Activating the Sleep Timer When activated, the TV's sleep timer will turn the TV off after a set period of time. To use the sleep timer: 1. Press the MENU button on the remote. The on-screen menu is displayed. 2. Use the Arrow buttons on the remote to highlight the Sleep Timer icon and press OK. The Sleep Timer menu is displayed. 3. Use the Up/Down Arrow buttons on the remote to highlight Timer and press OK. The Timers menu is displayed. 4. Use the Up/Down Arrow buttons on the remote to highlight the period of time after which you want the TV to turn off: 30, 60, 90, 120, or 180 minutes. 5. Press OK, then press EXIT. Setting the Auto Power Off Feature To help save energy, your TV is set by default to turn off after 10 minutes if no signal is being displayed on the screen. This feature can be deactivated. To set the Auto Power Off feature: 1. From the Sleep Timer menu, use the Up/Down Arrow buttons on the remote to highlight Auto Power Off and press OK. The Auto Power-Off menu is displayed. 2. Highlight Off or 10 min and press OK. Press Exit. Using the Network Connection Menu Your TV is internet-ready, featuring both an ethernet port and built-in high-speed 802.11n. If you connect to your home network using an Ethernet cable, the TV automatically detects the connection. You do not need to do any setup. Connecting to a Wireless Network To connect to a wireless network whose network name (SSID) is being broadcast: 1. Press the MENU button on the remote. The on-screen menu is displayed. 2. Use the Arrow buttons on the remote to highlight the Network icon and press OK. The Network Connection menu is displayed. 3. If you do not see your wireless network displayed, highlight More Access Points and press OK. The More Access Points menu, which is a list of available wireless networks, is displayed. 4. Highlight the name of your wireless network (this is the network's SSID) and press OK. 5. Using the QWERTY Keypad on the remote, enter your network's password, then highlight Connect and press OK. (If you would like to use the on-screen keyboard instead, highlight Show Keyboard and press OK.) 6. Press the EXIT button on the remote. 18
-
 1
1 -
2
-
3
-
4
-
5
-
6
-
7
-
8
-
9
-
10
-
11
-
12
-
13
-
14
-
15
-
16
-
17
-
18
-
19
-
20
-
21
-
 22
22 -
 23
23 -
 24
24 -
 25
25 -
 26
26 -
 27
27 -
 28
28 -
 29
29 -
 30
30 -
 31
31 -
 32
32 -
33
-
34
-
35
-
36
-
37
-
38
-
39
-
40
-
41
-
42
-
43
-
44
-
45
-
46
-
47
-
48
-
49
-
50
-
51
-
52
-
53
-
54
-
55
-
56
-
57
-
58
-
59
-
60
-
61
-
62
-
63
-
64
-
65
-
66
-
67
-
68
 |
 |
