Vtech DS4122-3 User Manual (DS4121-3 User Manual) - Page 30
Answering system setup, Activate the answering system, Set the clock
 |
UPC - 735078014368
View all Vtech DS4122-3 manuals
Add to My Manuals
Save this manual to your list of manuals |
Page 30 highlights
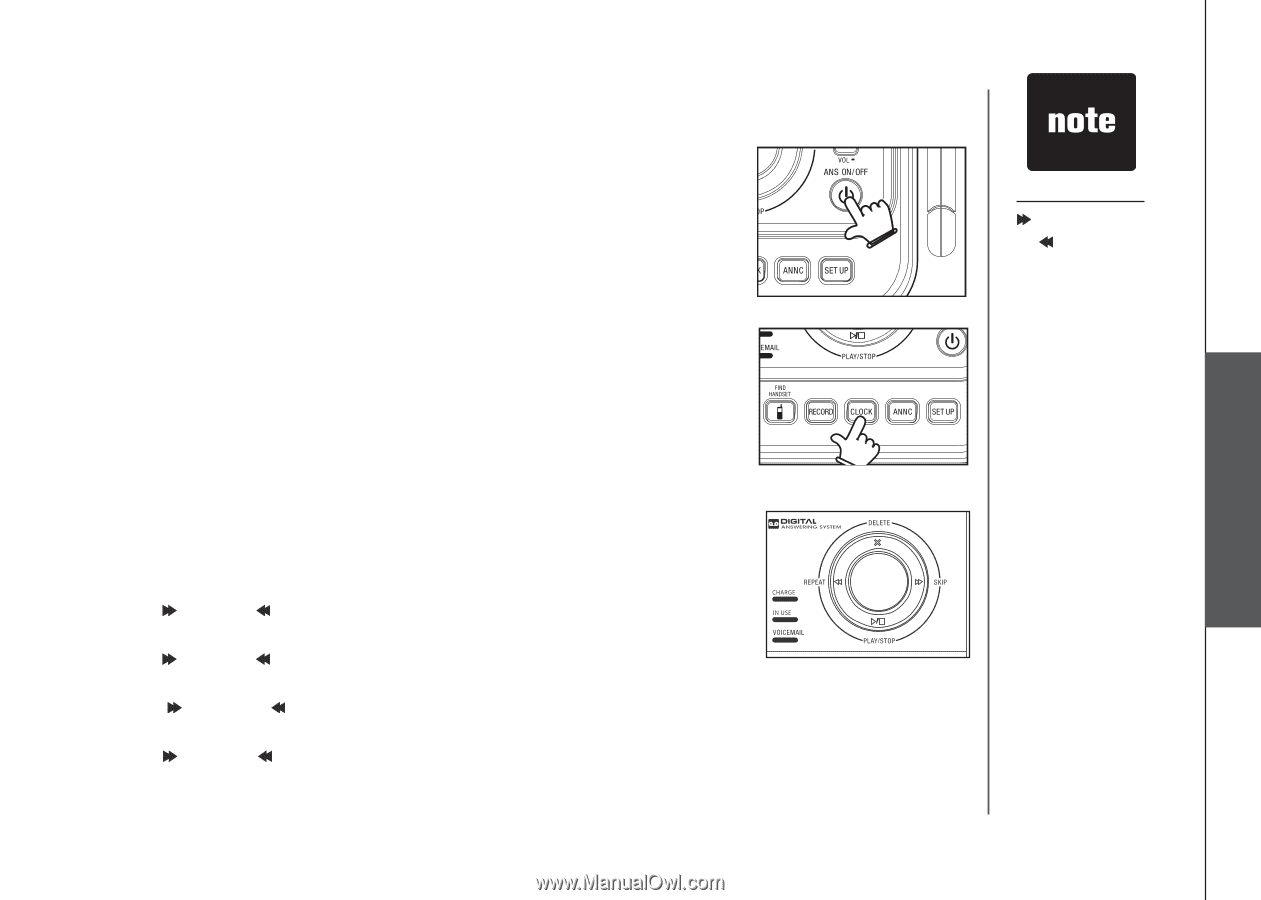
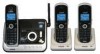
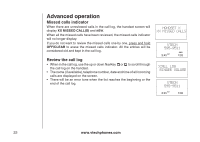
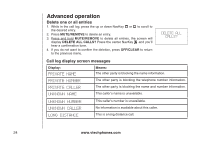
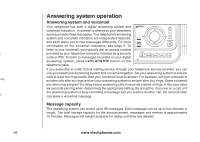
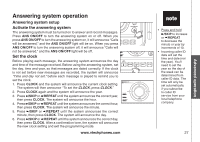
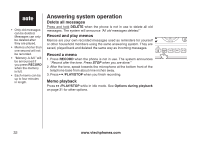
Answering system operation Answering system setup Activate the answering system The answering system must be turned on to answer and record messages. Press ANS ON/OFF to turn the answering system on or off. When you press ANS ON/OFF to turn the answering system on, it will announce "Calls will be answered," and the ANS ON/OFF light will be on. When you press ANS ON/OFF to turn the answering system off, it will announce "Calls will not be answered," and the ANS ON/OFF light will be off. Set the clock Before playing each message, the answering system announces the day and time of the message received. Before using the answering system, set the day, time and year, so that messages are dated correctly. If the clock is not set before new messages are recorded, the system will announce "Time and day not set." before each message is played to remind you to set the clock. 1. Press CLOCK and the system will announce the current clock setting. The system will then announce "To set the CLOCK, press CLOCK." 2. Press CLOCK again and the system will announce the year. 3. Press /SKIP or /REPEAT until the system announces the correct year, then press CLOCK. The system will announce the hour. 4. Press /SKIP or /REPEAT until the system announces the correct hour, then press CLOCK. The system will announce the minute. 5. Press /SKIP or /REPEAT until the system announces the correct minute, then press CLOCK. The system will announce the day. 6. Press /SKIP or /REPEAT until the system announces the correct day, then press CLOCK. After a confirmation tone, the system will announce the new clock setting and exit the programming mode. www.vtechphones.com • Press and hold /SKIP to increase or /REPEAT to decrease the minute or year by increments of 10. • Incoming caller ID data will set the time and date (not the year). You'll need to set the year so the day of the week can be determined from caller ID data. The time will only be set automatically if you subscribe to caller ID service from your local telephone company. 27 Advanced operation
-
 1
1 -
2
-
3
-
4
-
5
-
6
-
7
-
8
-
9
-
10
-
11
-
12
-
13
-
14
-
15
-
16
-
17
-
18
-
19
-
20
-
21
-
22
-
23
-
24
-
 25
25 -
 26
26 -
 27
27 -
 28
28 -
 29
29 -
 30
30 -
 31
31 -
 32
32 -
 33
33 -
 34
34 -
 35
35 -
36
-
37
-
38
-
39
-
40
-
41
-
42
-
43
-
44
-
45
-
46
-
47
-
48
-
49
-
50
-
51
-
52
-
53
-
54
-
55
-
56
-
57
-
58
-
59
-
60
-
61
 |
 |