Weider Pro 7000 Uk Manual - Page 8
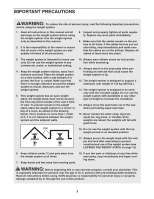
Engage the VKR Pin 101 into the VKR Frame
 |
View all Weider Pro 7000 manuals
Add to My Manuals
Save this manual to your list of manuals |
Page 8 highlights
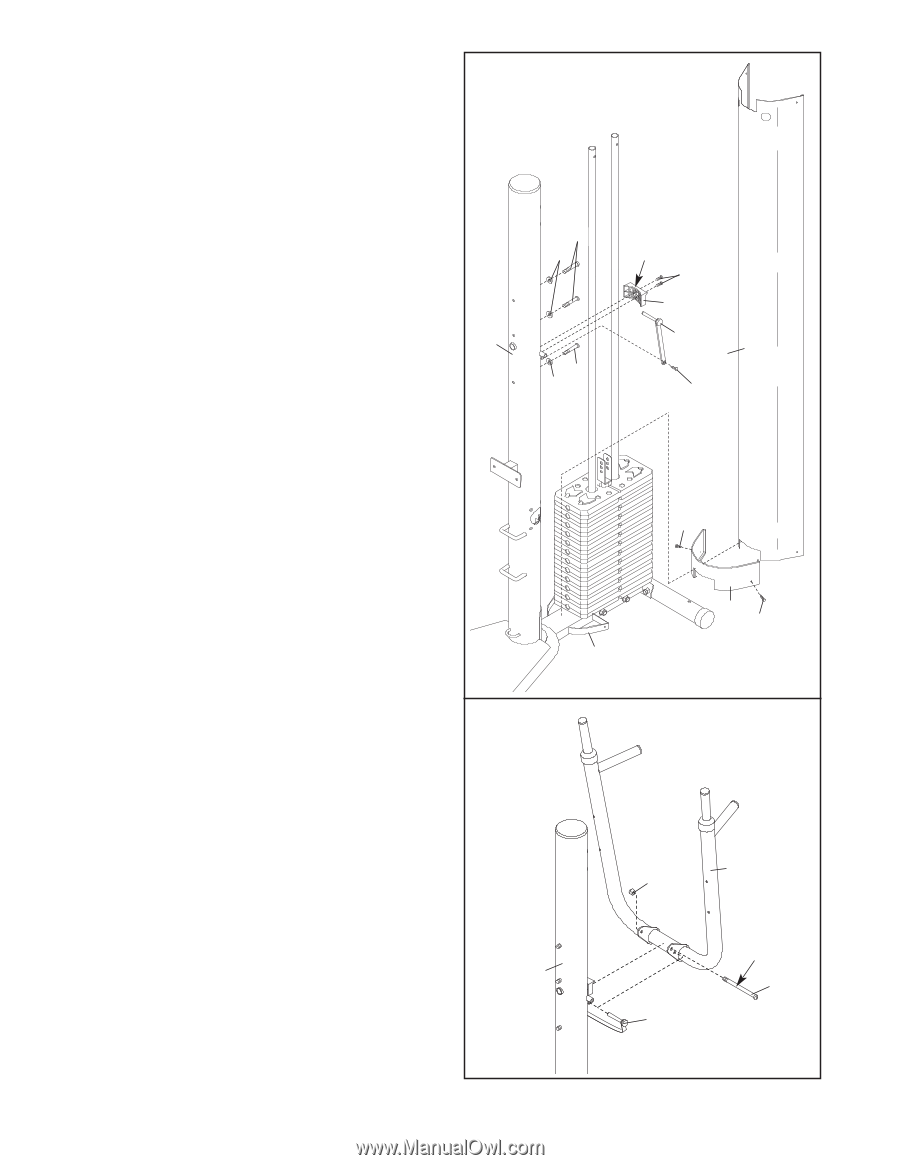
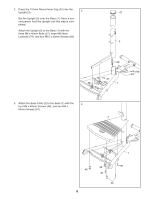
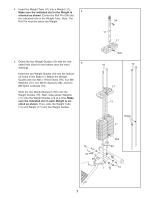
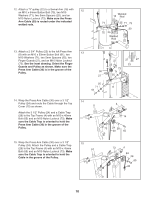
6. Slide three M6 Washers (78) onto three M6 x 127mm Screws (79) and insert the Screws into 6 the Upright (3) through the indicated holes. Orient the VKR Bumper (95) with the wide end on top. Attach the VKR Bumper to the Upright (3) with two M4 x 16mm Screws (70). Attach the VKR Pin (101) to the Upright (3) with an M4 x 16mm Screw (70). Set the Shroud (13) onto the Base (1). Attach the Bottom Cover (14) and the Shroud to the Base with two M4 x 16mm Screws (70). 3 79 78 79 78 Wide End 70 95 101 13 70 70 7. Grease the M10 x 168mm Button Bolt (99). Attach the VKR Frame (82) to the Upright (3) with 7 the Bolt and an M10 Nylon Locknut (73). Do not overtighten the Locknut; the VKR Frame must be able to pivot easily. Engage the VKR Pin (101) into the VKR Frame (82) and the Upright (3). 14 70 1 82 73 Grease 3 99 101 8
-
 1
1 -
2
-
 3
3 -
 4
4 -
 5
5 -
 6
6 -
 7
7 -
 8
8 -
 9
9 -
 10
10 -
 11
11 -
 12
12 -
 13
13 -
14
-
15
-
16
-
17
-
18
-
19
-
20
-
21
-
22
-
23
-
24
 |
 |