Weslo Aerostep 600 English Manual - Page 5
Assembly
 |
View all Weslo Aerostep 600 manuals
Add to My Manuals
Save this manual to your list of manuals |
Page 5 highlights
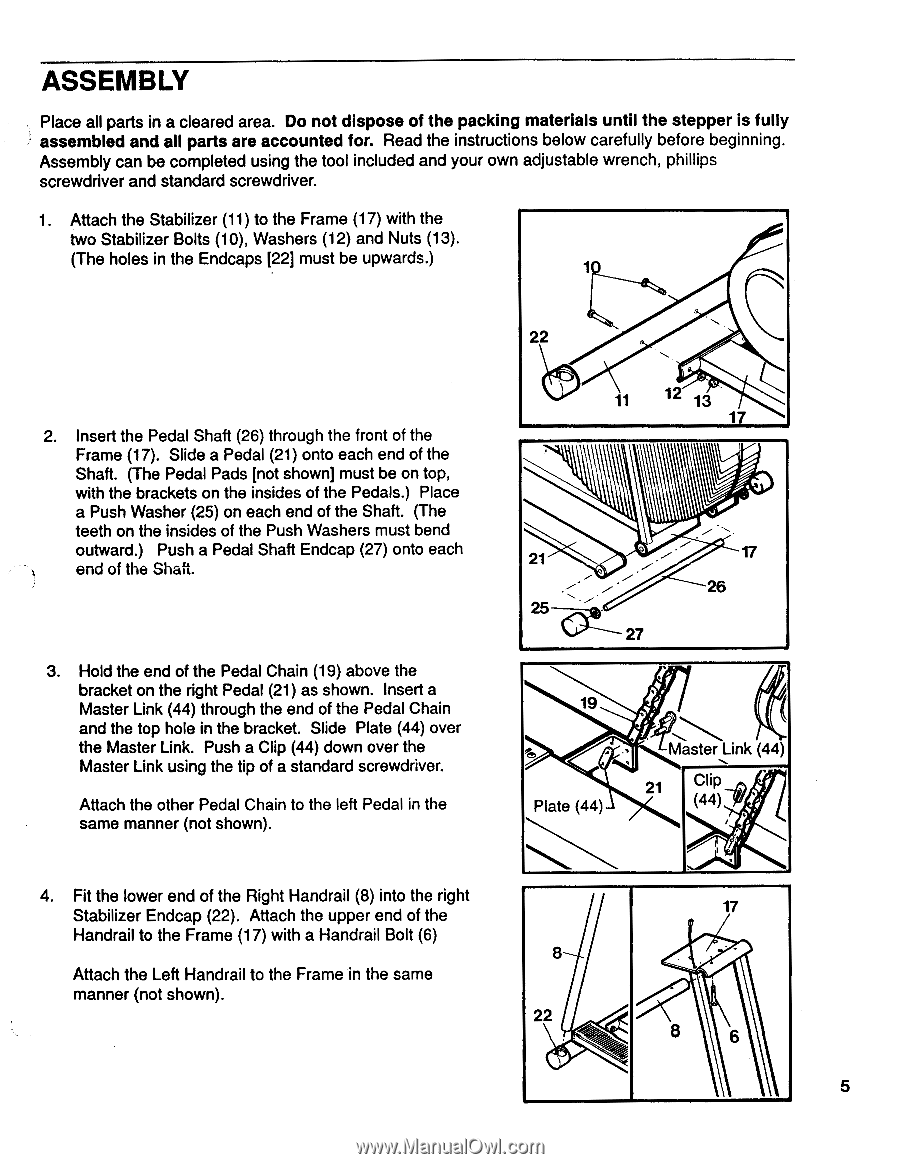
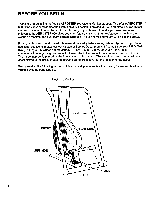
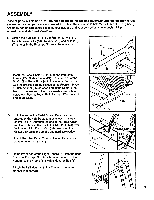
ASSEMBLY Place all parts in a cleared area. Do not dispose of the packing materials until the stepper is fully assembled and all parts are accounted for. Read the instructions below carefully before beginning. Assembly can be completed using the tool included and your own adjustable wrench, phillips screwdriver and standard screwdriver. 1. Attach the Stabilizer (11) to the Frame (17) with the two Stabilizer Bolts (10), Washers (12) and Nuts (13). (The holes in the Endcaps [22] must be upwards.) 22 2. Insert the Pedal Shaft (26) through the front of the Frame (17). Slide a Pedal (21) onto each end of the Shaft. (The Pedal Pads [not shown] must be on top, with the brackets on the insides of the Pedals.) Place a Push Washer (25) on each end of the Shaft. (The teeth on the insides of the Push Washers must bend outward.) Push a Pedal Shaft Endcap (27) onto each end of the Shaft. 3. Hold the end of the Pedal Chain (19) above the bracket on the right Pedal (21) as shown. Insert a Master Link (44) through the end of the Pedal Chain and the top hole in the bracket. Slide Plate (44) over the Master Link. Push a Clip (44) down over the Master Link using the tip of a standard screwdriver. Attach the other Pedal Chain to the left Pedal in the same manner (not shown). 4. Fit the lower end of the Right Handrail (8) into the right Stabilizer Endcap (22). Attach the upper end of the Handrail to the Frame (17) with a Handrail Bolt (6) Attach the Left Handrail to the Frame in the same manner (not shown). 17 21 17 26 25 27 19 CT) Plate (44) MasterLink (44) 21 Clip (44) • 17 8 22 8 4 5
-
 1
1 -
 2
2 -
 3
3 -
 4
4 -
 5
5 -
 6
6 -
 7
7 -
 8
8 -
 9
9 -
 10
10 -
 11
11 -
12
 |
 |