Weslo Cadence Dx15 English Manual - Page 6
treadmill.
 |
View all Weslo Cadence Dx15 manuals
Add to My Manuals
Save this manual to your list of manuals |
Page 6 highlights
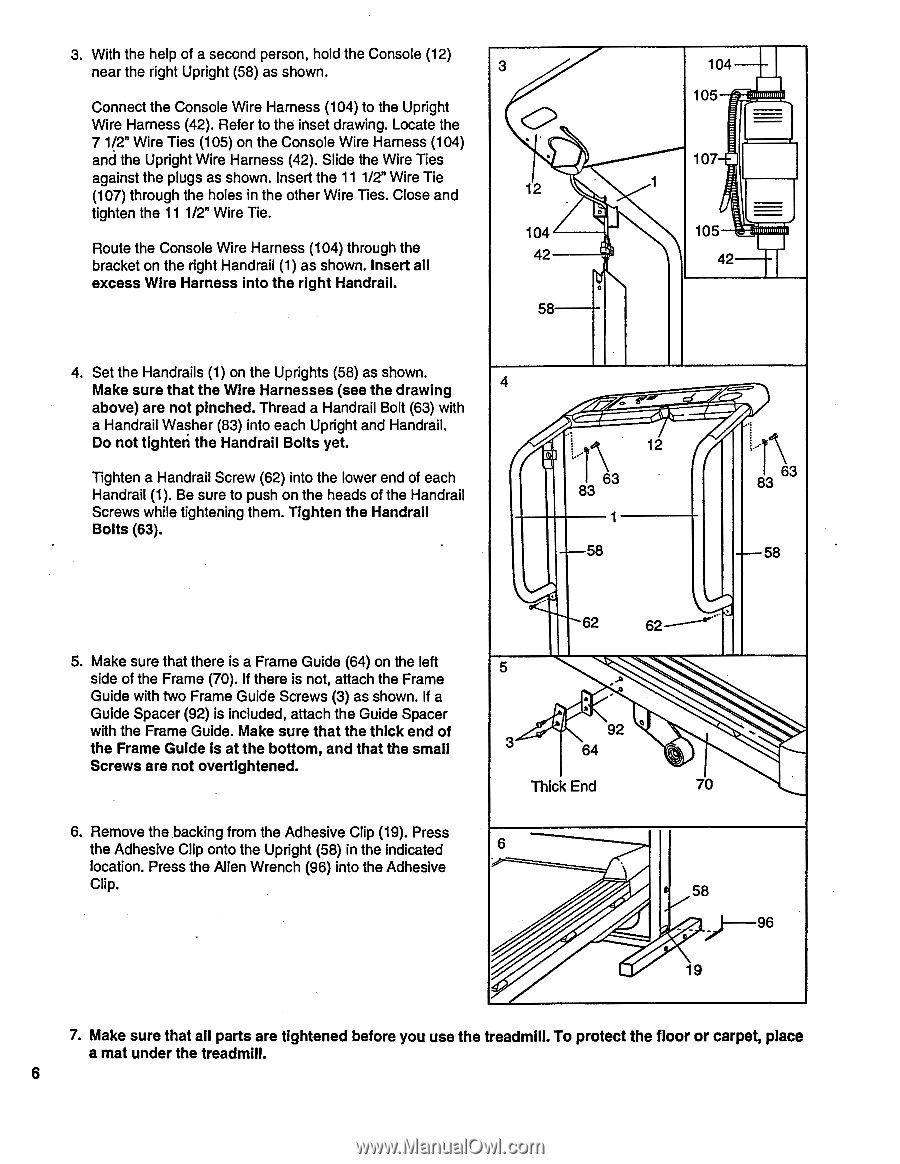
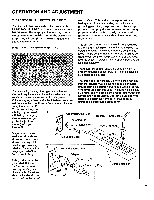
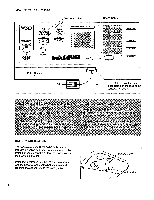
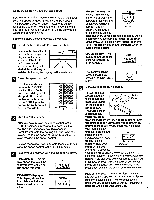
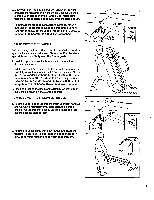
3. With the help of a second person, hold the Console (12) near the right Upright (58) as shown. 3 Connect the Console Wire Harness (104) to the Upright Wire Harness (42). Refer to the inset drawing. Locate the 7 1/2" Wire Ties (105) on the Console Wire Harness (104) and the Upright Wire Harness (42). Slide the Wire Ties against the plugs as shown. Insert the 11 1/2" Wire Tie (107) through the holes in the other Wire Ties. Close and tighten the 11 1/2" Wire Tie. Route the Console Wire Harness (104) through the bracket on the right Handrail (1) as shown. Insert all excess Wire Harness into the right Handrail. 12 . 104 42 58 104 105 107 105 42 4. Set the Handrails (1) on the Uprights (58) as shown. Make sure that the Wire Harnesses (see the drawing 4 above) are not pinched. Thread a Handrail Bolt (63) with a Handrail Washer (83) into each Upright and Handrail. Do not tighten the Handrail Bolts yet. Tighten a Handrail Screw (62) into the lower end of each Handrail (1). Be sure to push on the heads of the Handrail Screws while tightening them. Tighten the Handrail Bolts (63). 12 83 63 58 ..=,• 63 83 58 5. Make sure that there is a Frame Guide (64) on the left side of the Frame (70). If there is not, attach the Frame Guide with two Frame Guide Screws (3) as shown. If a Guide Spacer (92) is included, attach the Guide Spacer with the Frame Guide. Make sure that the thick end of the Frame Guide Is at the bottom, and that the small Screws are not overtightened. . ..t, 62 5 ....k....„..7.1. 62 ----. 92 a 3 64 Thick End 70 6. Remove the backing from the Adhesive Clip (19). Press the Adhesive Clip onto the Upright (58) in the indicated 6 location. Press the Allen Wrench (96) into the Adhesive Clip. 58 96 19 7. Make sure that ail parts are tightened before you use the treadmill. To protect the floor or carpet, place a mat under the treadmill. 6
-
 1
1 -
 2
2 -
 3
3 -
 4
4 -
 5
5 -
 6
6 -
 7
7 -
 8
8 -
 9
9 -
 10
10 -
 11
11 -
 12
12 -
13
-
14
-
15
-
16
-
17
-
18
-
19
 |
 |