Weslo Cadence Lx15 English Manual - Page 10
temperatures
 |
View all Weslo Cadence Lx15 manuals
Add to My Manuals
Save this manual to your list of manuals |
Page 10 highlights
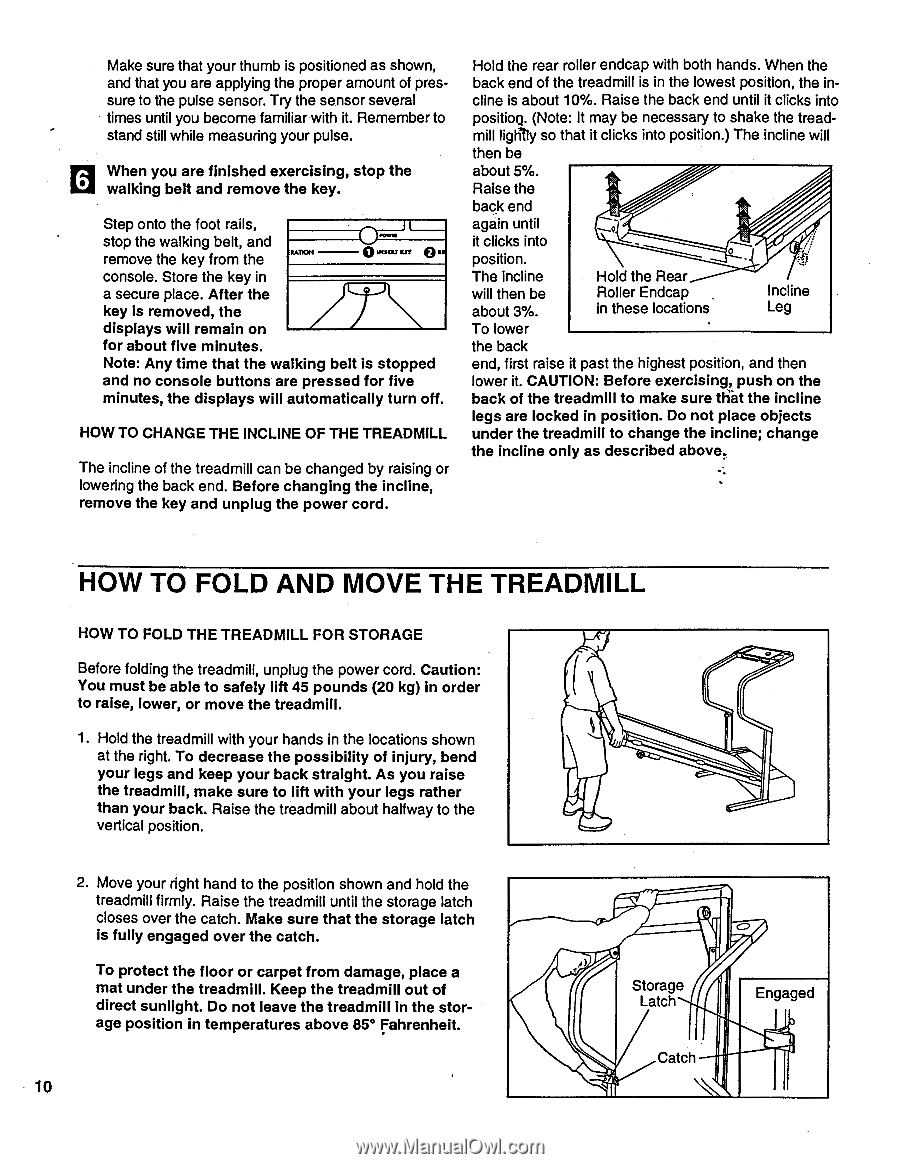
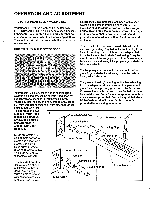
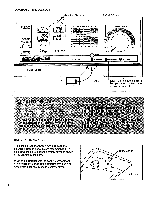
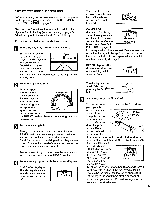
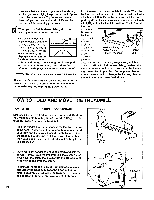
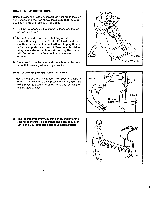
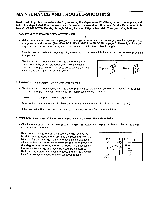
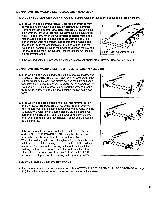
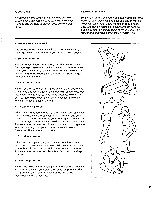
Make sure that your thumb is positioned as shown, and that you are applying the proper amount of pressure to the pulse sensor. Try the sensor several times until you become familiar with it. Remember to stand still while measuring your pulse. 6 When you are finished exercising, stop the walking belt and remove the key. Step onto the foot rails, stop the walking belt, and remove the key from the iIIALON 0 INSULT KR 0 at console. Store the key in a secure place. After the key is removed, the displays will remain on 2) for about five minutes. Note: Any time that the walking belt is stopped and no console buttons are pressed for five minutes, the displays will automatically turn off. HOW TO CHANGE THE INCLINE OF THE TREADMILL The incline of the treadmill can be changed by raising or lowering the back end. Before changing the incline, remove the key and unplug the power cord. Hold the rear roller endcap with both hands. When the back end of the treadmill is in the lowest position, the in- cline is about 10%. Raise the back end until it clicks into position. (Note: It may be necessary to shake the tread- mill so that it clicks into position.) The incline will then be about 5%. Raise the back end again until it clicks into position. 0 The incline will then be about 3%. Hold the Rear Roller Endcap in these locations. Incline Leg To lower the back end, first raise it past the highest position, and then lower it. CAUTION: Before exercising, push on the back of the treadmill to make sure that the incline legs are locked in position. Do not place objects under the treadmill to change the incline; change the incline only as described above. HOW TO FOLD AND MOVE THE TREADMILL HOW TO FOLD THE TREADMILL FOR STORAGE Before folding the treadmill, unplug the power cord. Caution: You must be able to safely lift 45 pounds (20 kg) in order to raise, lower, or move the treadmill. 1. Hold the treadmill with your hands in the locations shown at the right. To decrease the possibility of injury, bend your legs and keep your back straight. As you raise the treadmill, make sure to lift with your legs rather than your back. Raise the treadmill about halfway to the vertical position. 2. Move your right hand to the position shown and hold the treadmill firmly. Raise the treadmill until the storage latch closes over the catch. Make sure that the storage latch is fully engaged over the catch. To protect the floor or carpet from damage, place a mat under the treadmill. Keep the treadmill out of direct sunlight. Do not leave the treadmill in the storage position in temperatures above 85° Fahrenheit. 10 Storage Latch Catch Engaged
-
 1
1 -
2
-
3
-
4
-
 5
5 -
 6
6 -
 7
7 -
 8
8 -
 9
9 -
 10
10 -
 11
11 -
 12
12 -
 13
13 -
 14
14 -
 15
15 -
16
-
17
-
18
-
19
 |
 |