Weslo Pursuit 360r Bike English Manual - Page 9
mm Button Screws 46.
 |
View all Weslo Pursuit 360r Bike manuals
Add to My Manuals
Save this manual to your list of manuals |
Page 9 highlights
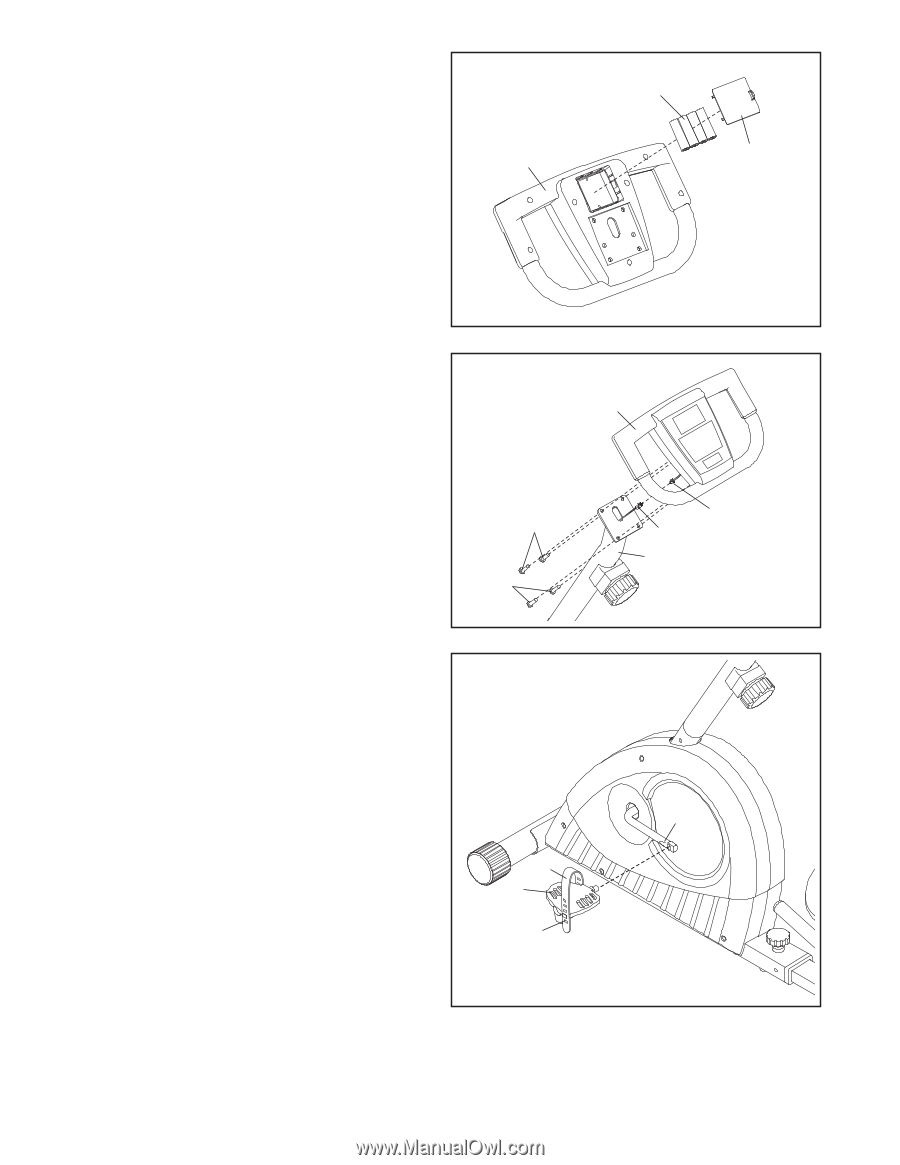
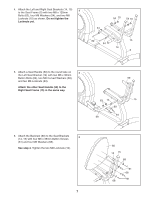
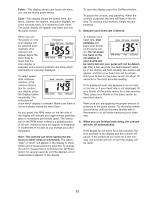
9. The Console (16) requires four AA batteries (not included); alkaline batteries are recommended. 9 IMPORTANT: If the exercise cycle has been exposed to cold temperatures, allow it to warm to room temperature before inserting batteries into the Console. If you do not do this, the console displays or other electronic 16 components may become damaged. Remove the battery cover and insert four batteries into the Console as shown. Make sure that the bat- teries are oriented as shown by the diagram inside the Console. Then, reattach the battery cover. Batteries Battery Cover 10. While another person holds the Console (16) near the Upright (13), connect the console wire to the Extension Wire (52). Then, insert the wires downward into the Upright (13). Tip: Avoid pinching the wires. Attach the Console (16) to the Upright (13) with four M6 x 15mm Button Screws (46). 10 16 Avoid pinching the wires 46 46 52 13 Console Wire 11. Identify the Left Pedal (24), which is marked 11 with an "L" sticker. Using an adjustable wrench, firmly tighten the Left Pedal (24) counterclockwise into the left arm of the Crank (21). Tighten the Right Pedal (not shown) clockwise into the right arm of the Crank (21). 21 IMPORTANT: Tighten both pedals as firmly as possible. After using the exercise cycle for one week, retighten the pedals. For best performance, keep the pedals tightened. 53 24 Adjust the left Pedal Strap (53) to the desired Tab position, and press the end of the Pedal Strap onto the tab on the Left Pedal (24). Adjust the right Pedal Strap (not shown) in the same way. 12. Make sure that all parts are properly tightened before you use the exercise cycle. After assembly is completed, some extra parts may be left over. Place a mat under the exercise cycle to protect the floor. 9
-
 1
1 -
2
-
3
-
 4
4 -
 5
5 -
 6
6 -
 7
7 -
 8
8 -
 9
9 -
 10
10 -
 11
11 -
 12
12 -
 13
13 -
 14
14 -
15
-
16
-
17
-
18
-
19
-
20
 |
 |